Remote Deposit Capture Demo
Remote Deposit Capture allows you to make deposits directly into your First Bank account from your office or anywhere work takes you. It also enables you to upload multiple checks as a single deposit, saving you valuable time and trips to the bank.
Step 1:
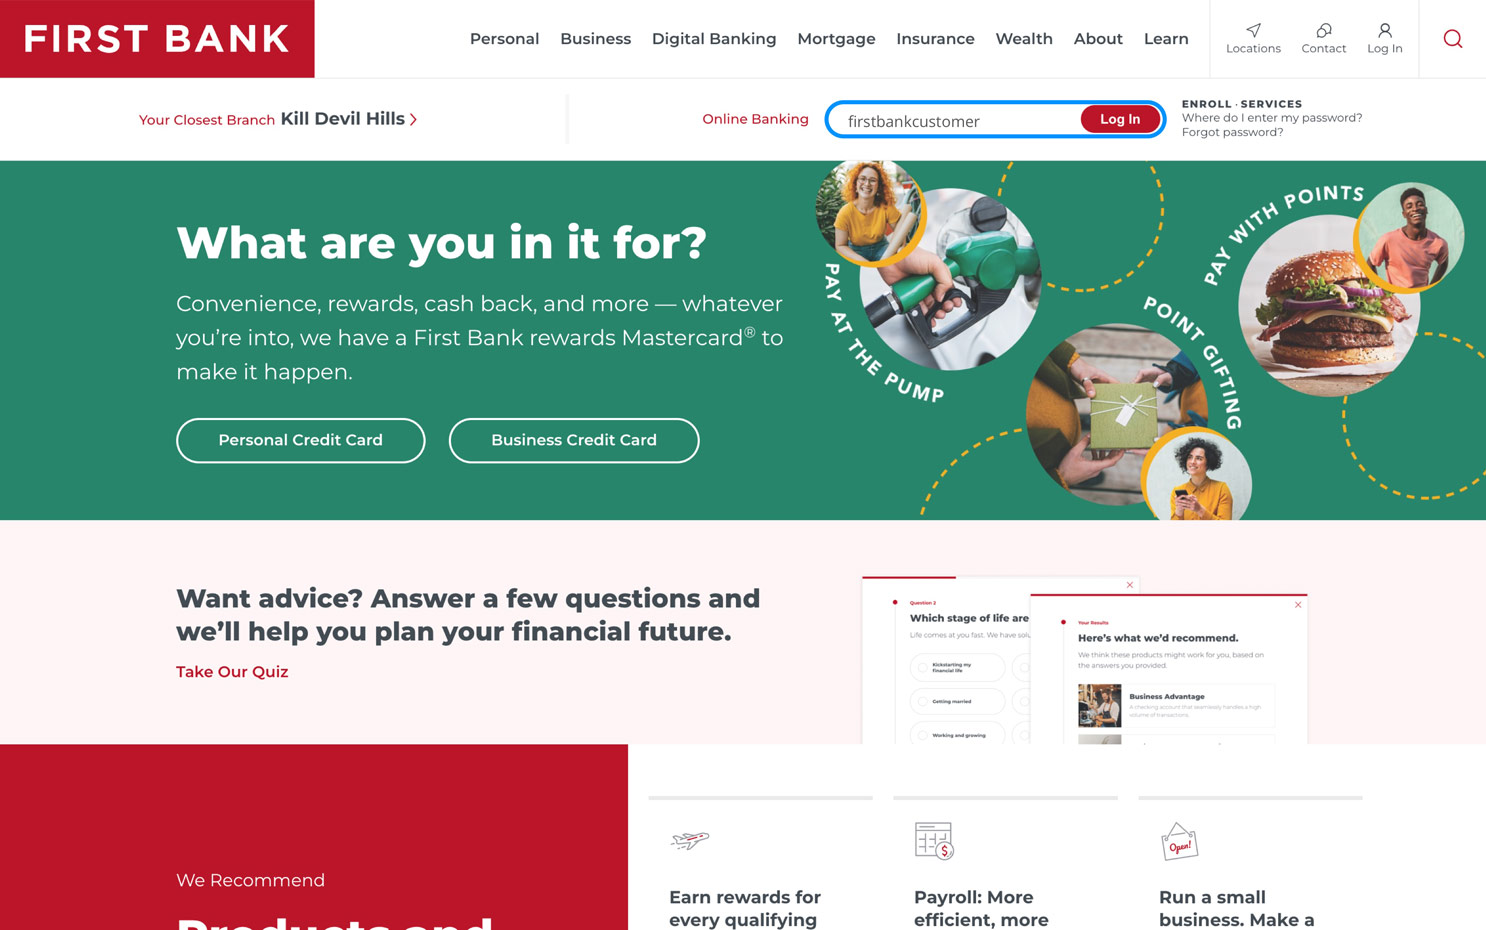
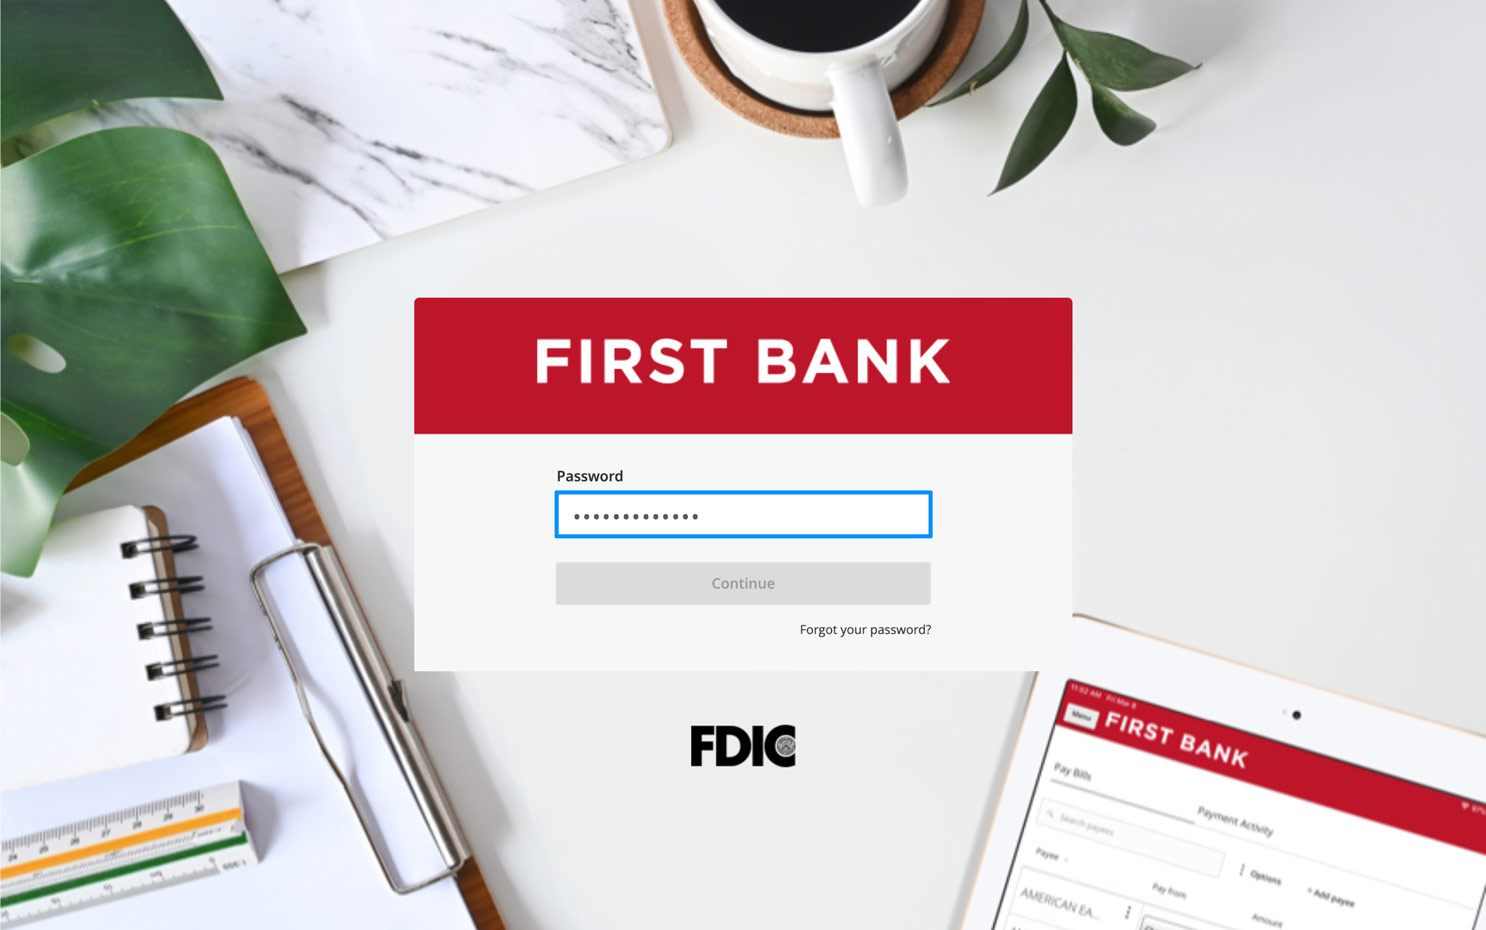
Log in to online banking.
When you enrolled in First Bank digital banking, you created a Login ID and Password. Enter that information in the corresponding screens and then click the “Log In” button. Next, you will be asked to enter your password, then click “Continue.”
Step 2:
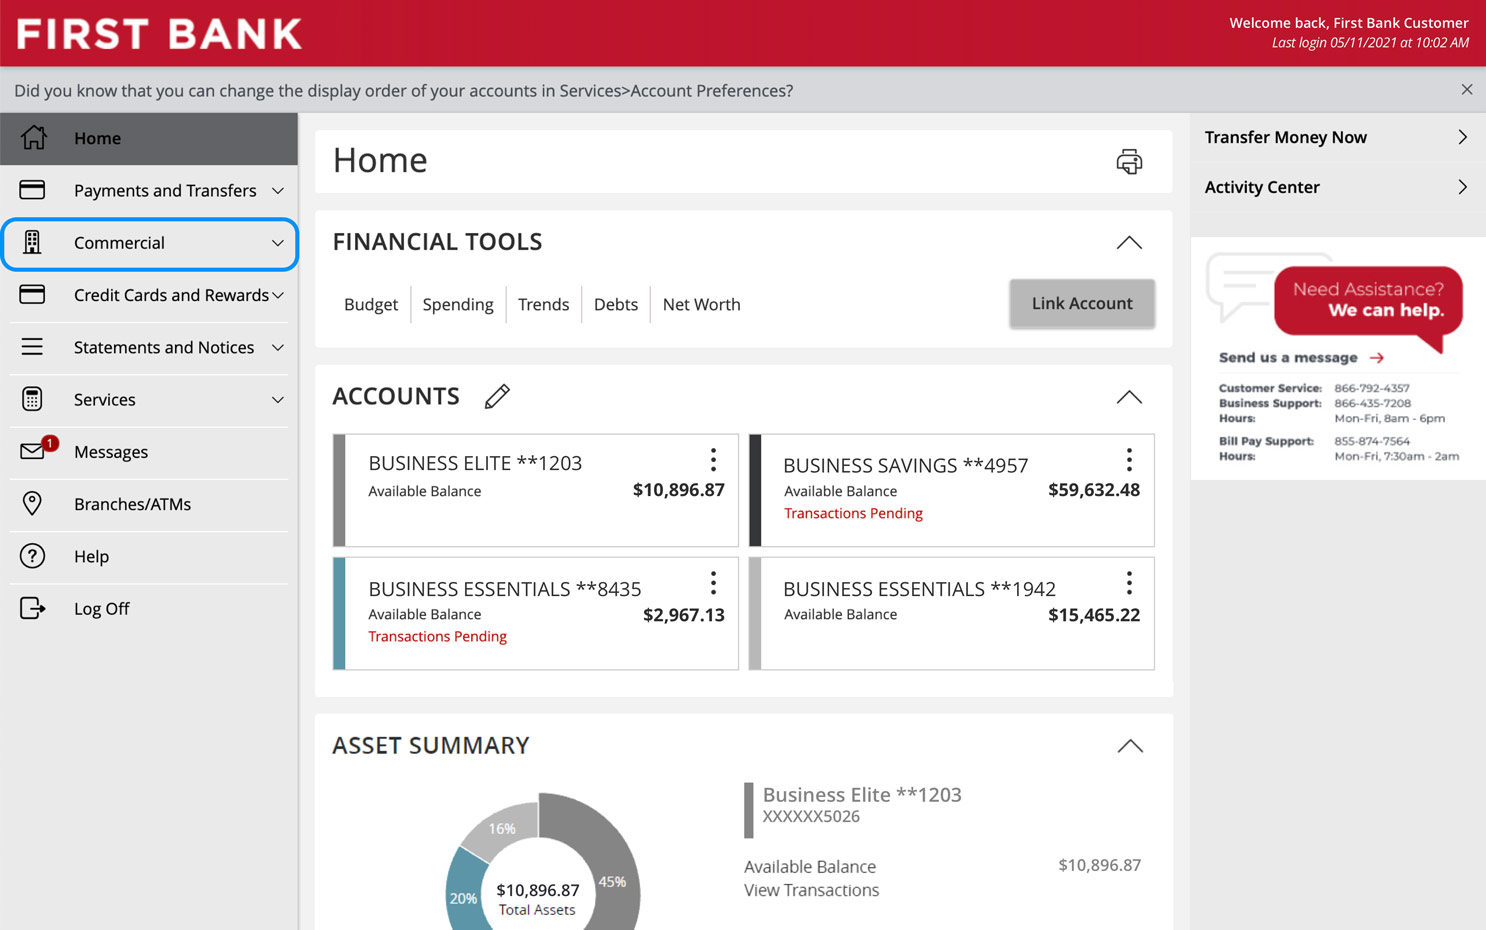
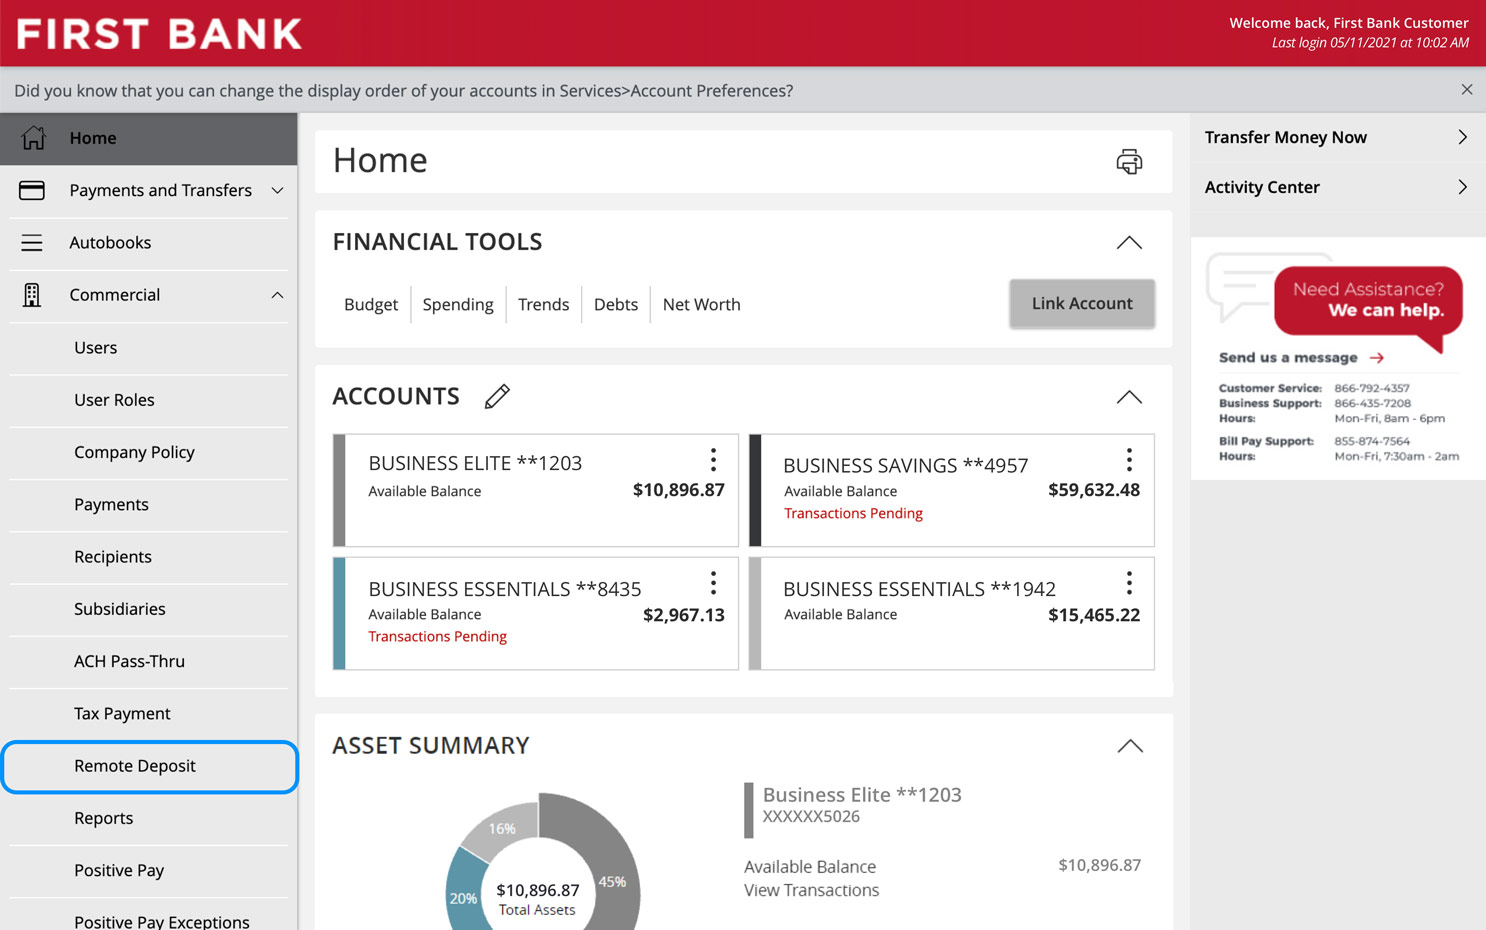
Navigate to Remote Deposits.
From the menu on the left, select “Commercial,” and click on “Remote Deposit” from the dropdown.
Step 3:
Navigate to Deposits.
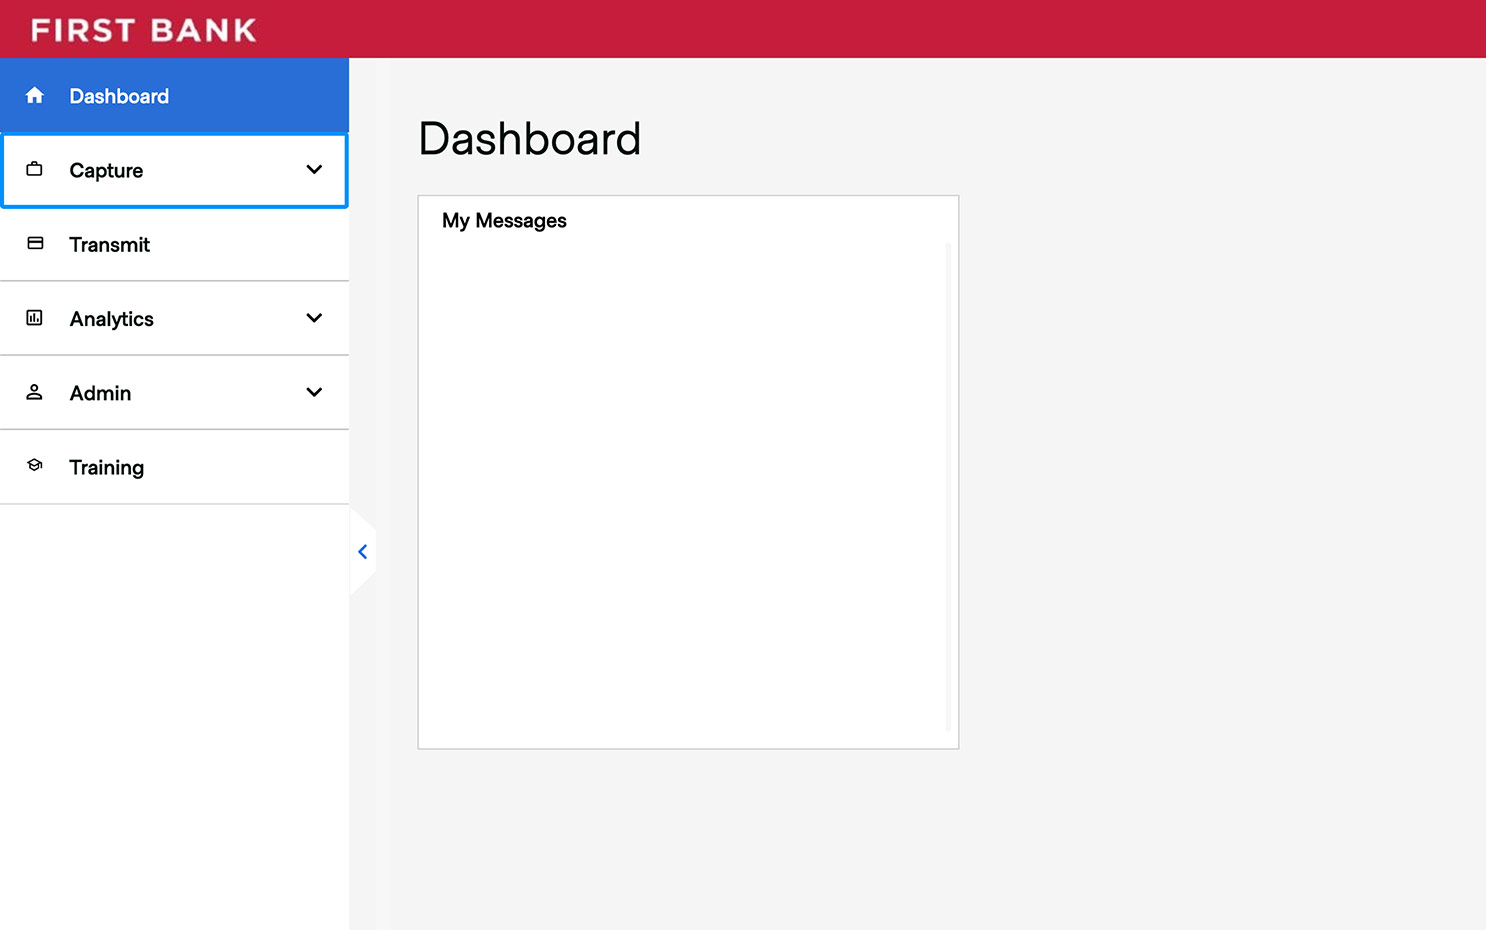
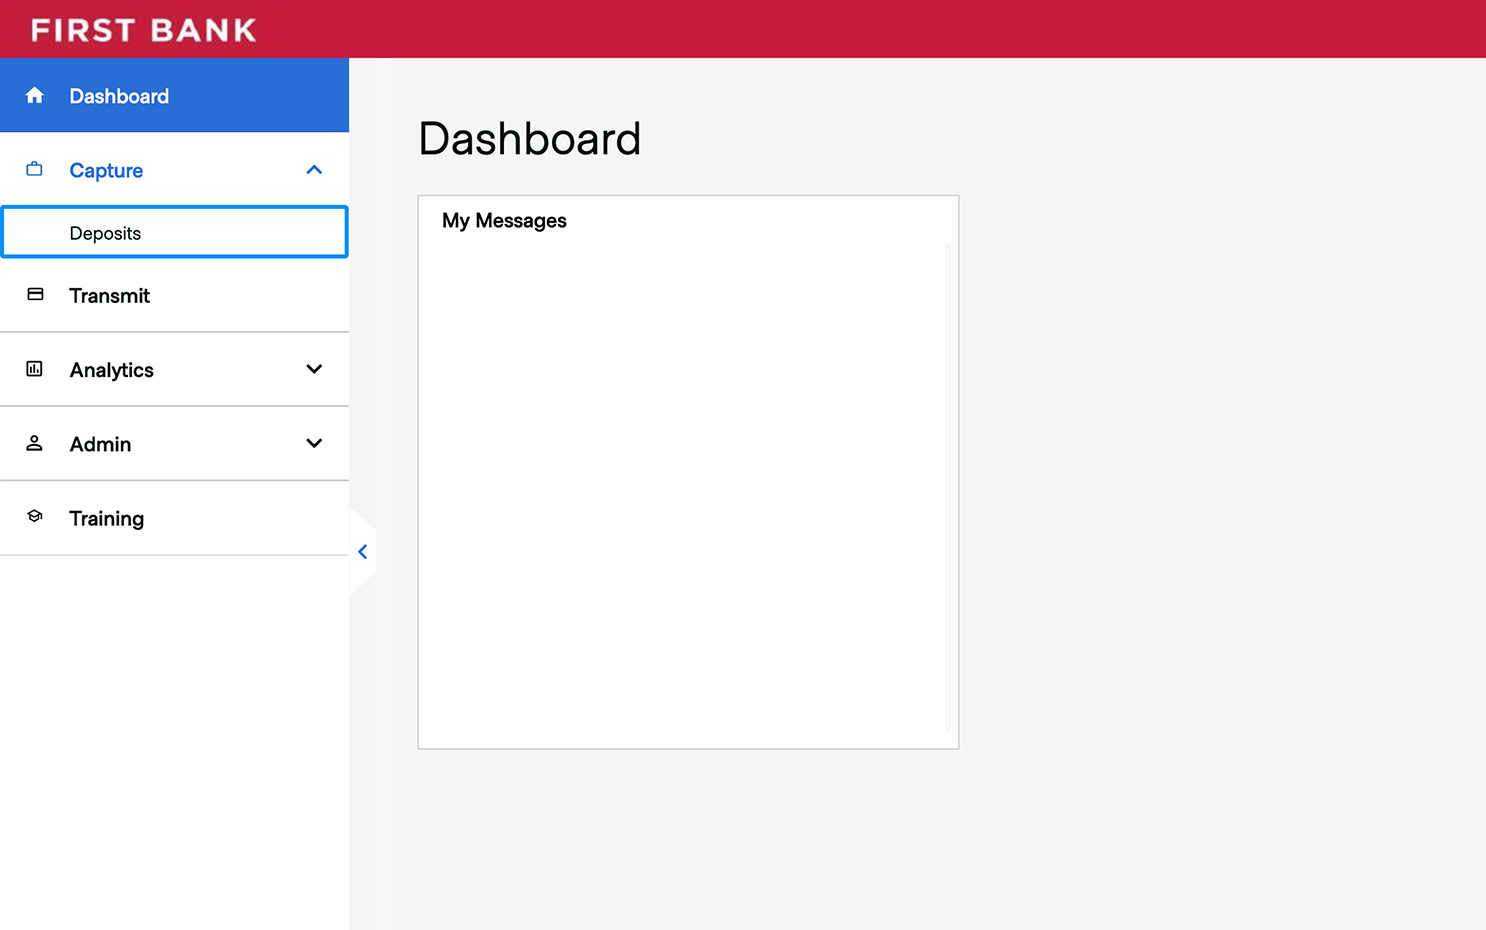
Select “Capture” from the menu on the left, and then select “Deposits.”
Step 4:
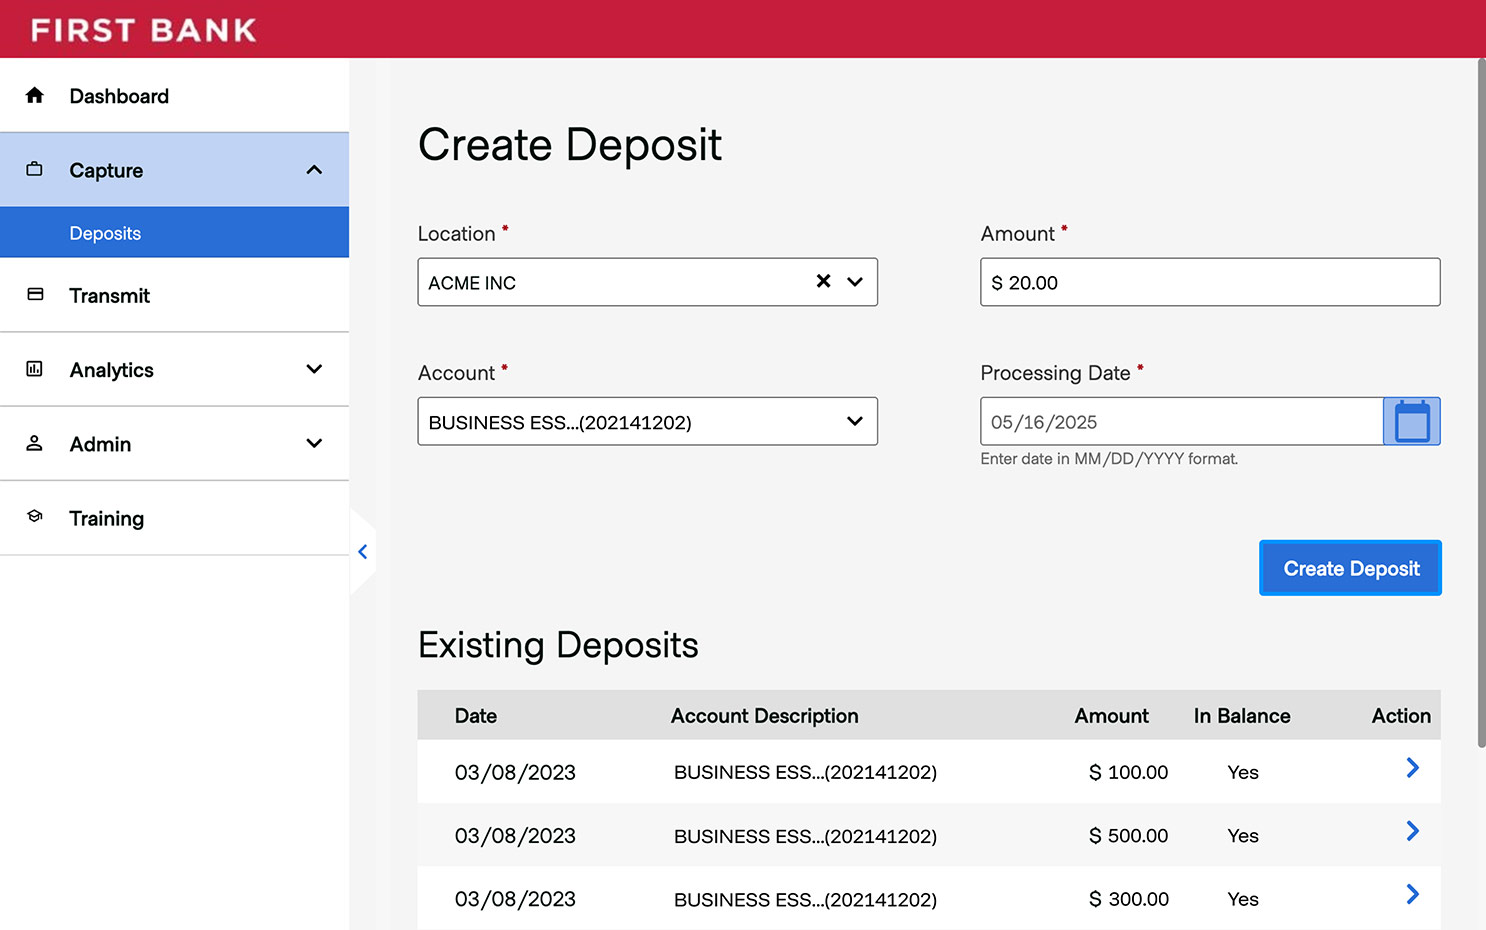
Create merchant deposit.
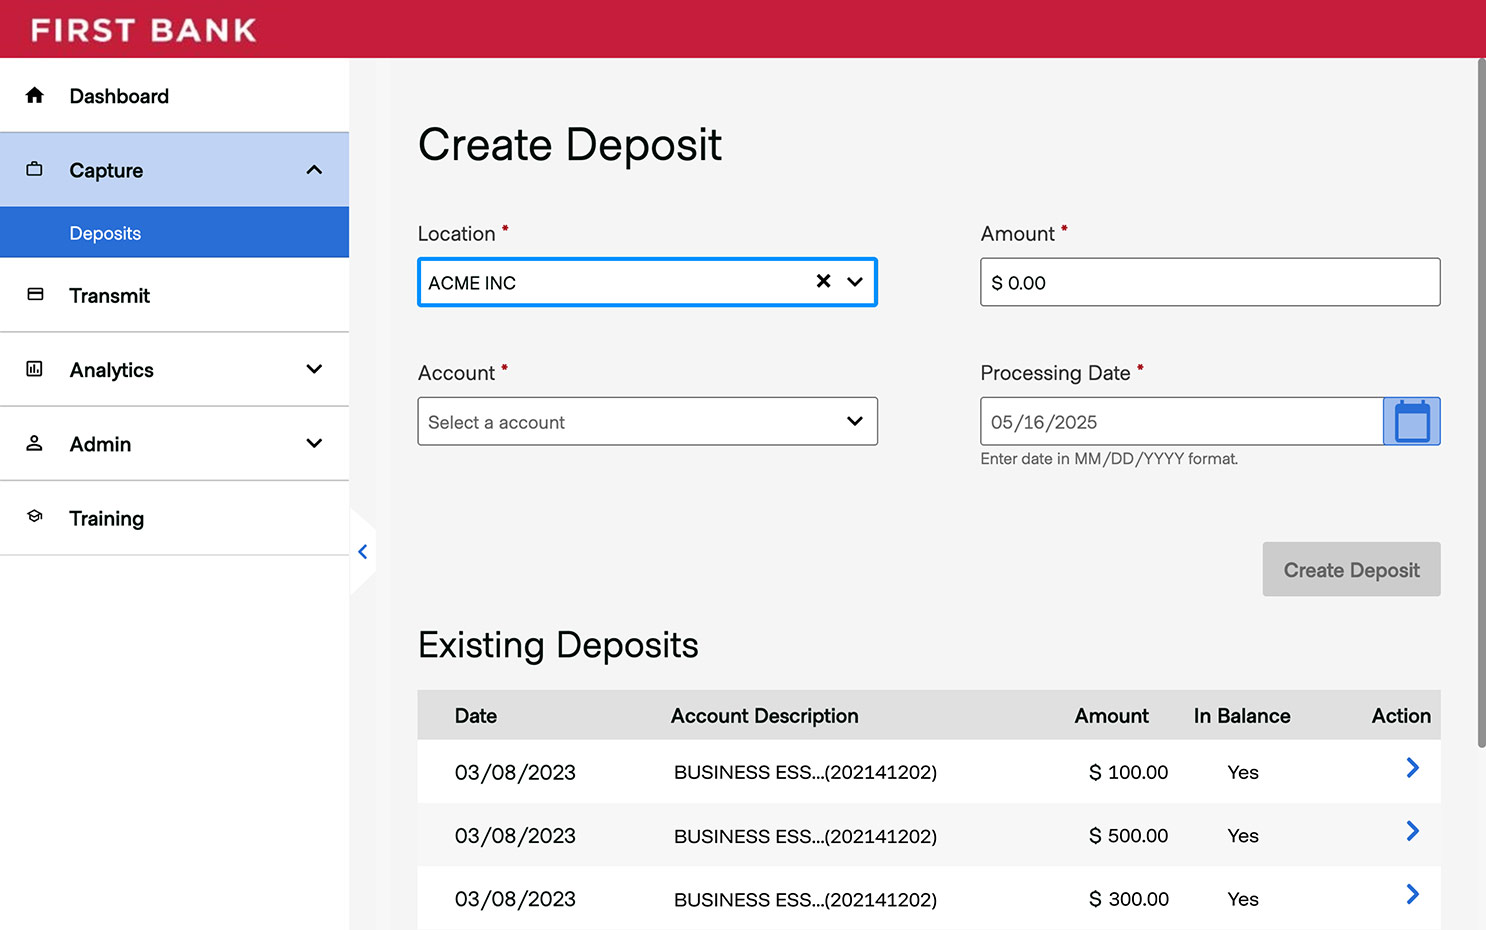
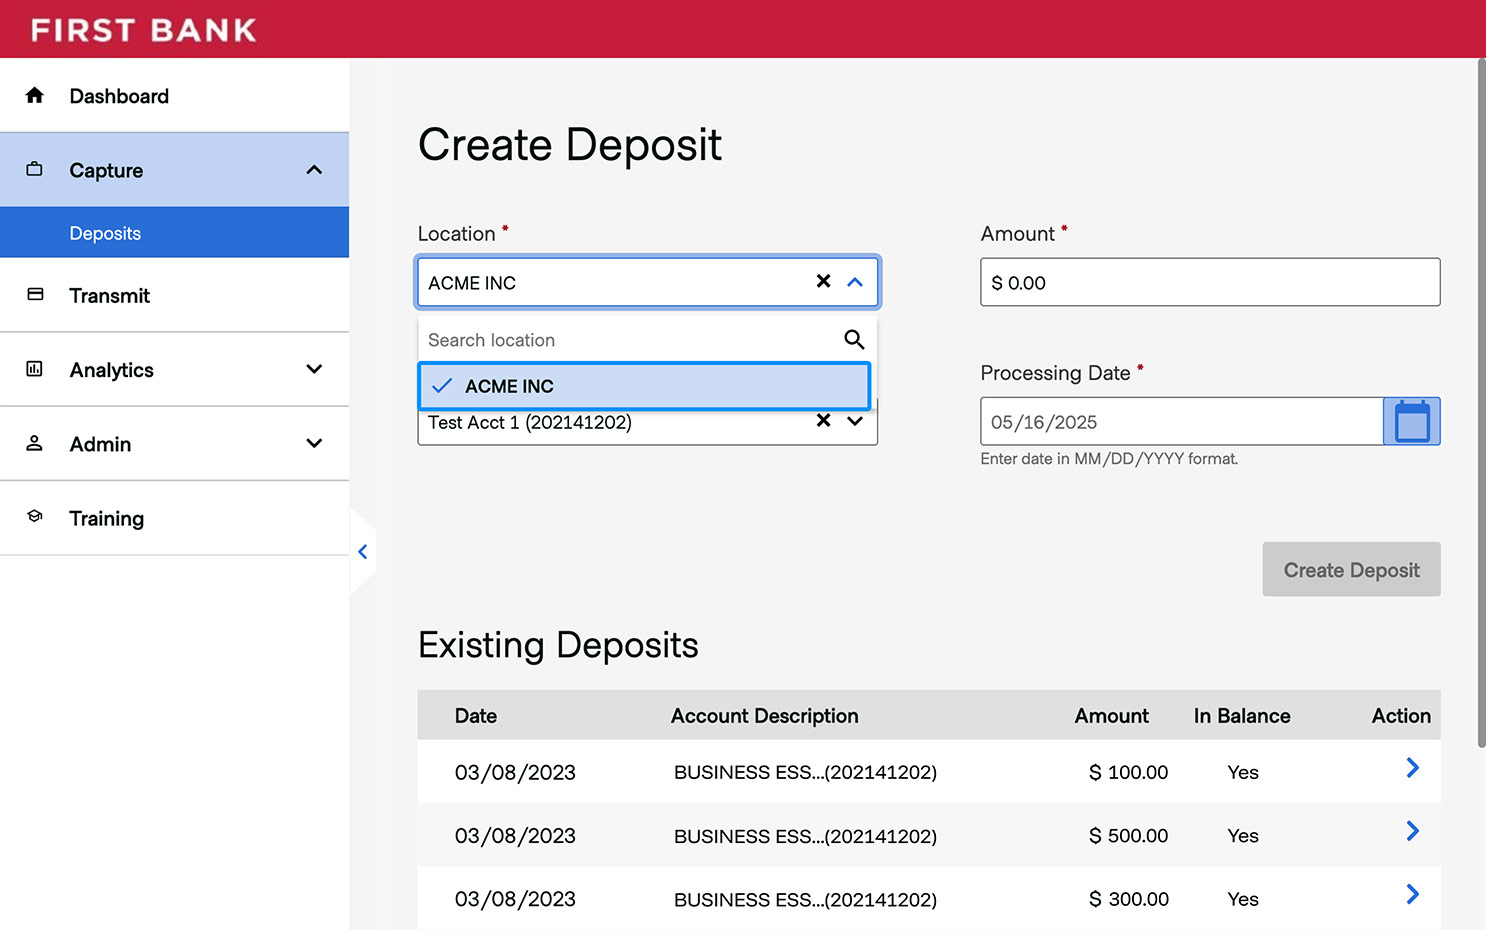
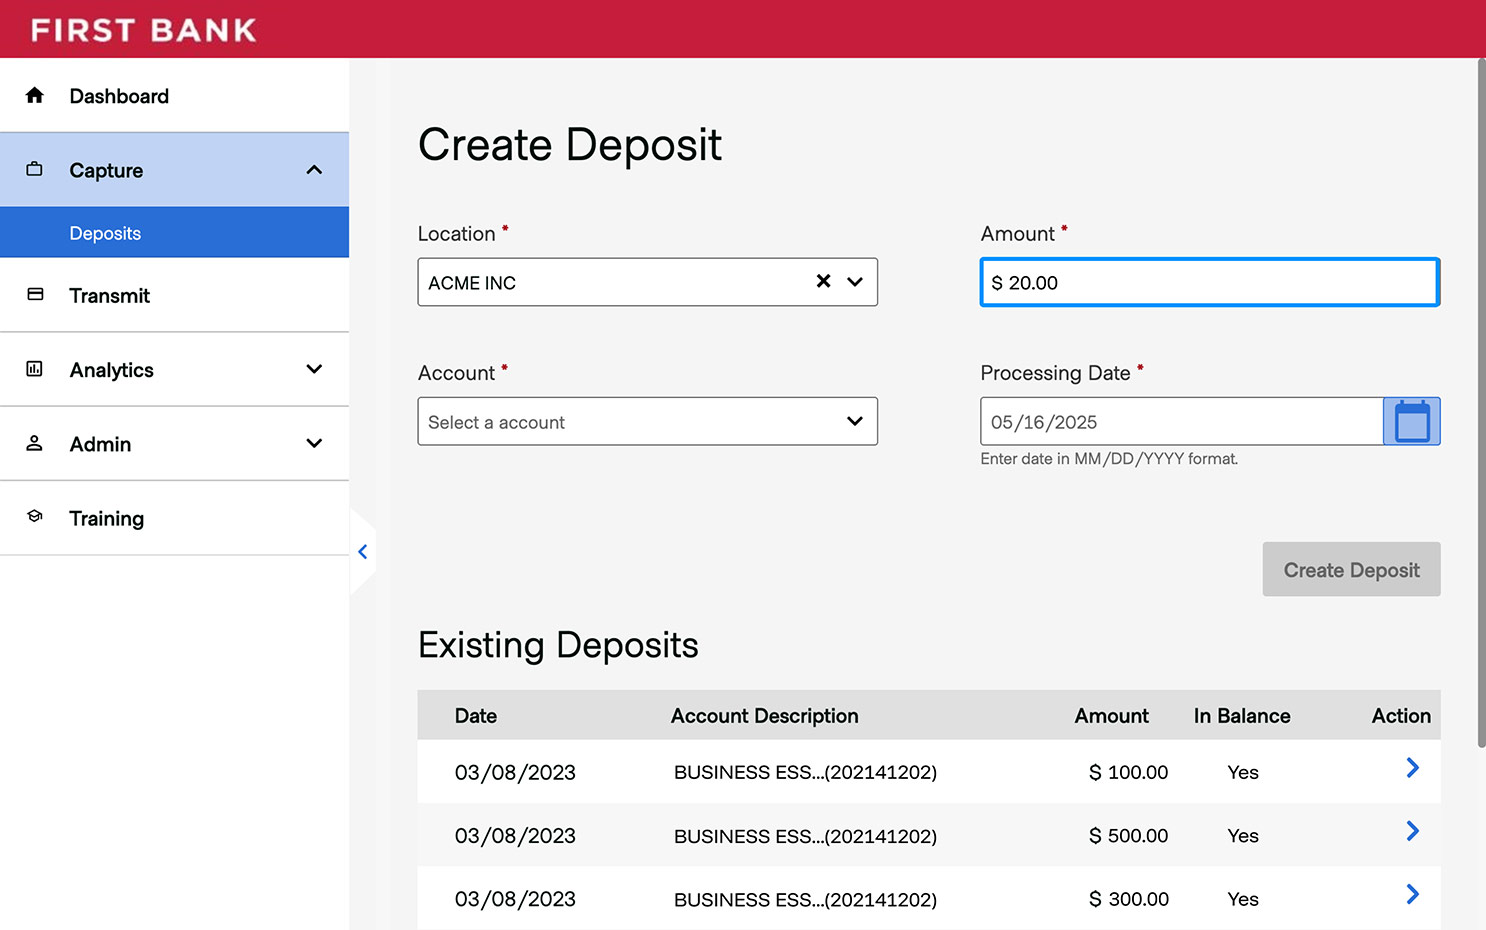
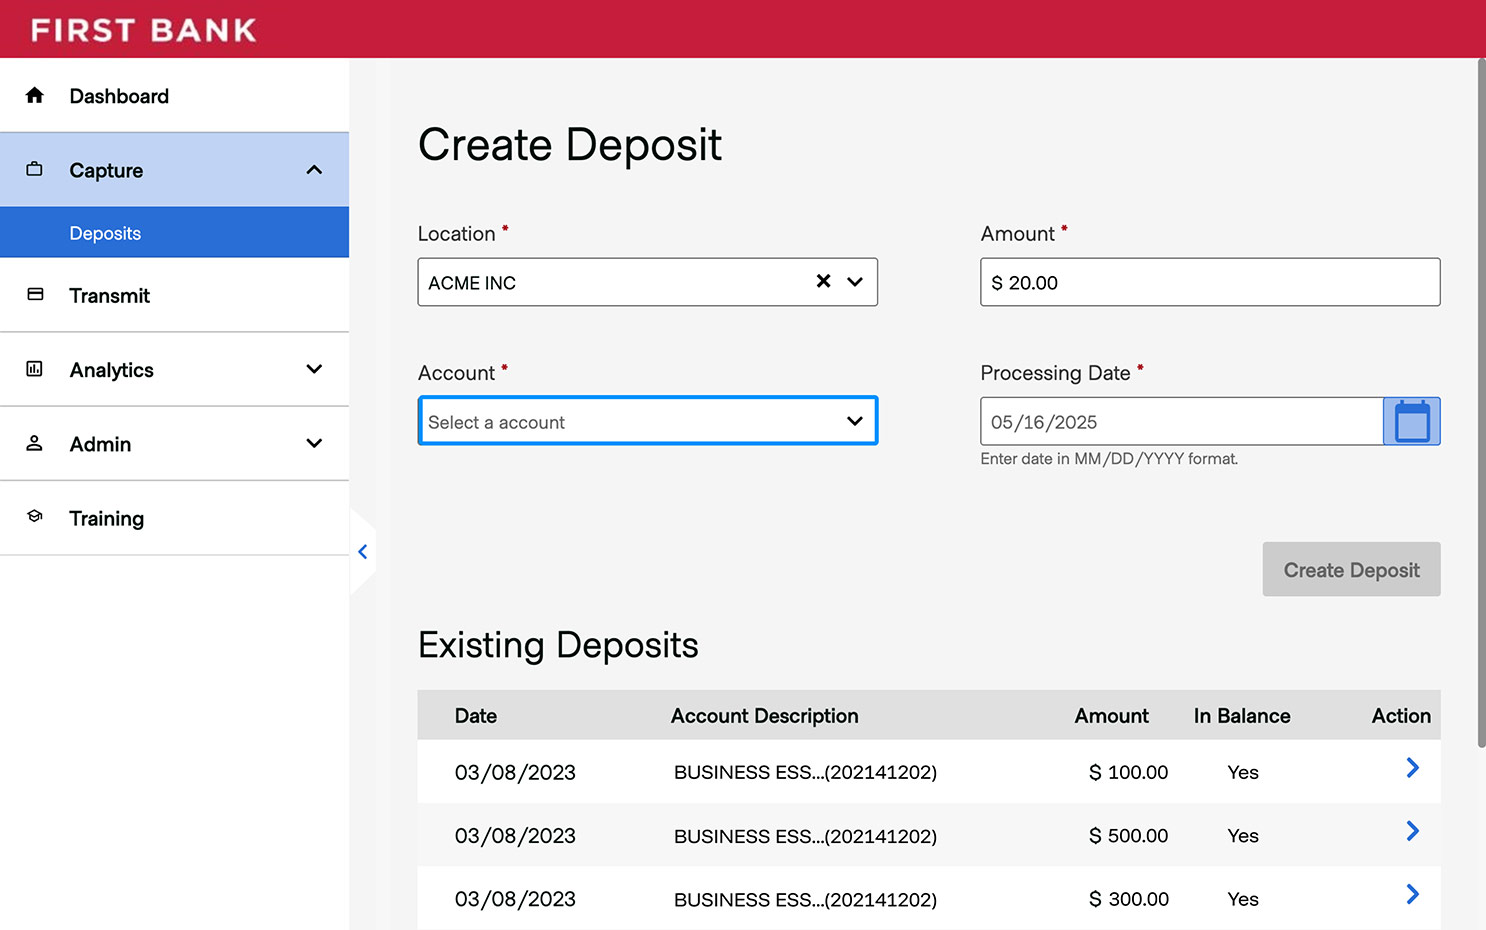
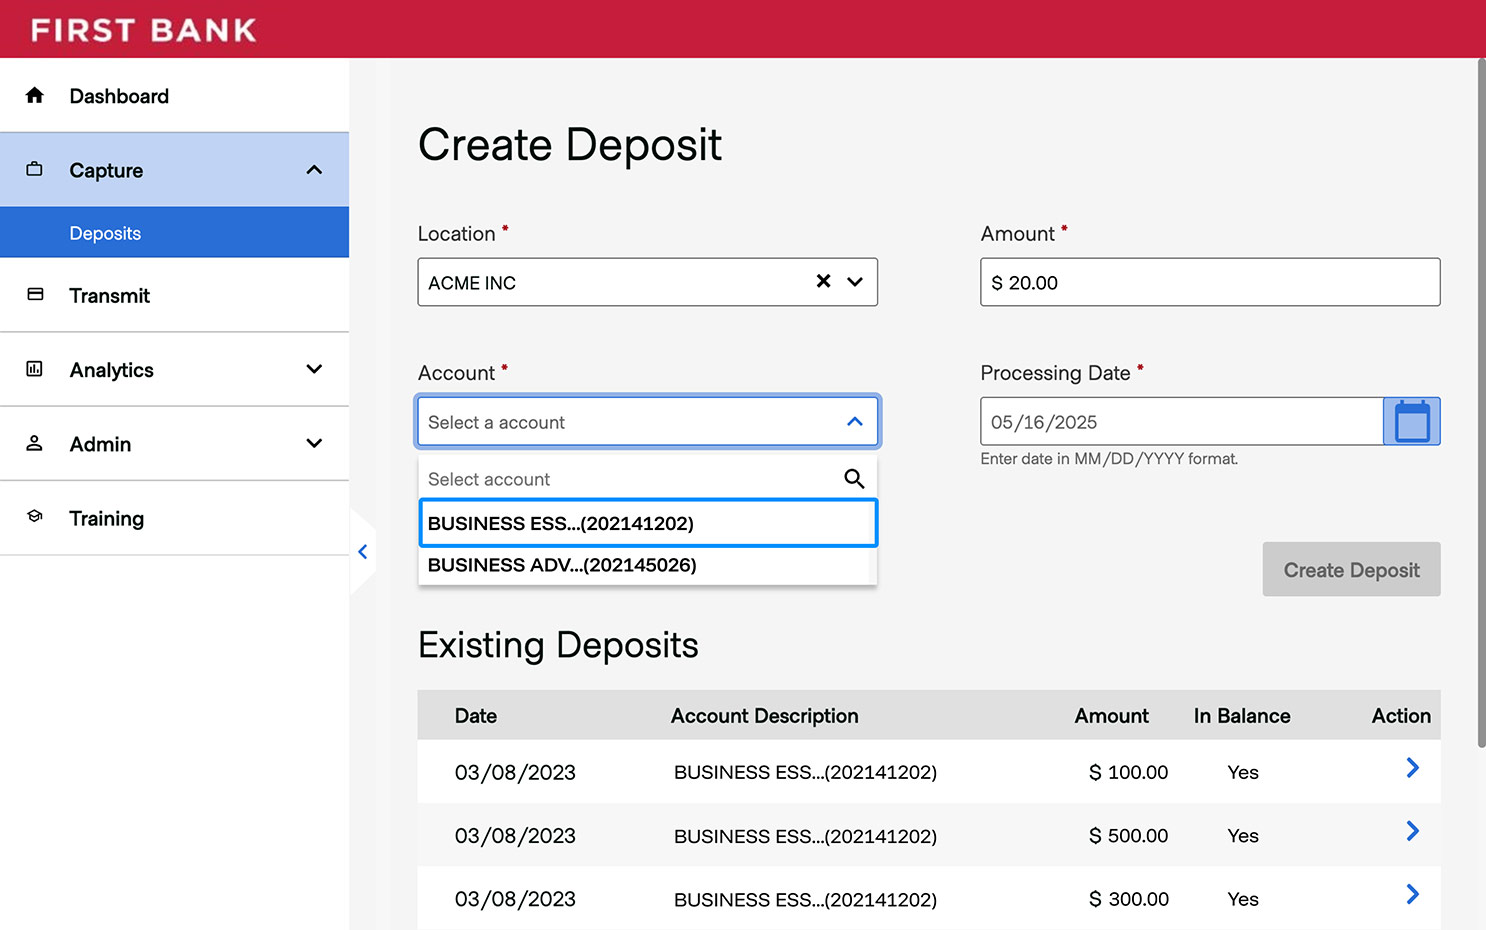
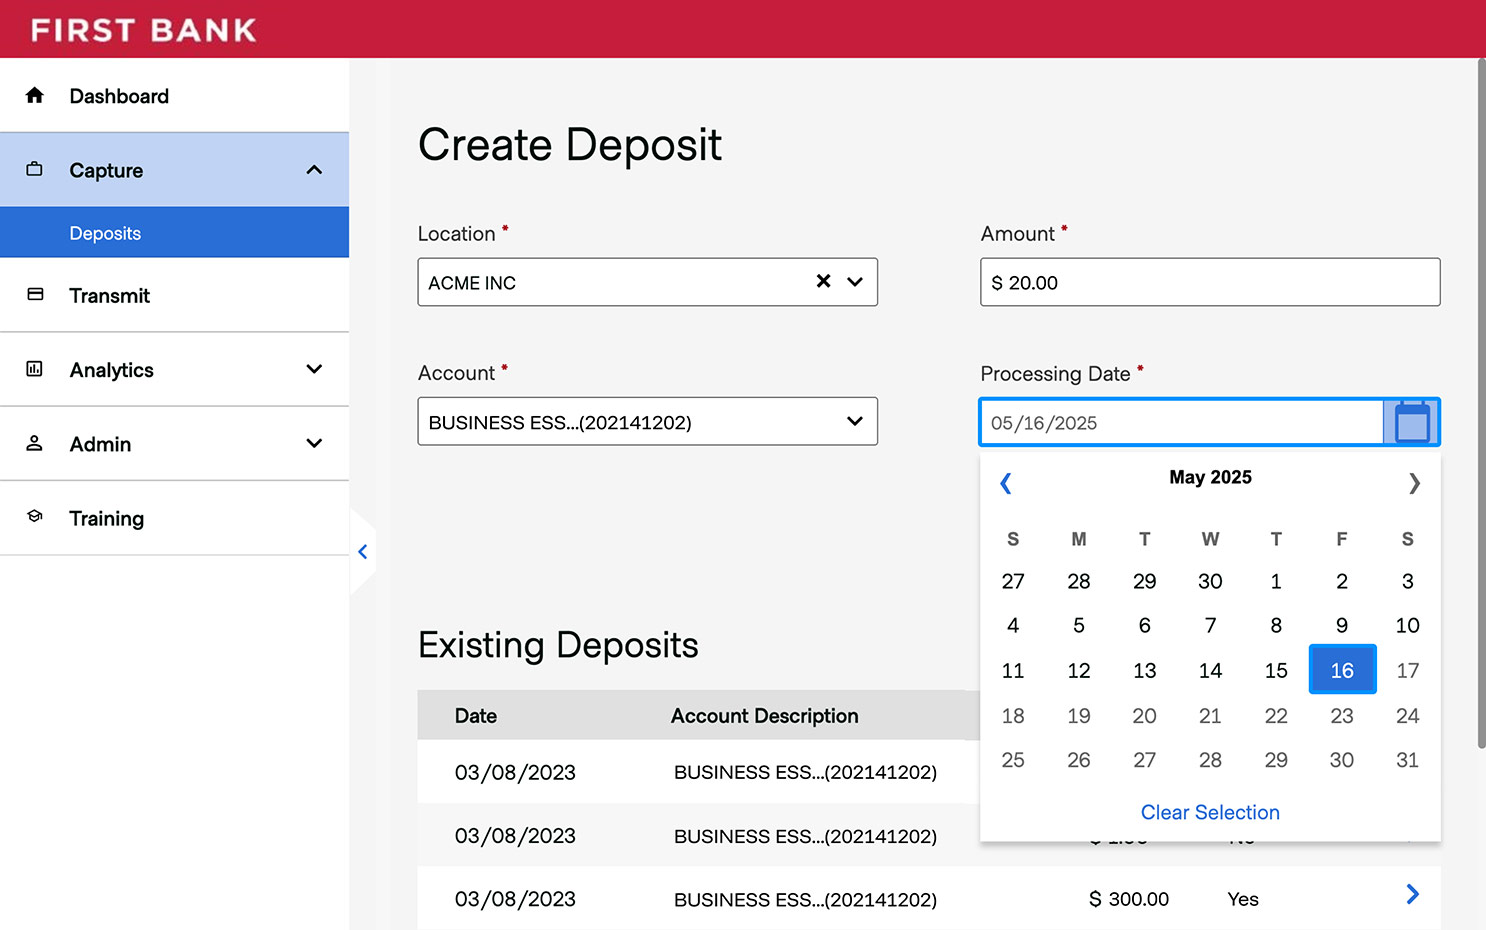
Click into the box under “Location” and choose from the dropdown list.
Enter the amount of the deposit in the box under “Amount.”
Click into the box under “Account” and choose the account you want the deposit to go to.
Click the calendar icon and choose the date you want the deposit to be processed.
Then click on “Create Deposit.”
Step 5:
Scan your check.
Place the check you want to deposit in your scanner and click “Scan.”
A picture of your check will appear. Review the Item Details in the left column to ensure they match the information on the check.
Then click “Close Transaction.”


Step 6:
Decision transaction.
Choose how you want to proceed. Select “Defer” to hold the transaction as an Existing Deposit, “Release” to transmit your transaction to the central site, or “Delete” to remove the entire transaction.
After making your choice, click “OK” to continue.

Step 7:
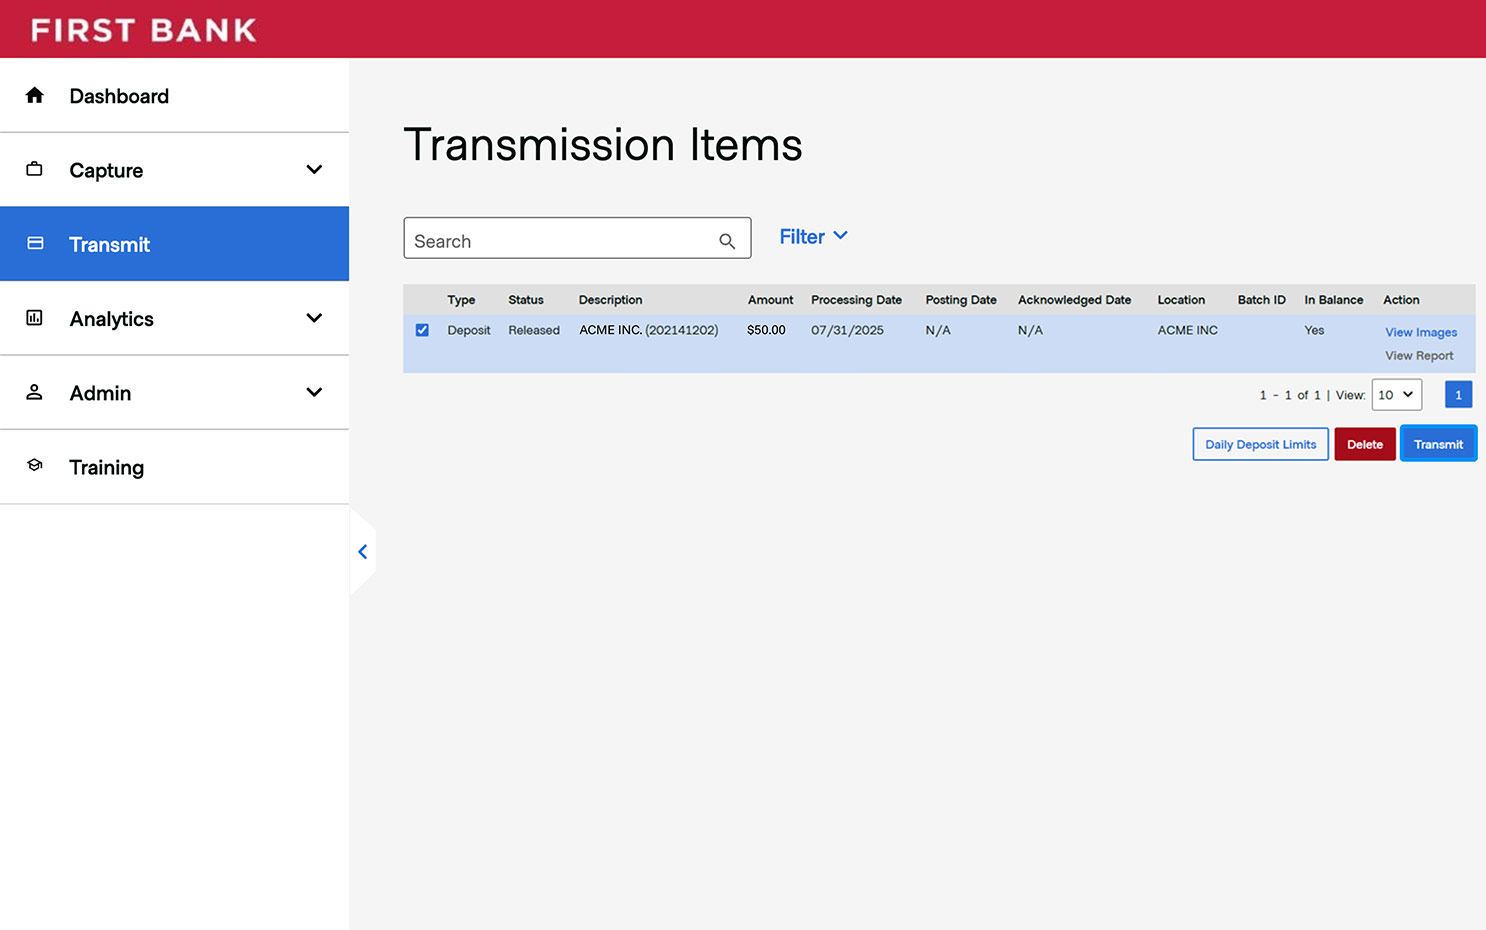
Transmit items.
If you selected “Release,” you will see all the items awaiting transmission.
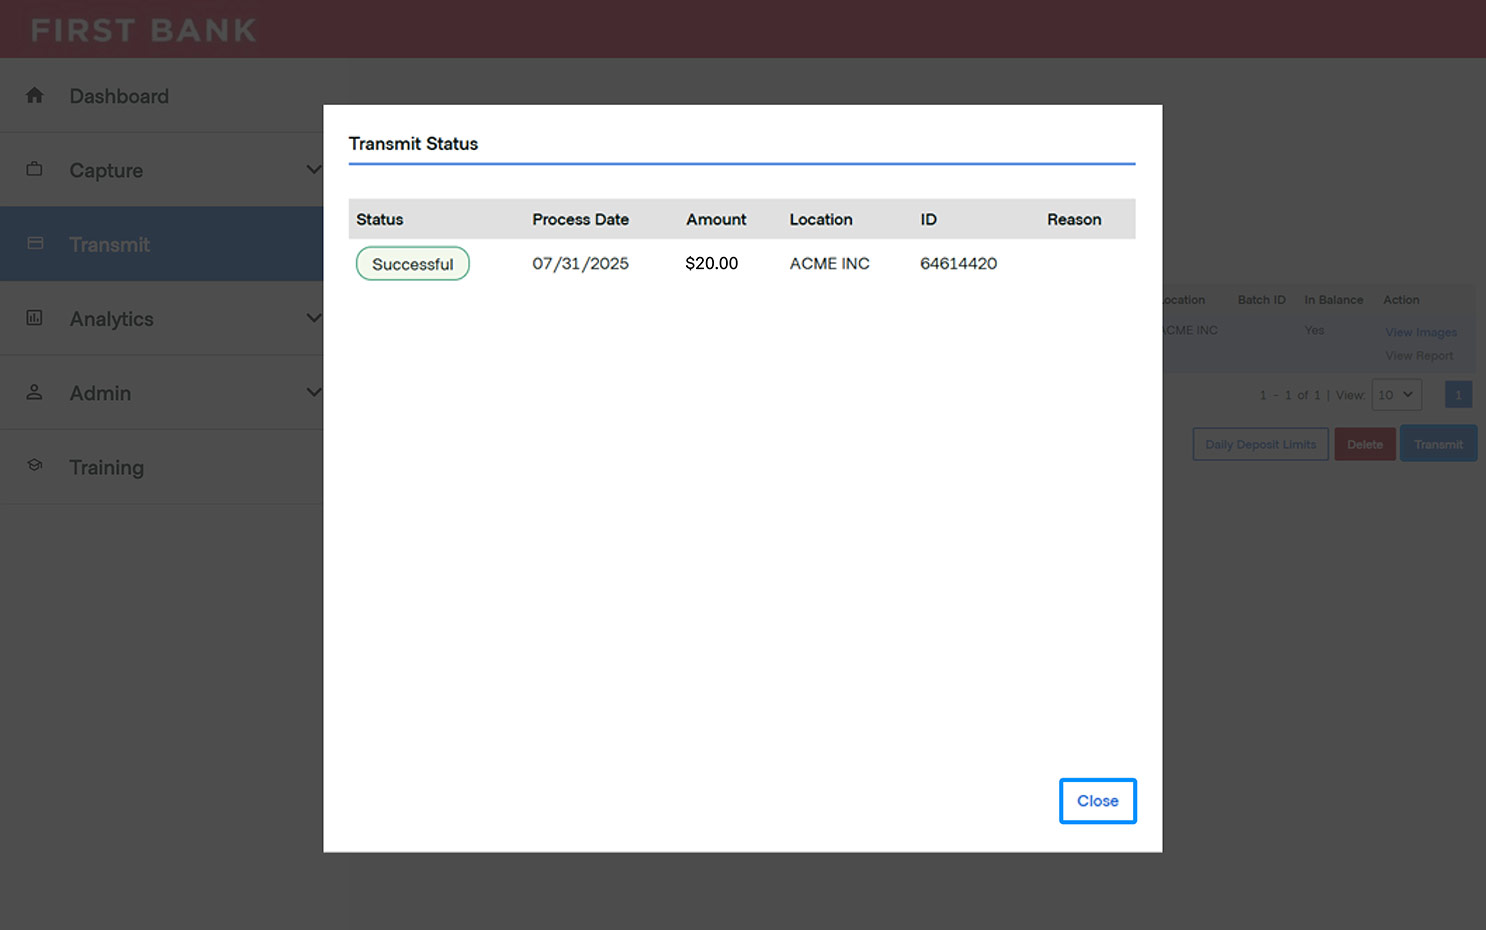
You must click “Transmit” for your deposit to go through. This step is essential so the bank receives your deposit and credits your account.
A pop-up will confirm when your transmission has been successful. Click “Close” to exit.
Step 8:
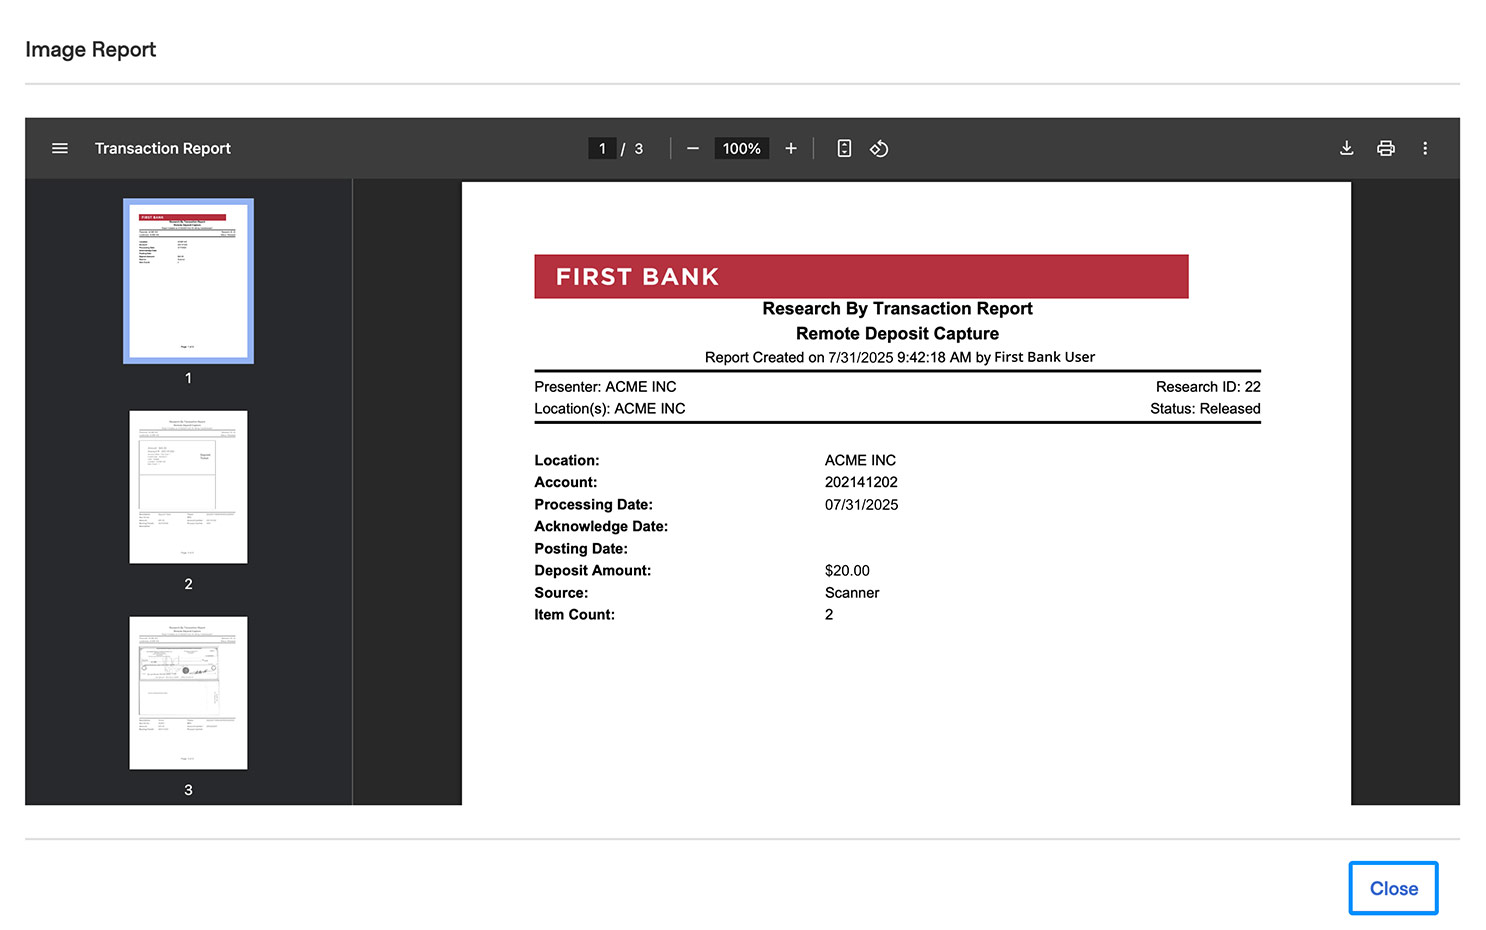
View transmission reports.
From the Transmit tab, the status of the transmissions you just submitted will show as “Acknowledged.”
Under the Action column, you can click on “View Images” or “View Report” if you want to open, print, or save these reports.
After viewing these items, click “Close” to exit.

Step 9:
Review Analytics.
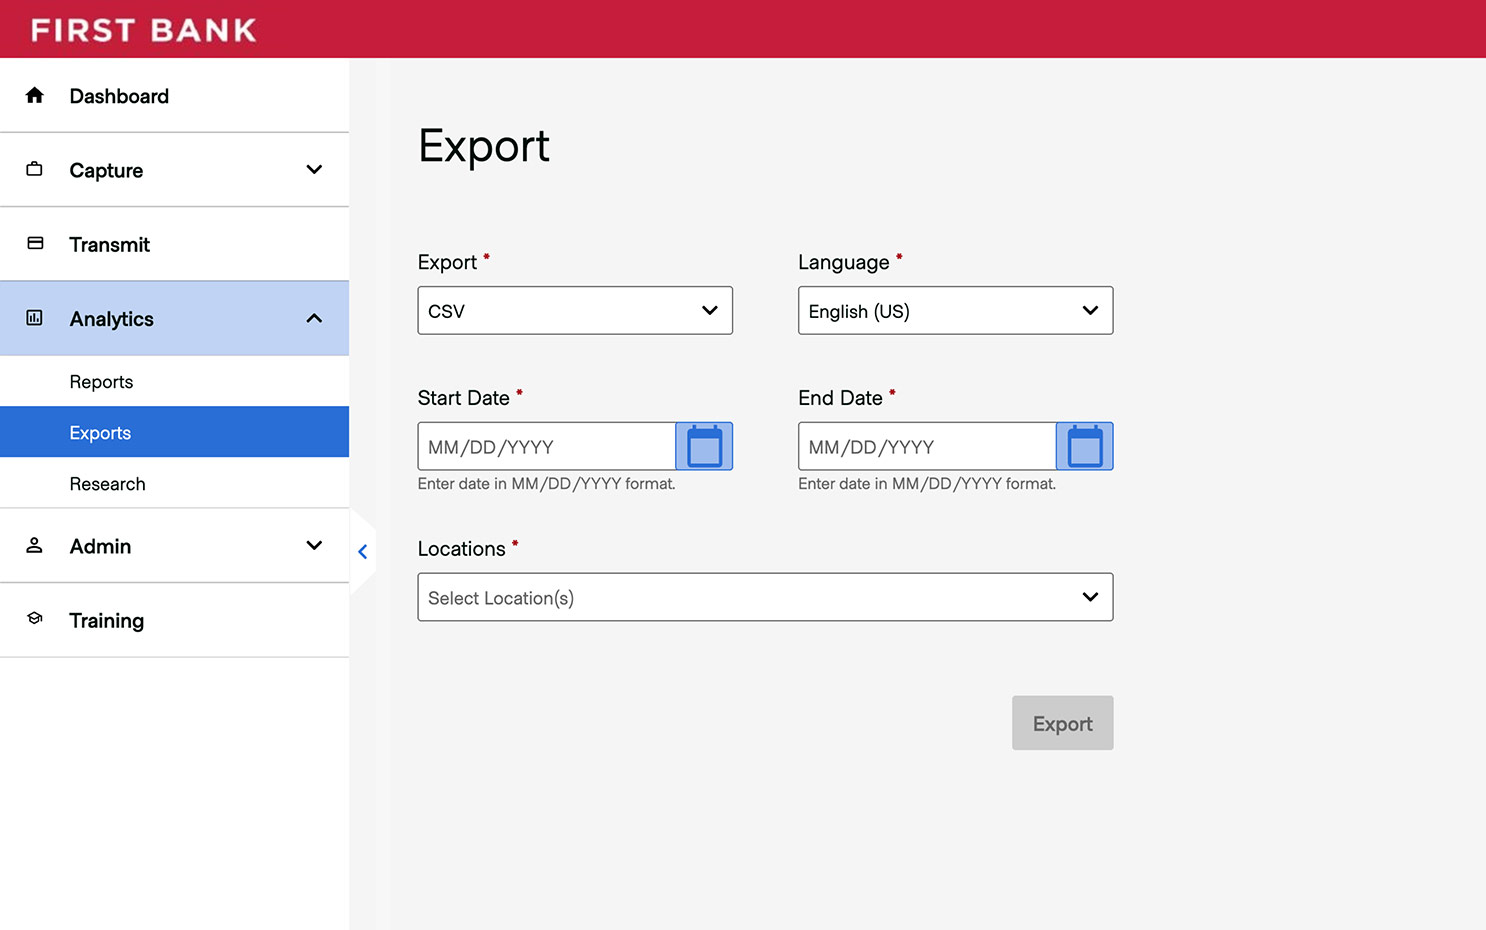
Click “Analytics” from the column on the left and click on “Reports” to choose to see Admin, Deposit, Payment, or Transaction Reports.
Click “Exports” and enter information in the required fields, then click “Export.”
Click “Research” and enter information in the required fields to find the information you want.


Step 10:
Install scanner.
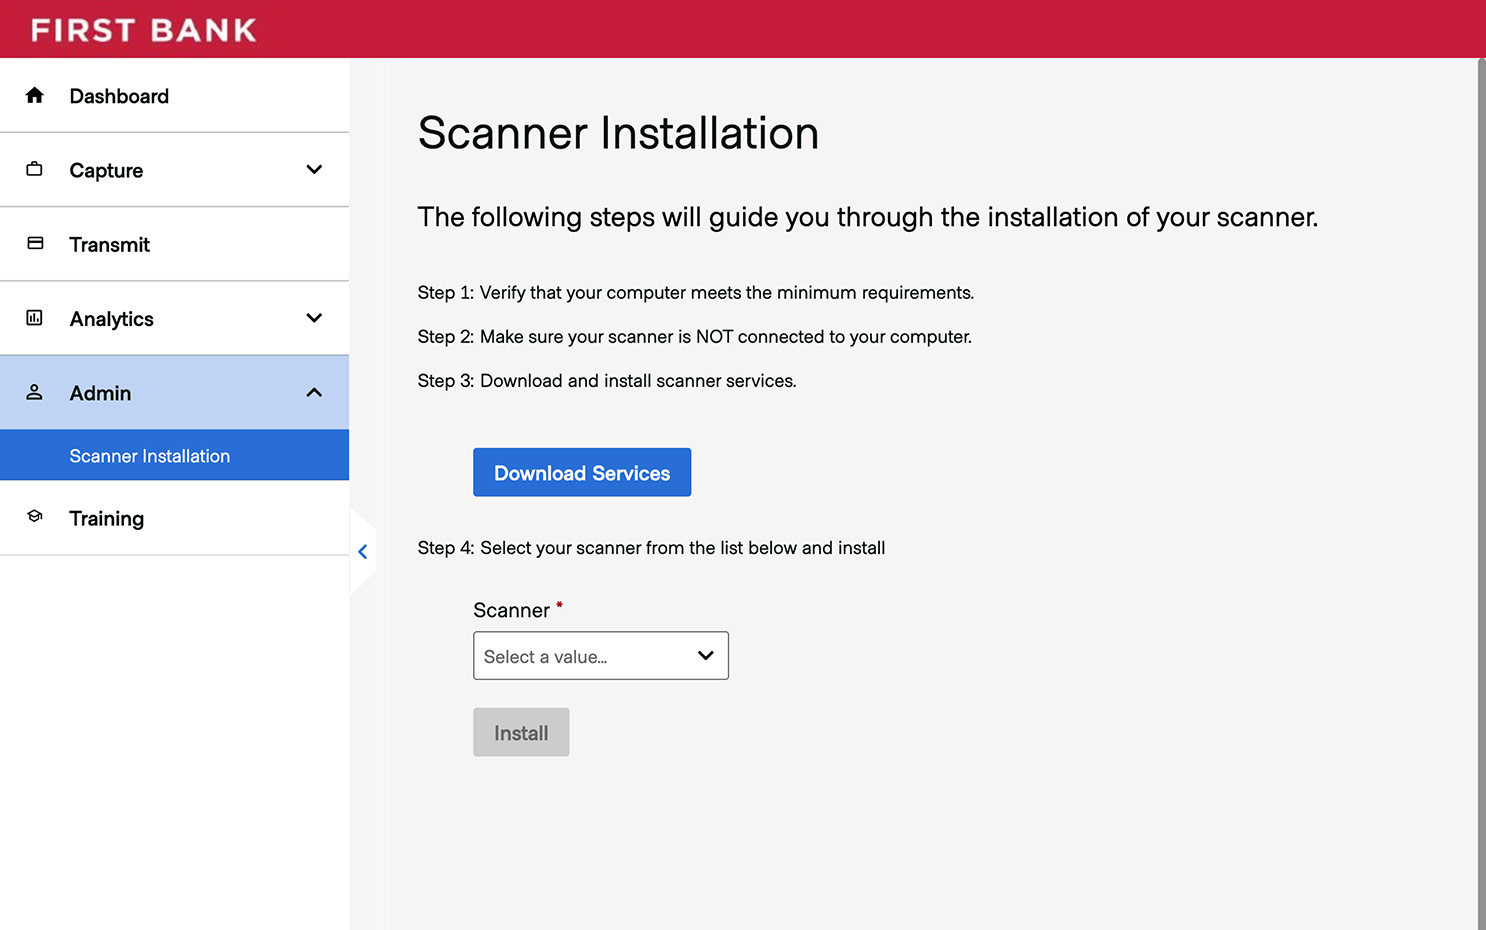
Click “Admin” from the column on the left and select “Scanner Installation.”
Follow the steps to install your scanner and then click “Install.”
The installation of the program may require Administrator rights on your computer network. If so, please coordinate with your IT department for further support.
Step: 11
Learn more.
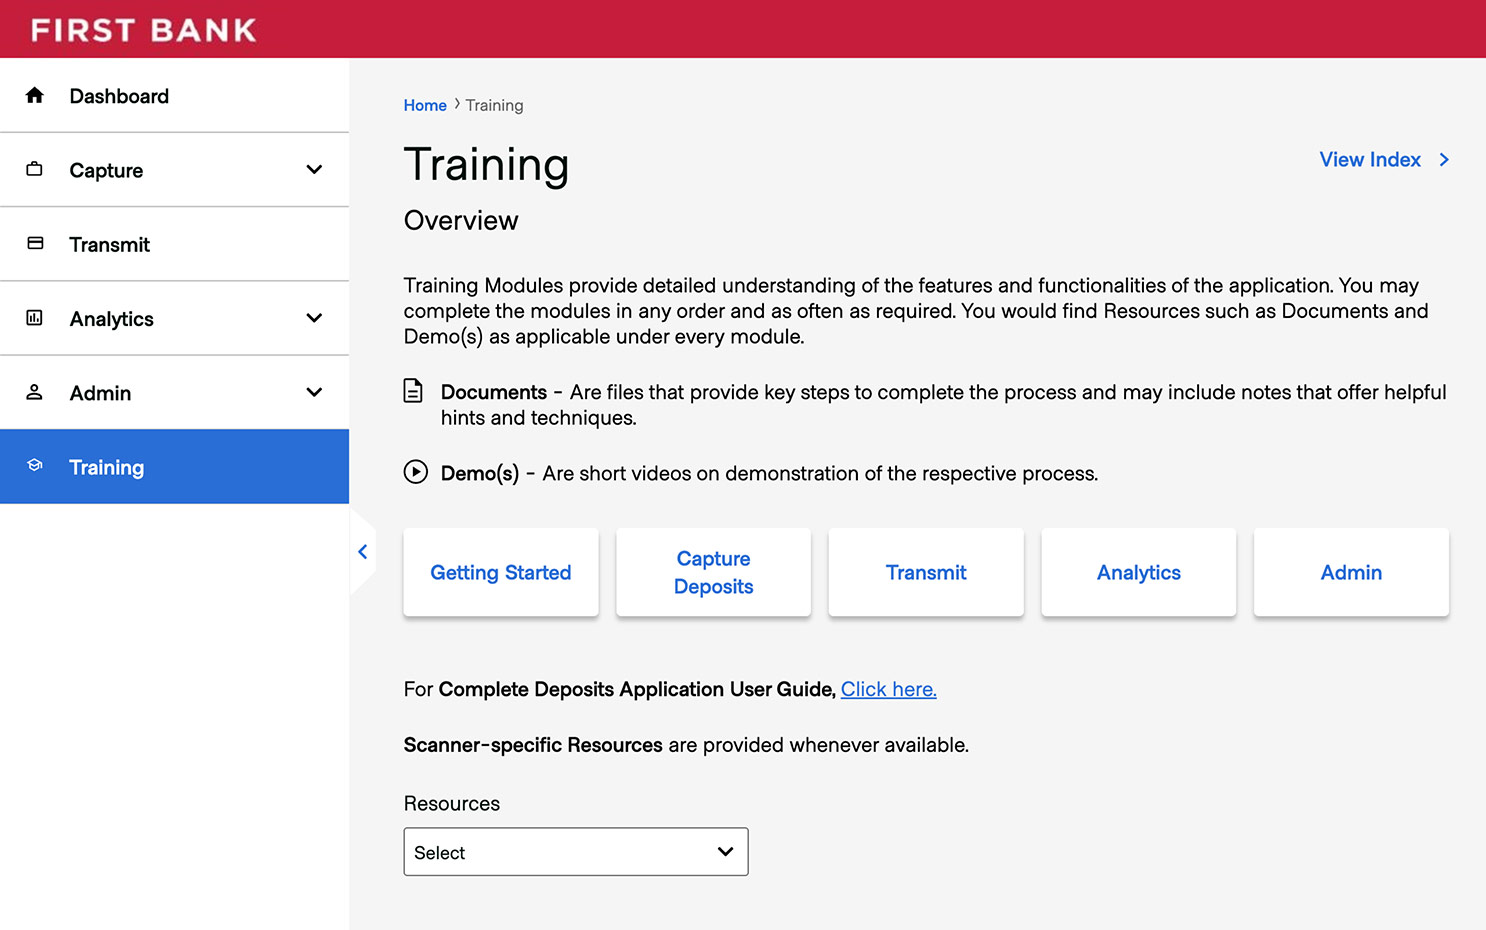
For any training, troubleshooting, or demos, click on “Training” in the menu on the left and choose from the topics provided.
Have questions or unsure where to start?
Contact your Treasury Services rep, or one of our support teams below, for help or to schedule personalized demos.