Viewing Reports
Learn how to create, schedule, and view Lockbox reports.
Step 1:
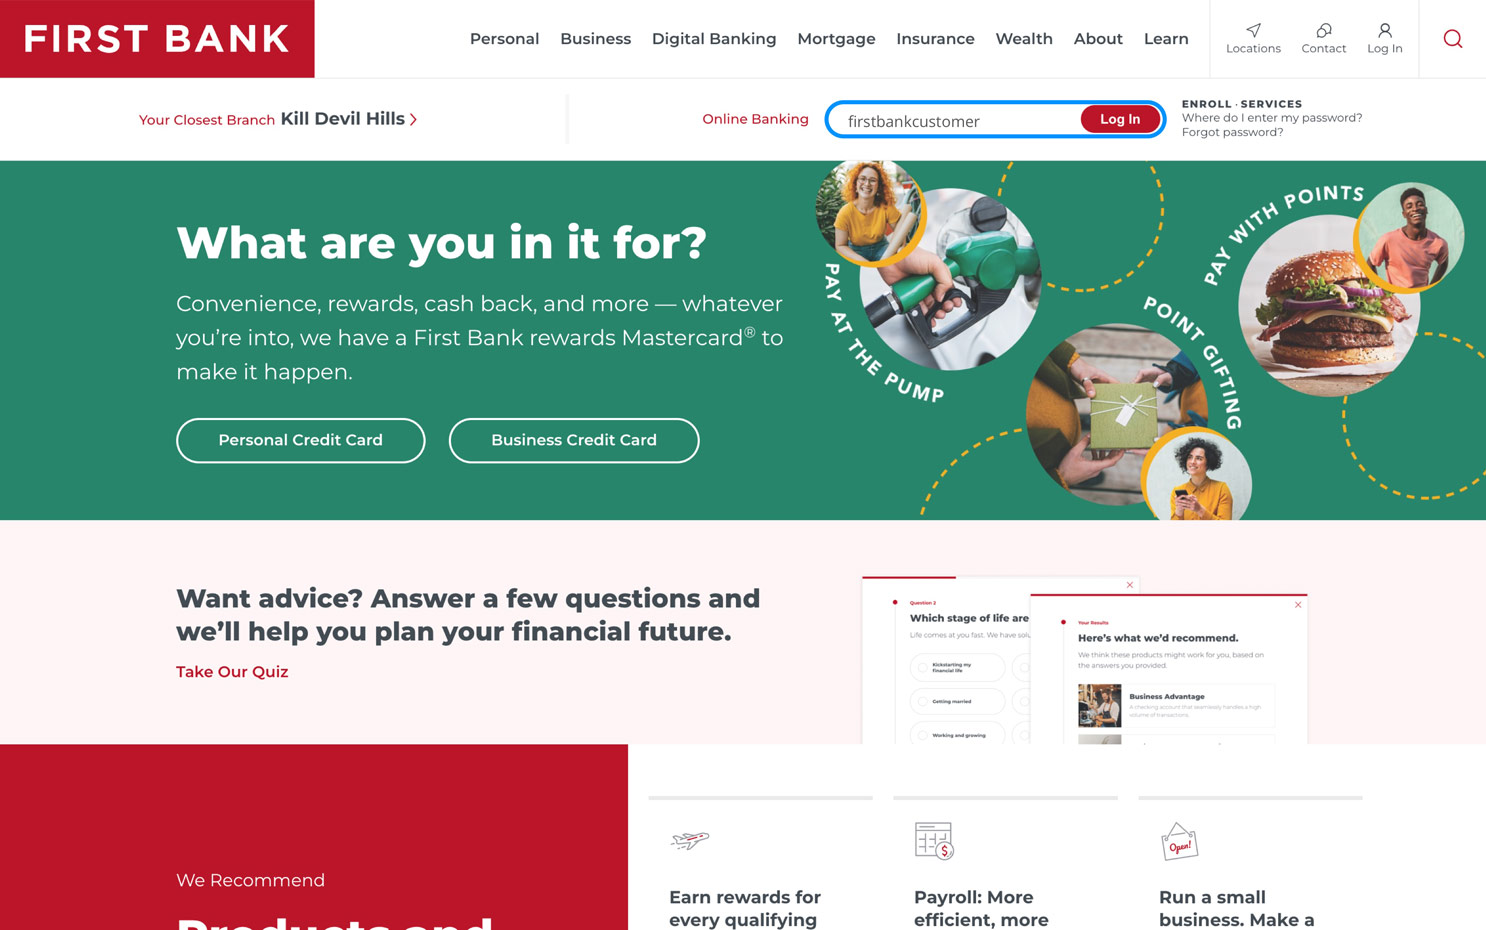
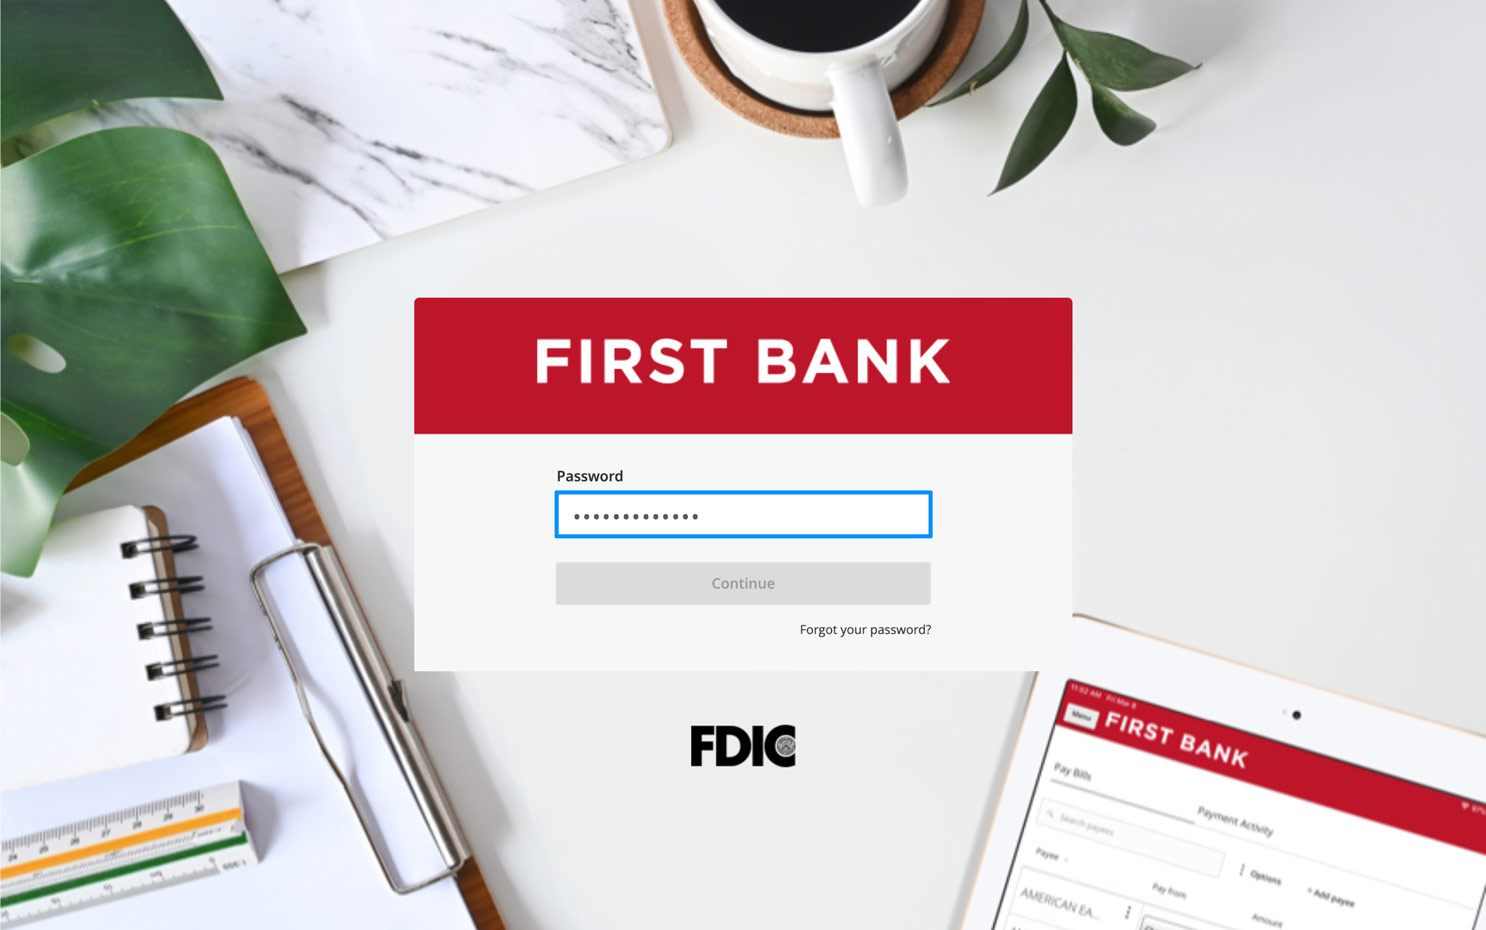
Log in to online banking.
When you enrolled in First Bank digital banking, you created a Login ID and Password. Enter your ID in the corresponding screen and then click the “Log In” button. Enter your password and click “Continue.”
Step 2:
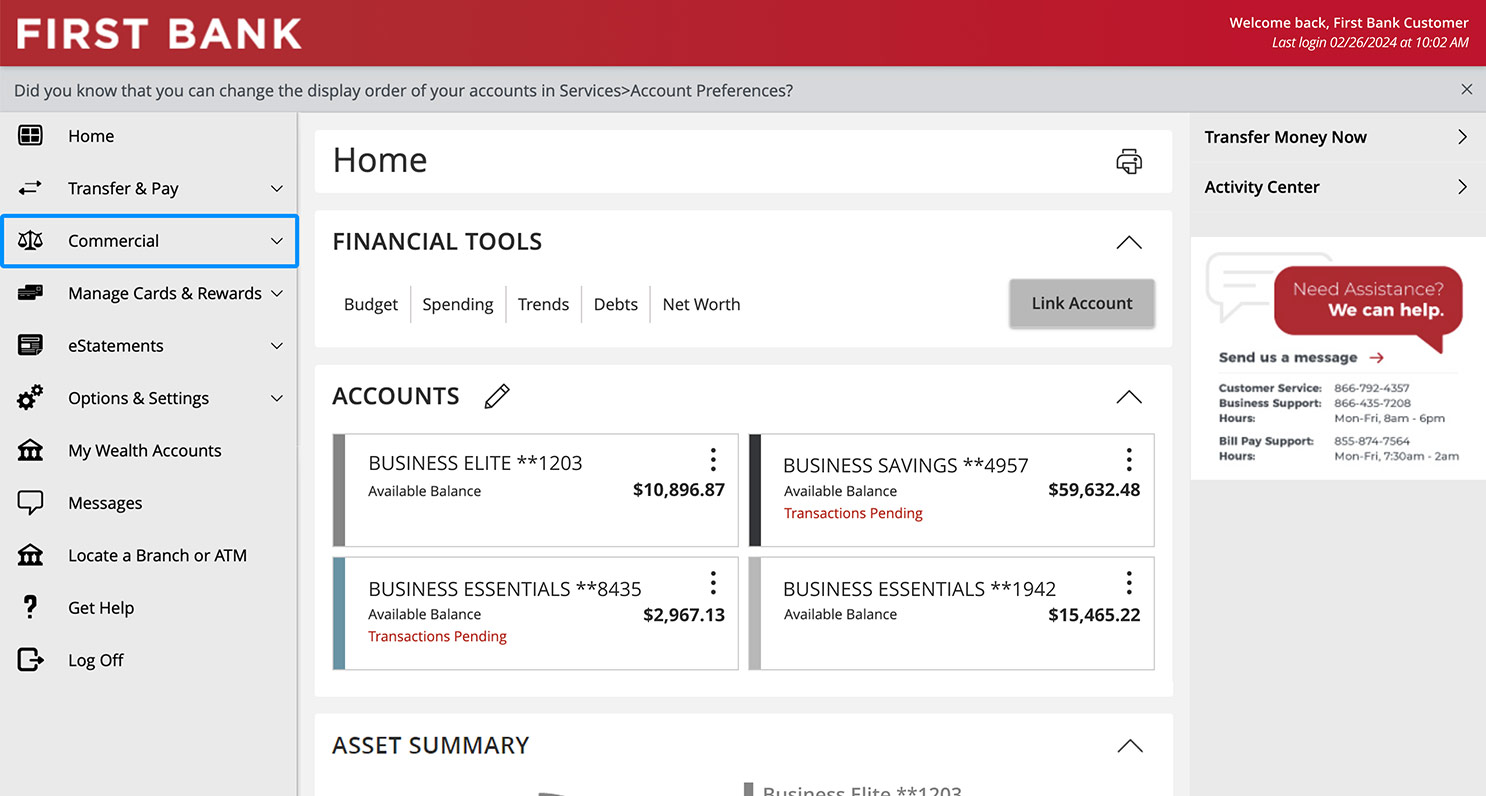
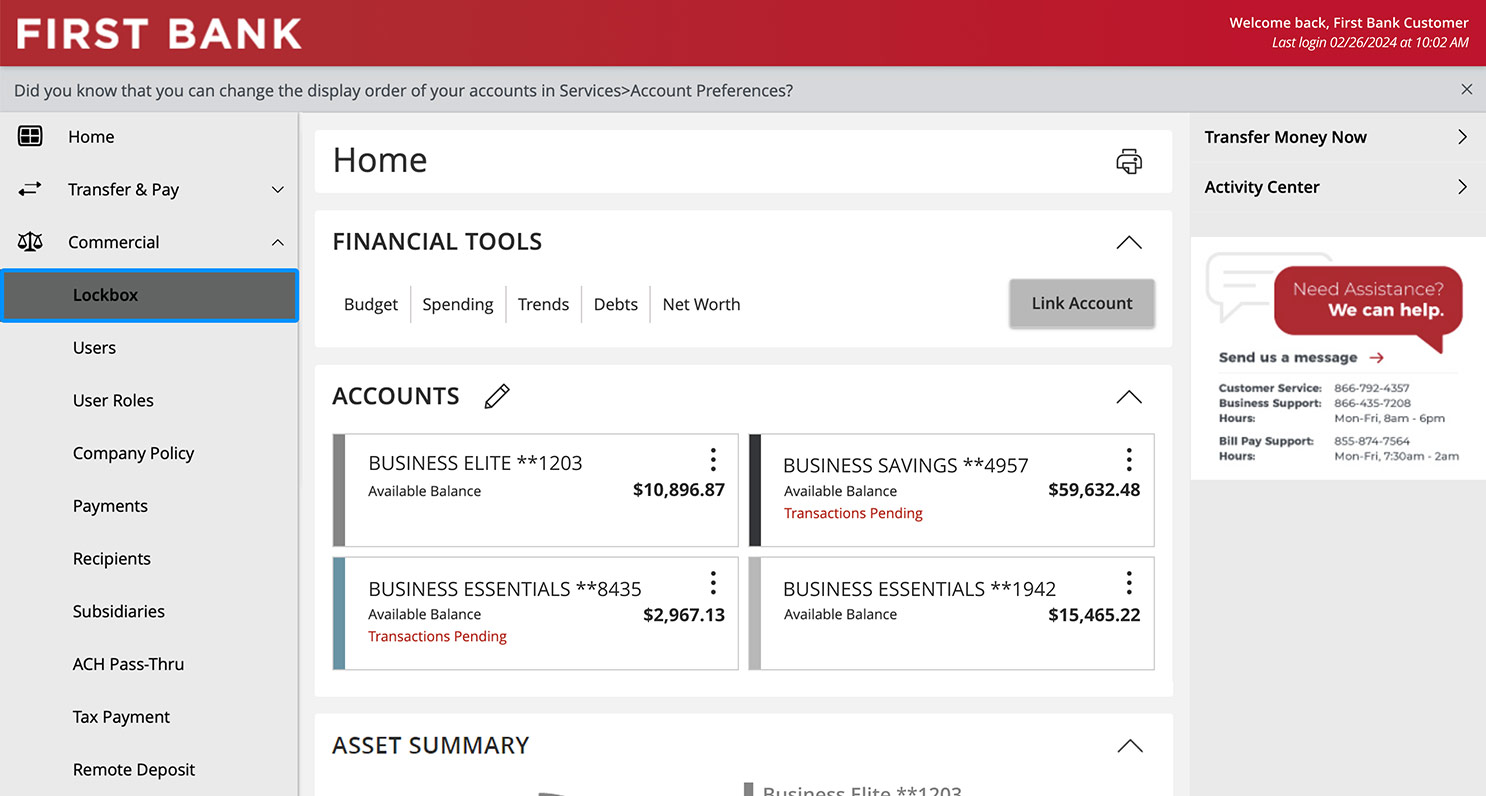
Access Archive.
From the menu on the left, click “Commercial” and choose “Lockbox” from the dropdown. Then select “Reports” from the menu on the left.
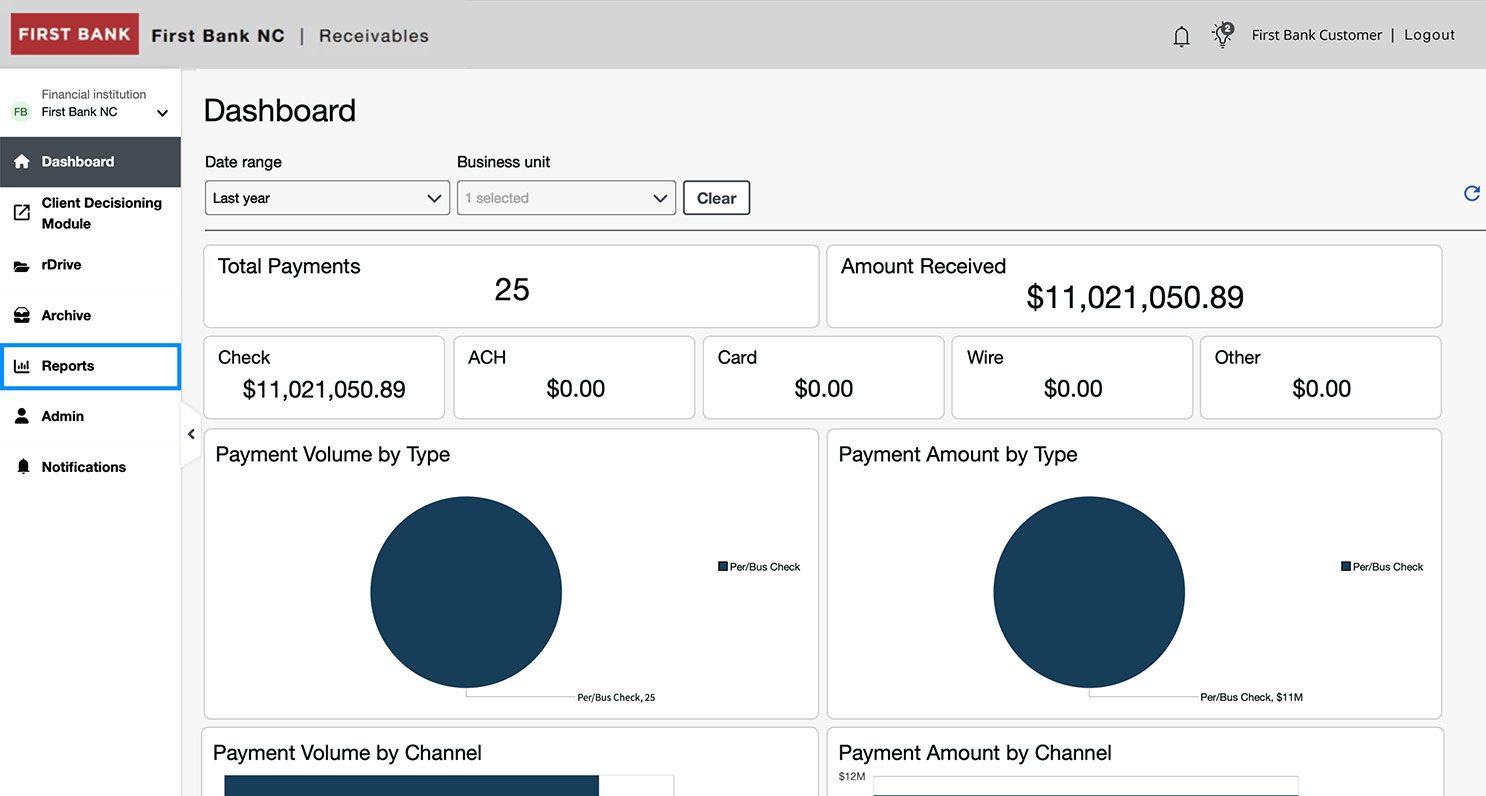
Step 3:
Create a report.
Click the “Create” tab at the top of the page. Under the My Payment Reports section, click “Create report.”

Step 4:
Customize report.
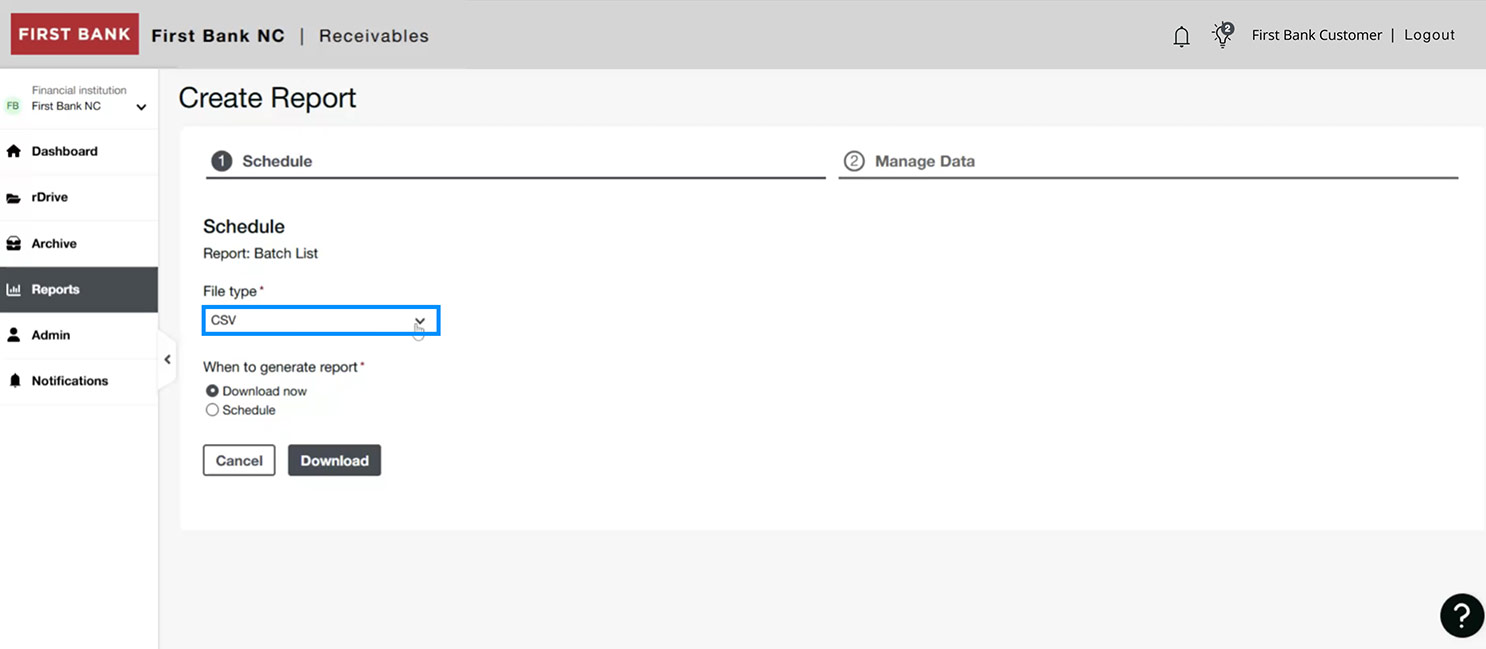
Under File type select CSV from the menu. Then choose to download it now or schedule it.
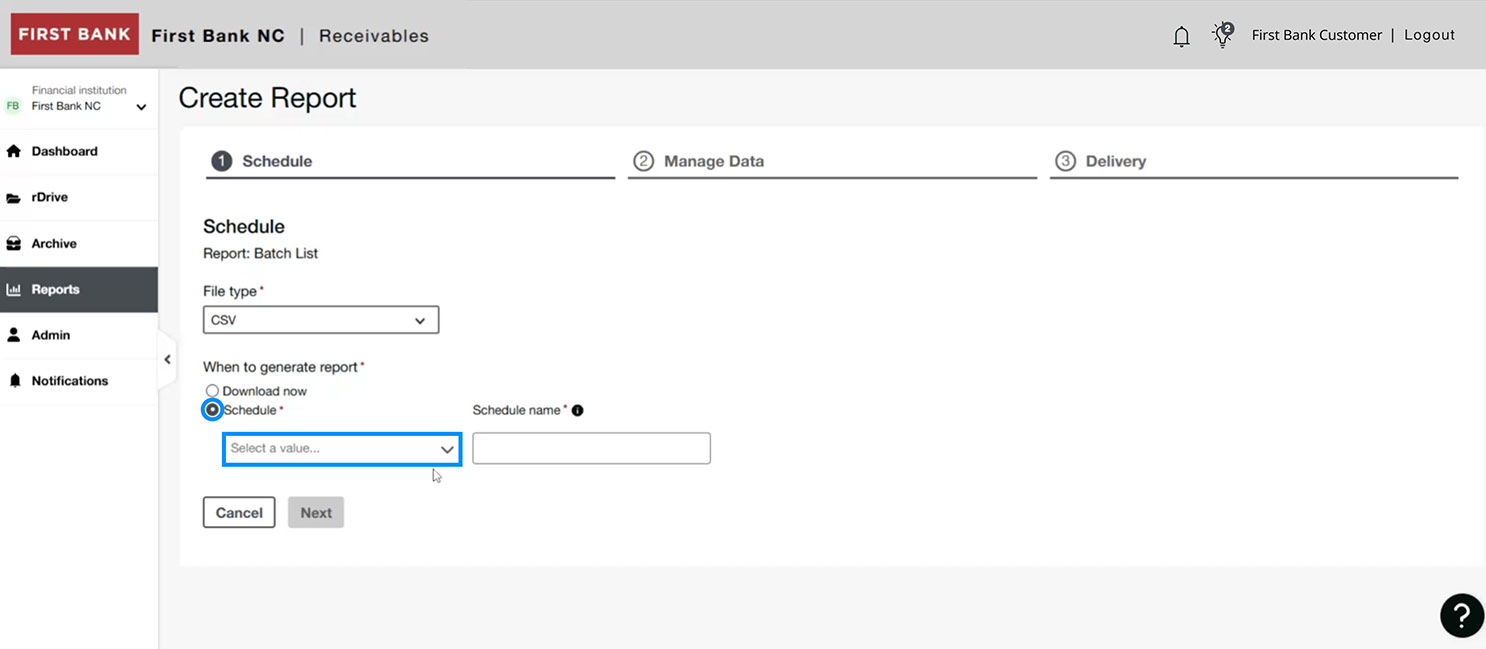
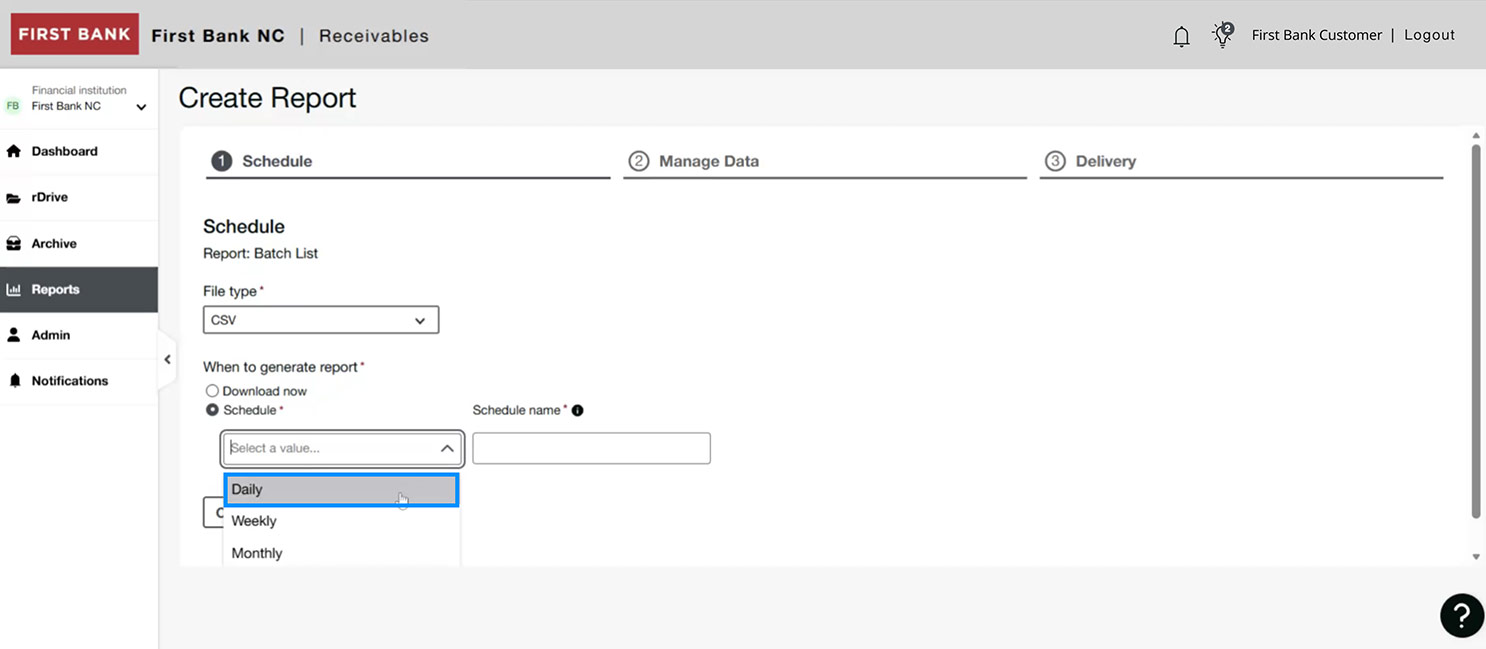
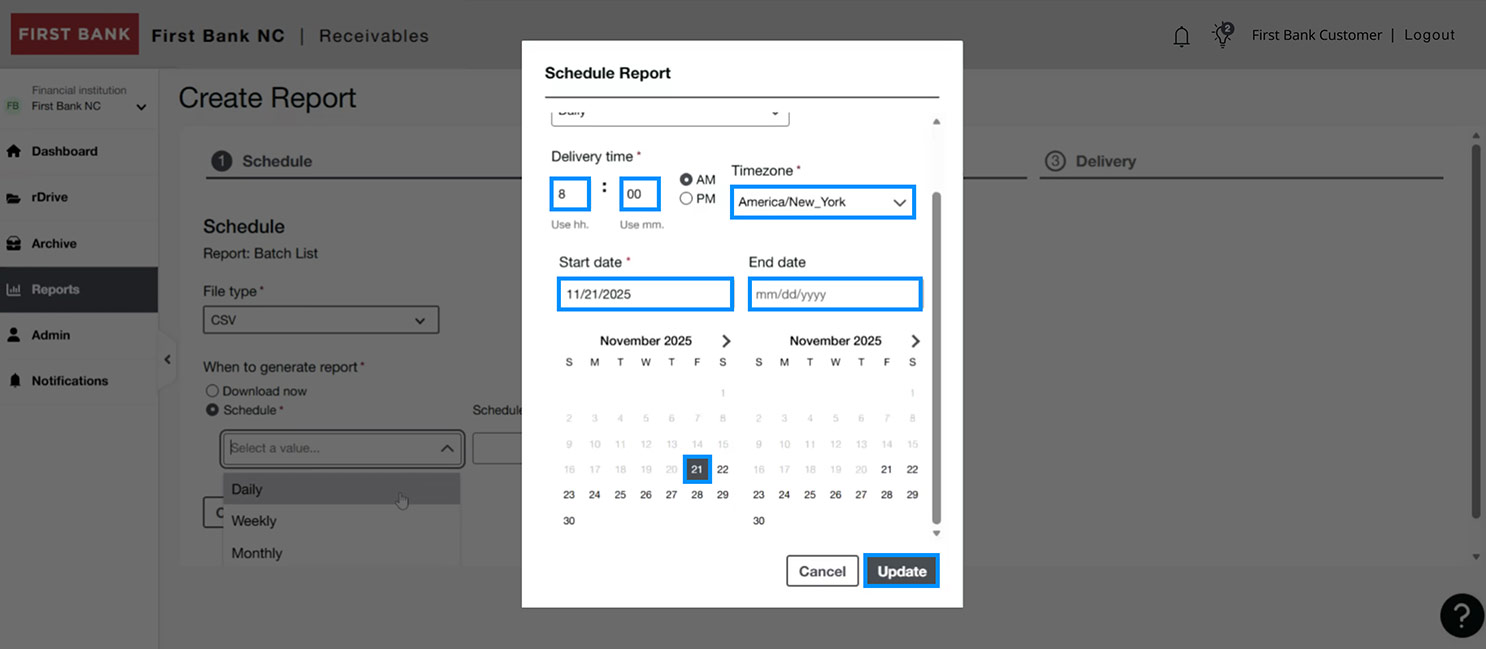
If you want to schedule it, in the Select a value box, choose a daily, weekly, or monthly cadence, then enter the delivery time and date details and click “Update.”
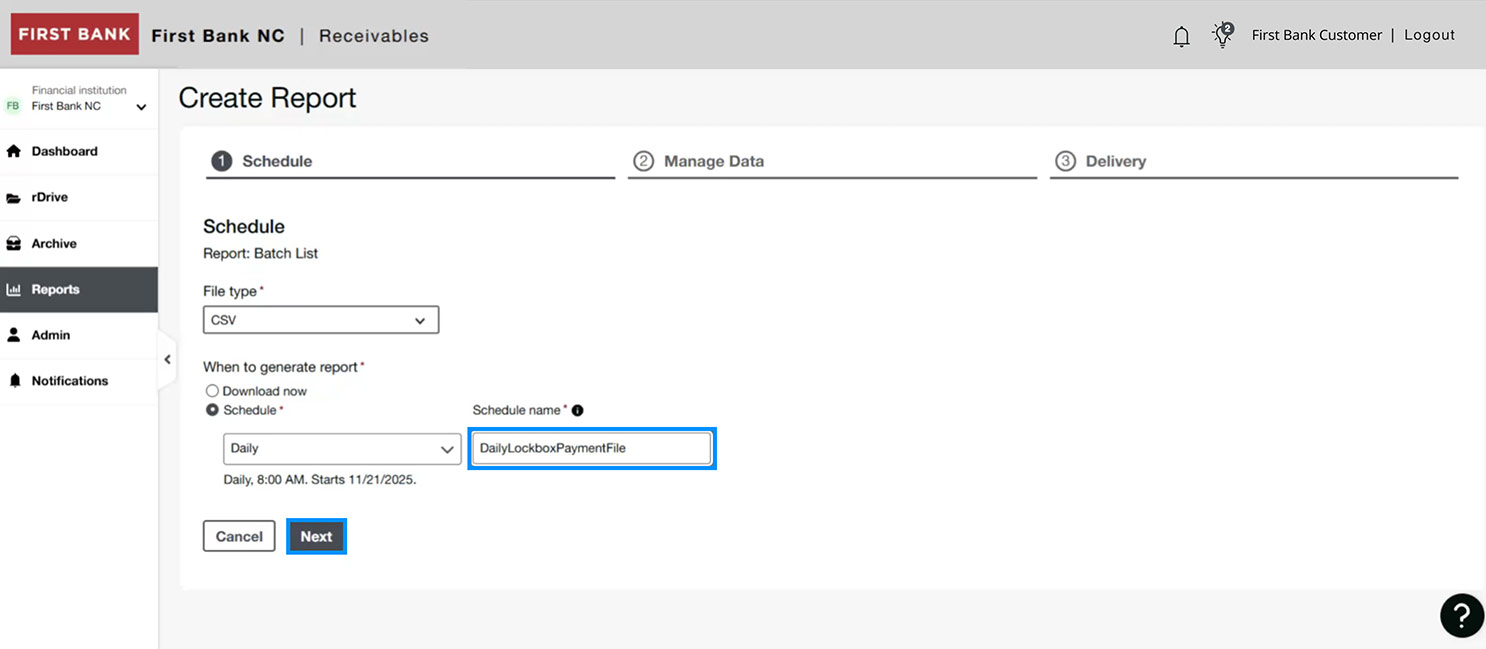
Under Schedule name, provide a name for the report, then click “Next.”
Step 5:
Review insights.
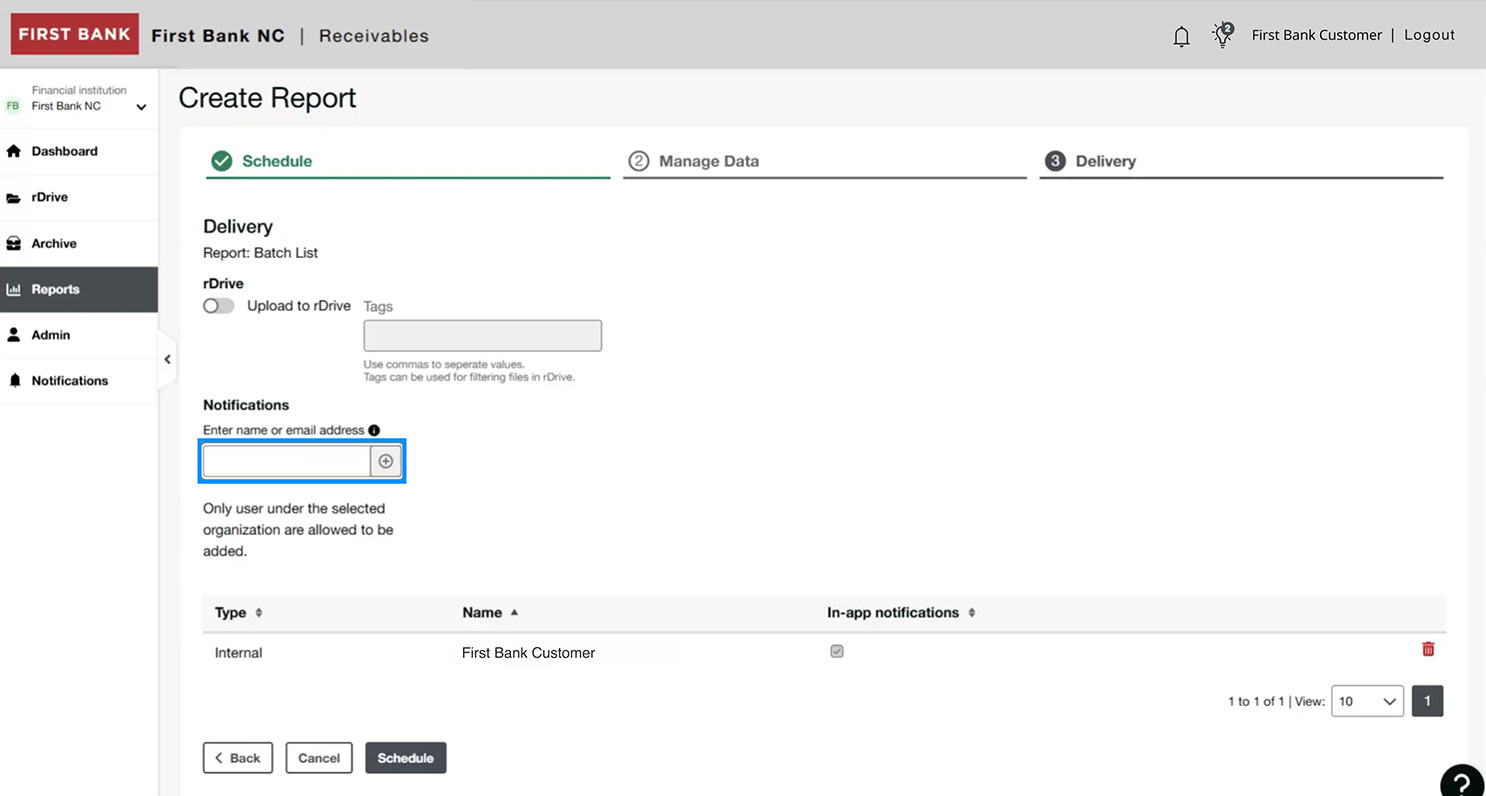
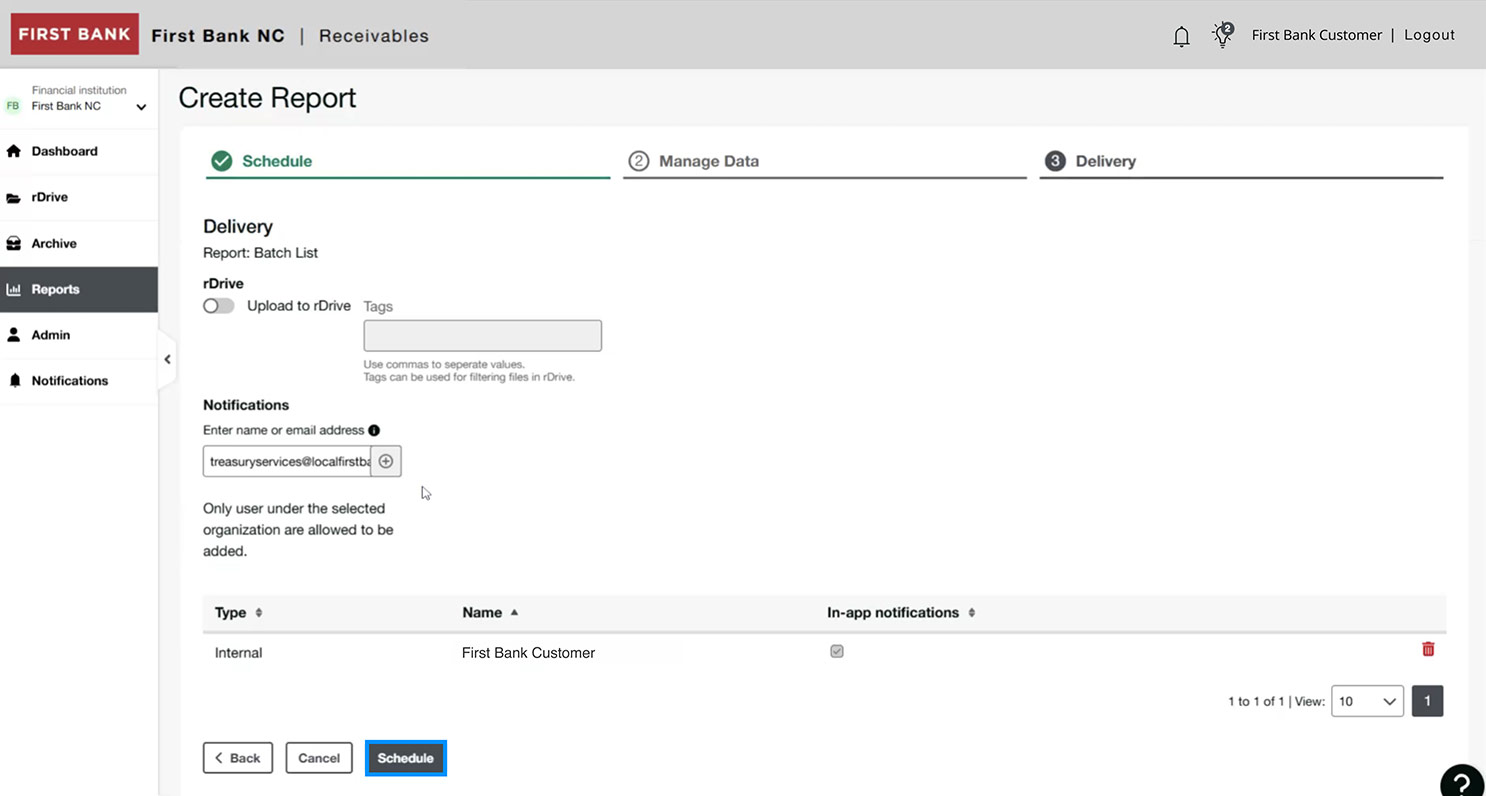
Under Notifications, enter the name or email address you want notifications sent to. Use the plus symbol next to the box to add additional people. Then click “Schedule.”
Step 6:
View scheduled reports.
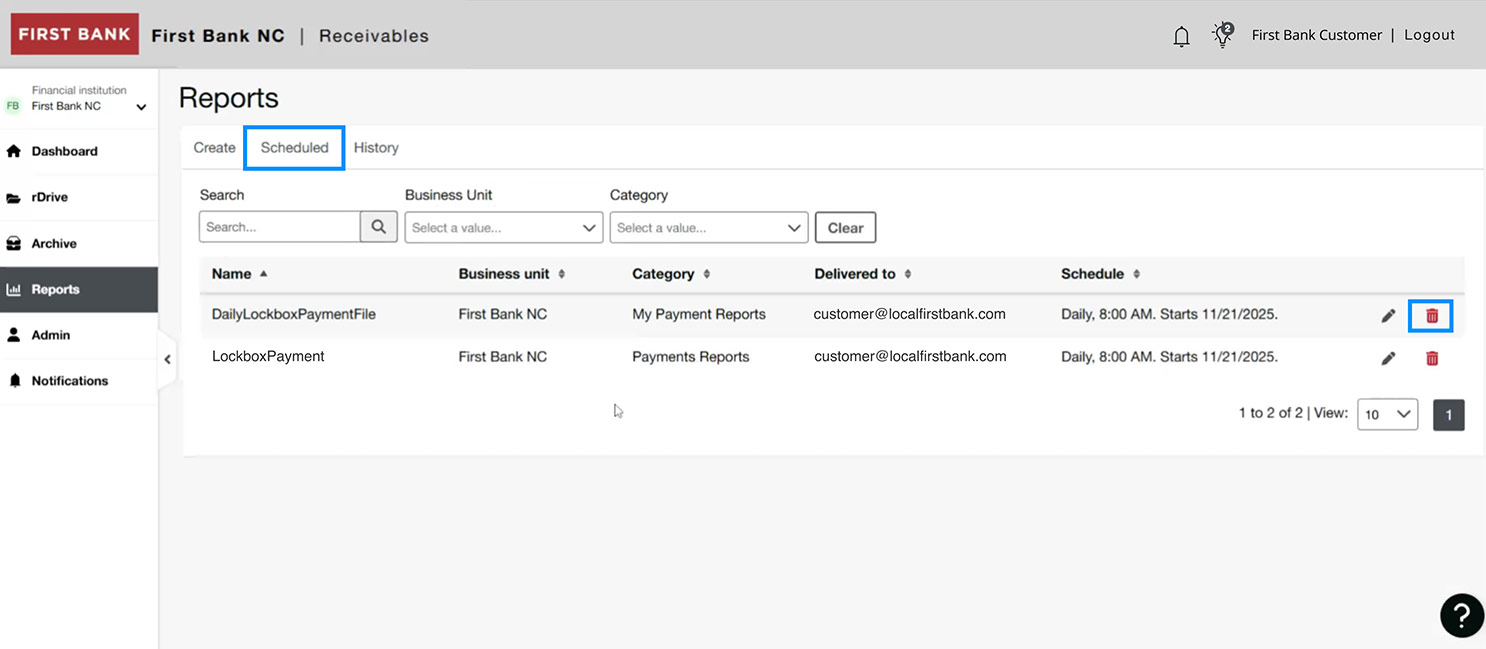
Click the “Scheduled” tab at the top of the page to see all the reports that have been scheduled.
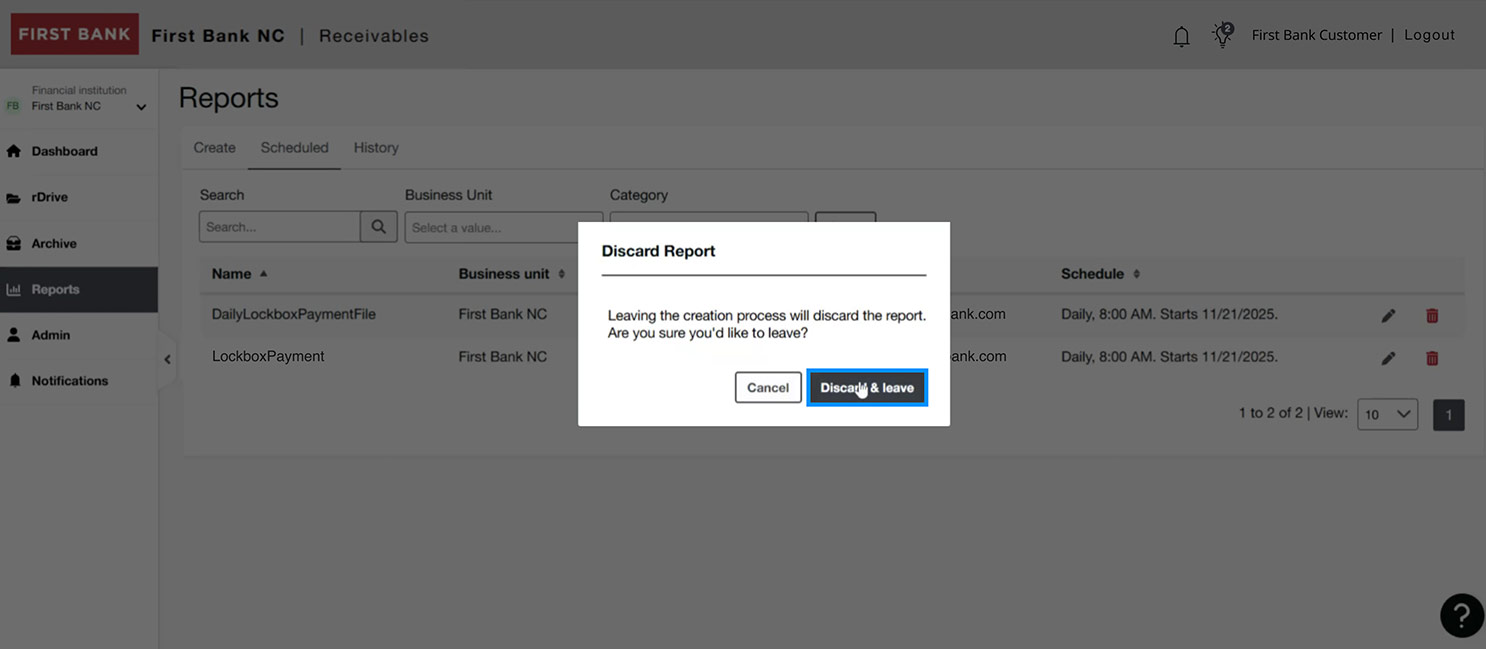
To delete a scheduled report, click the red trashcan icon. A confirmation screen will pop up, click “Discard & leave” to complete the deletion.
Step 7:
Review history.
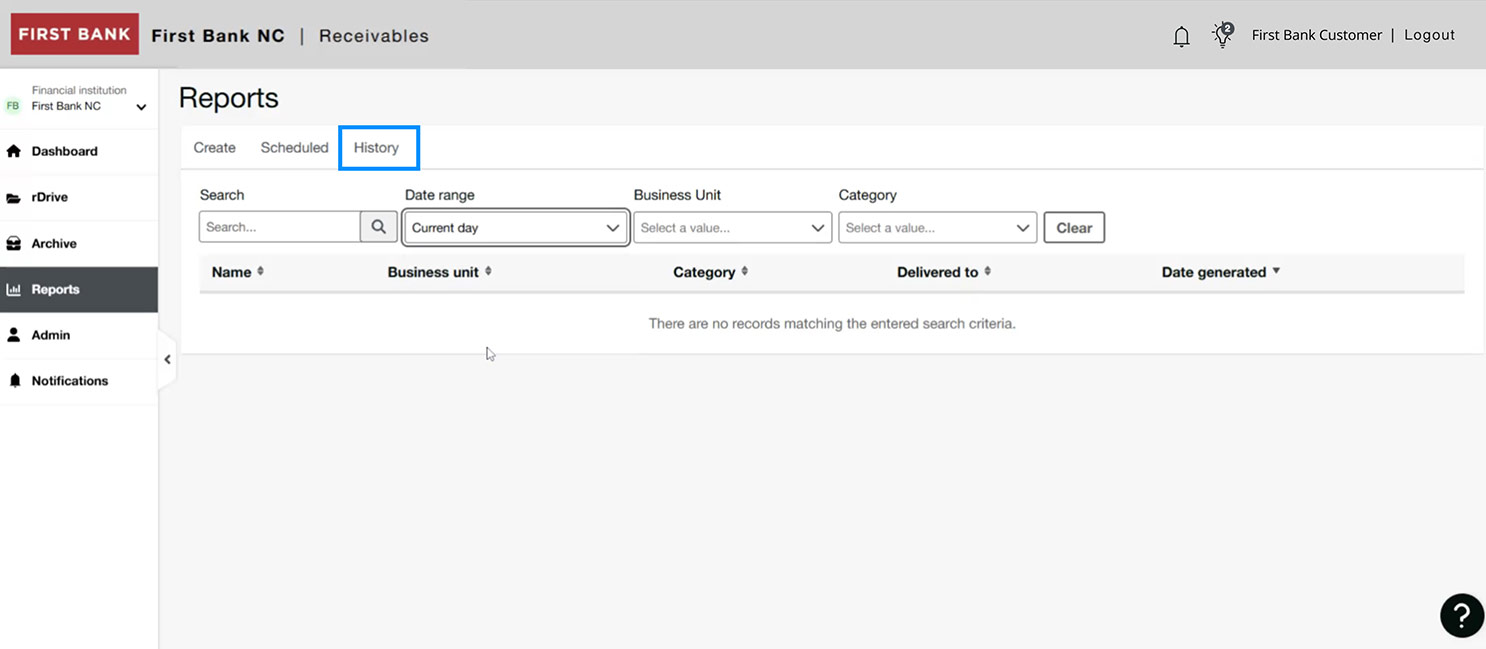
Click the “History” tab at the top of the page to see all previous reports.
Have questions or unsure where to start?
Contact your Treasury Services rep, or one of our support teams below, for help or to schedule personalized demos.