Using Lockbox
Learn how to navigate Lockbox and its capabilities.
Step 1:
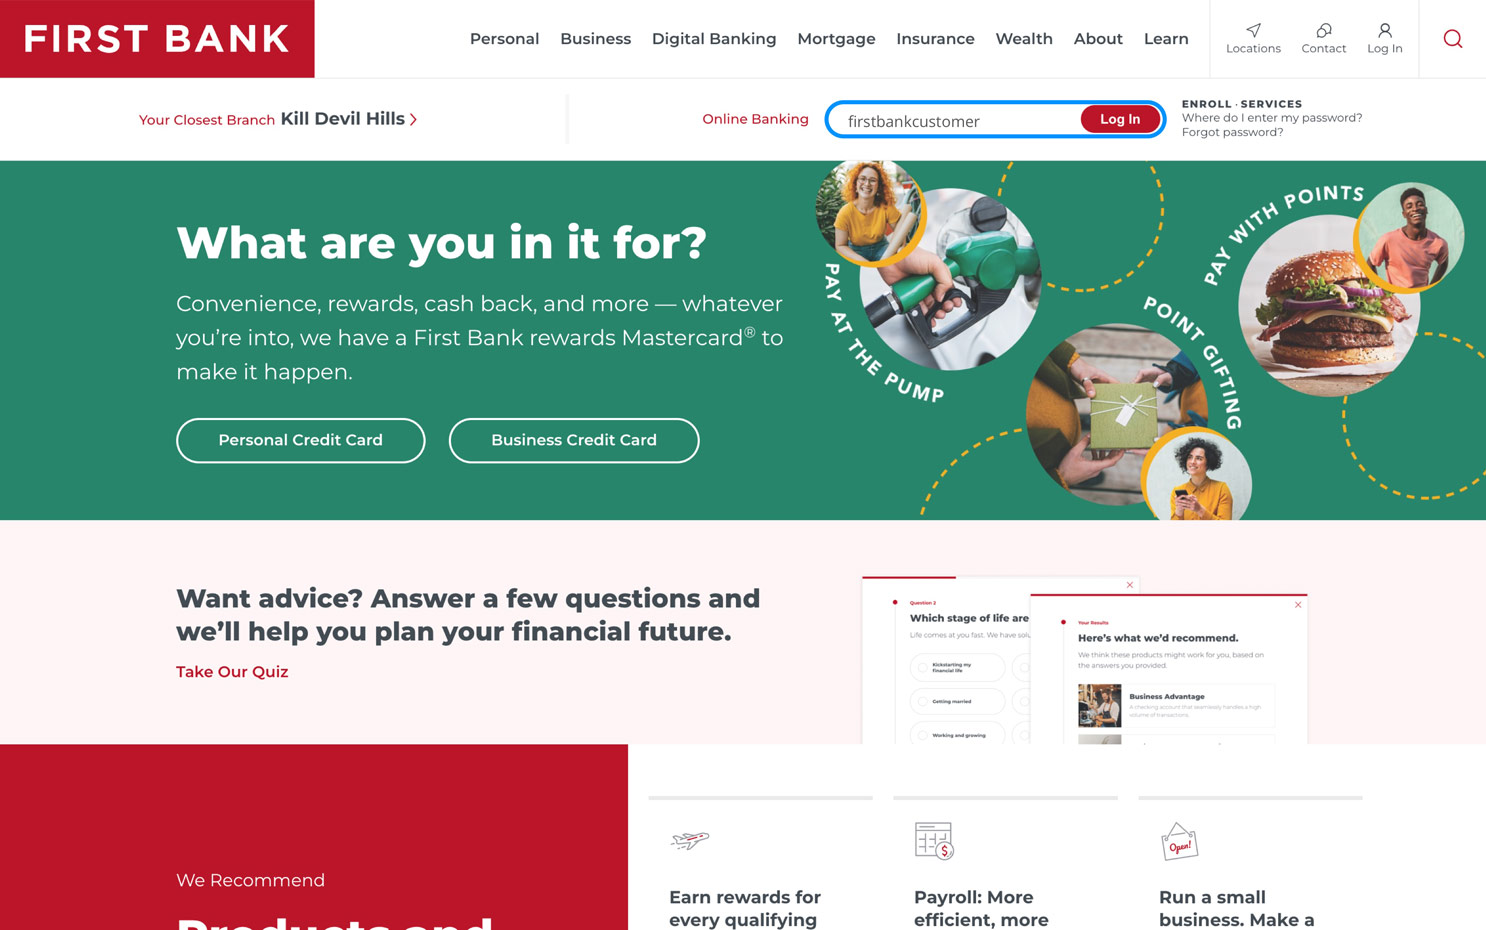
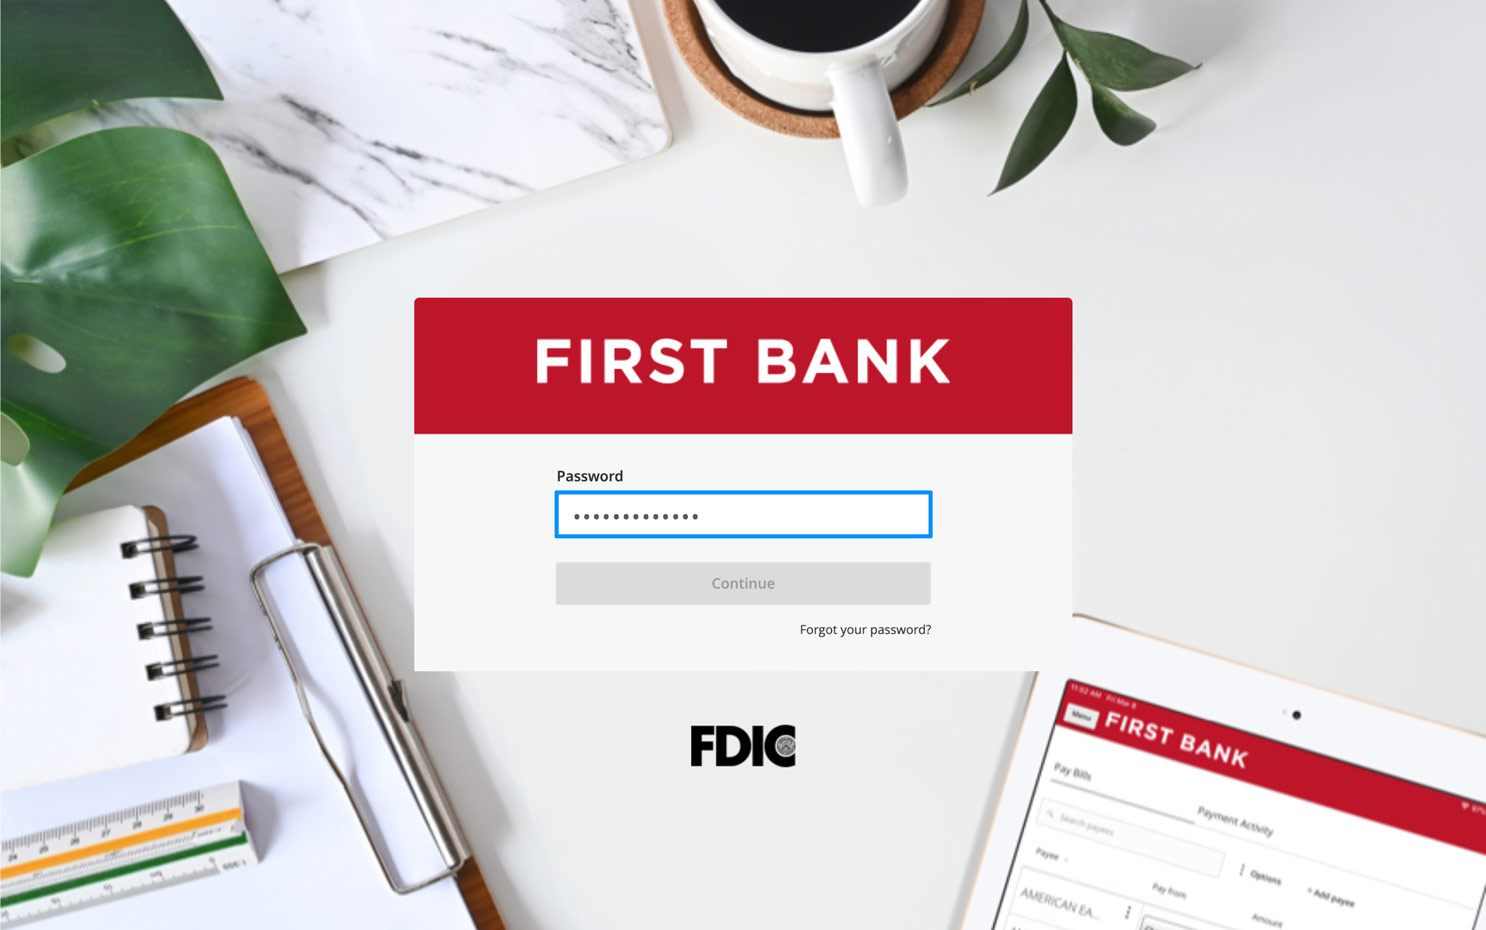
Log in to online banking.
When you enrolled in First Bank digital banking, you created a Login ID and Password. Enter your ID in the corresponding screen and then click the “Log In” button. Enter your password and click “Continue.”
Step 2:
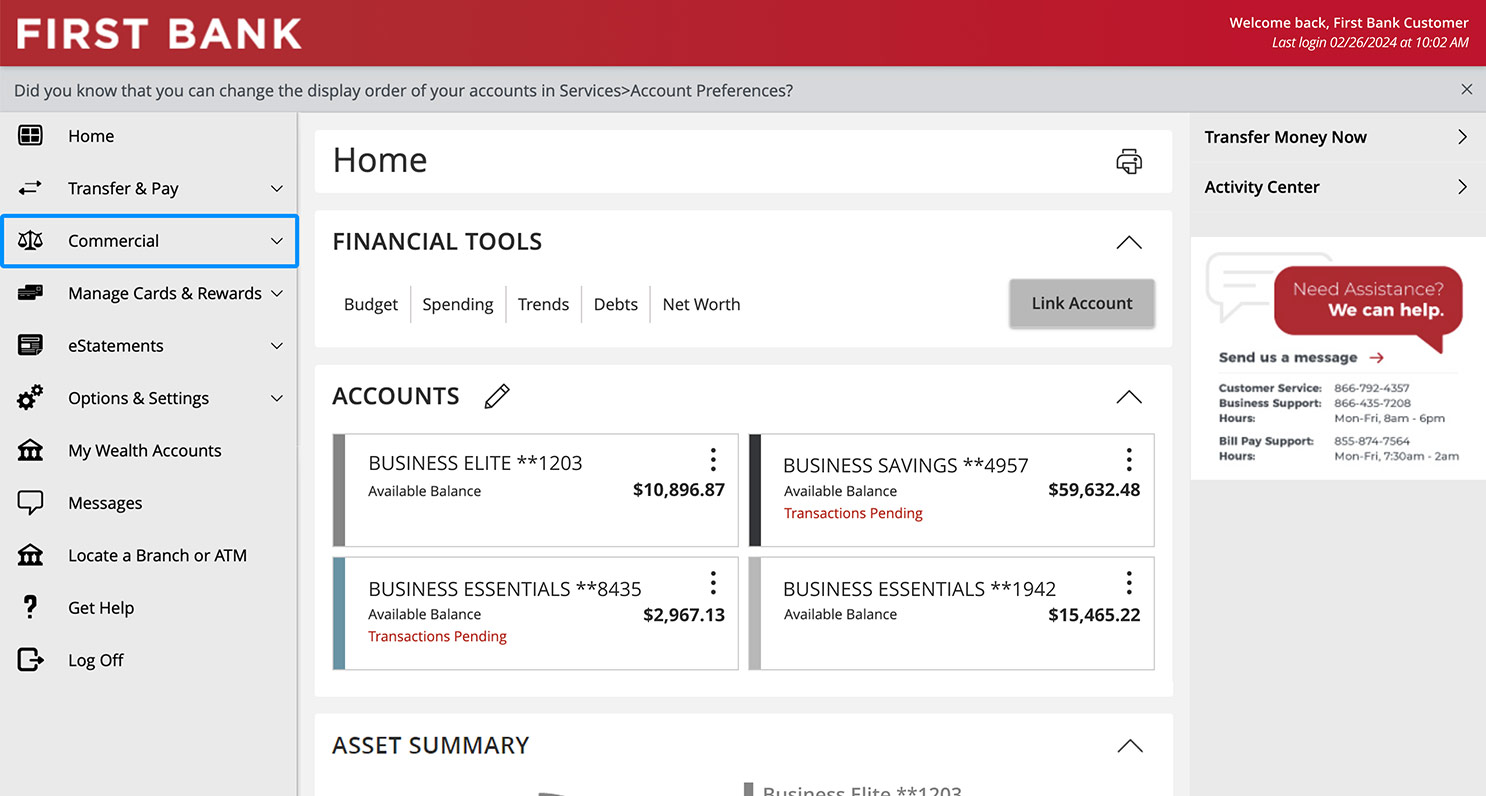
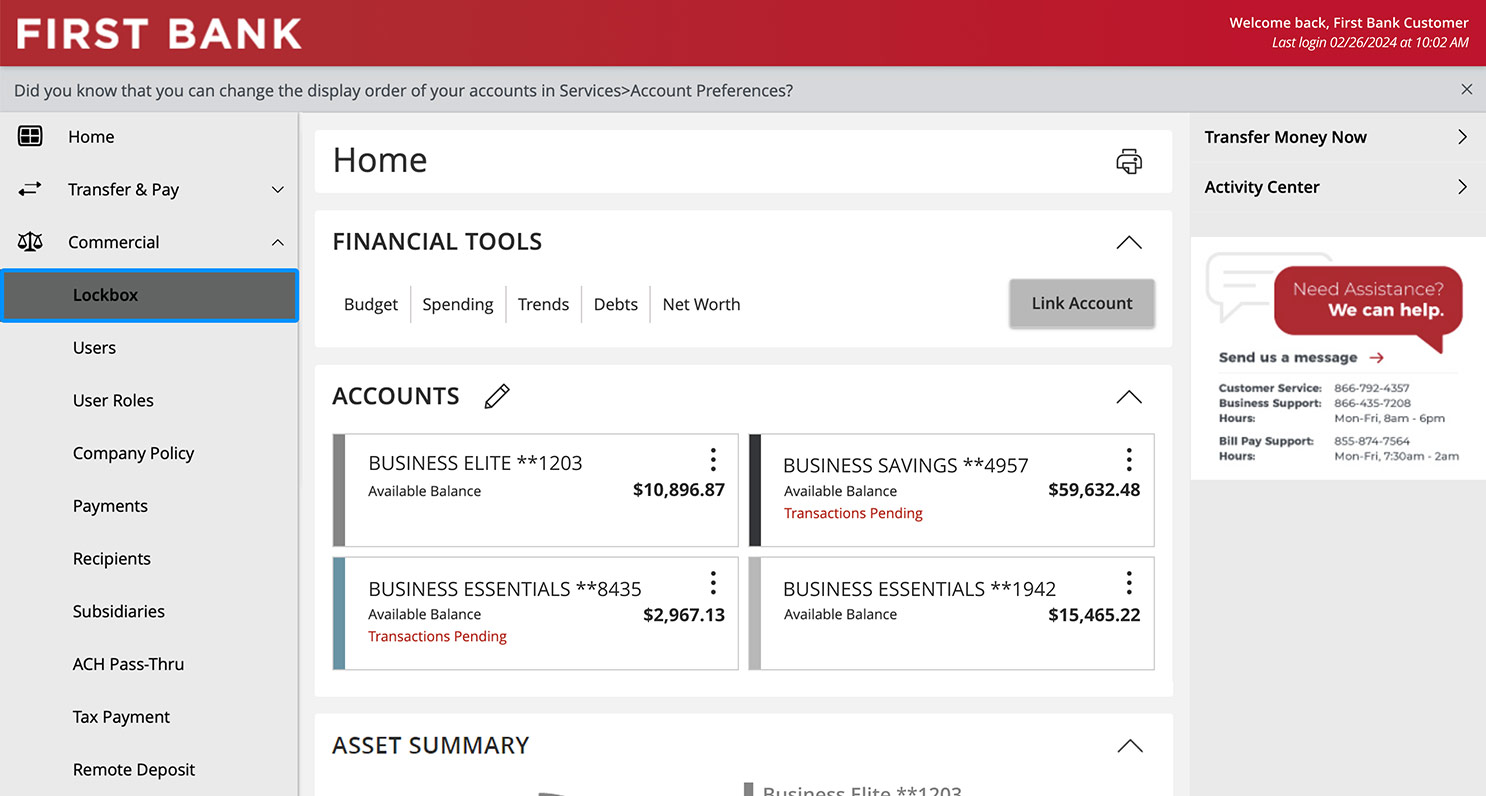
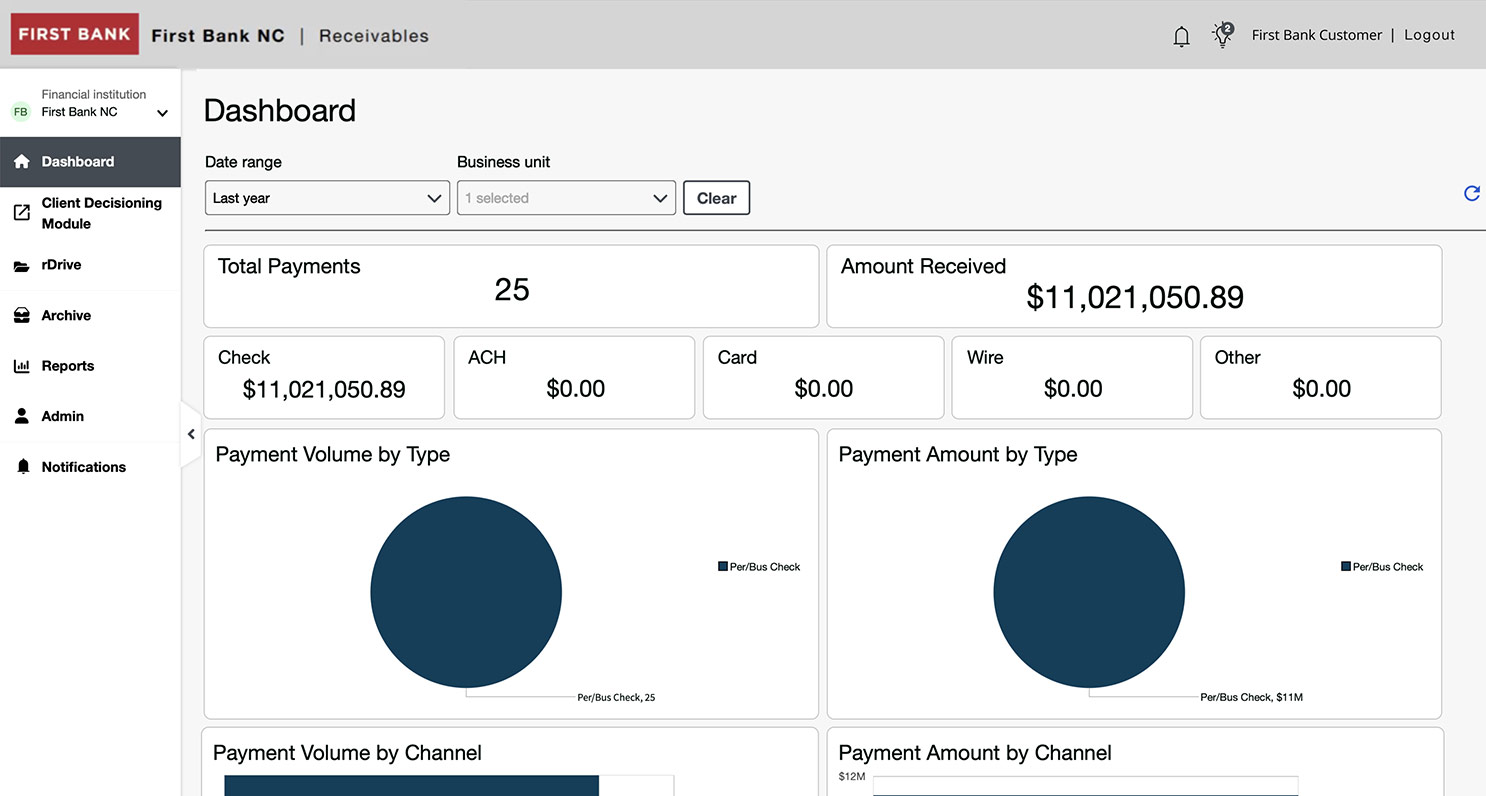
Access dashboard.
From the menu on the left, click “Commercial” and choose “Lockbox” from the dropdown. Then select “Dashboard” from the menu on the left.
Step 3:
Adjust dates.
From the dashboard you will see all the payments that have been processed on the current day.
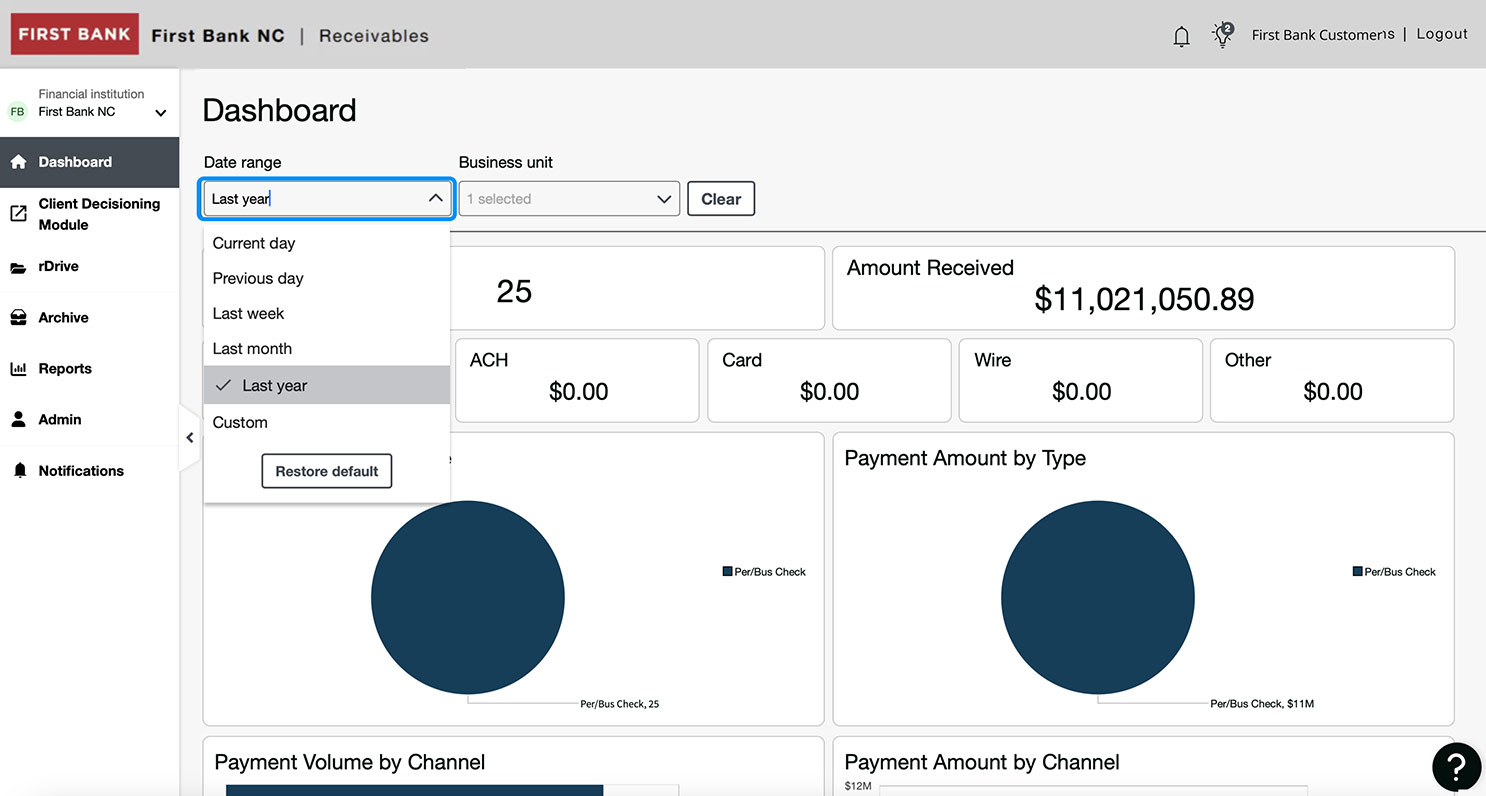
To change the date range on your dashboard, click on the box under Date Range and select from the dropdown menu. You can also customize the dates by clicking on “Custom” and choosing start and end dates from the calendar. Once you’ve selected your desired date range, click “Apply.”
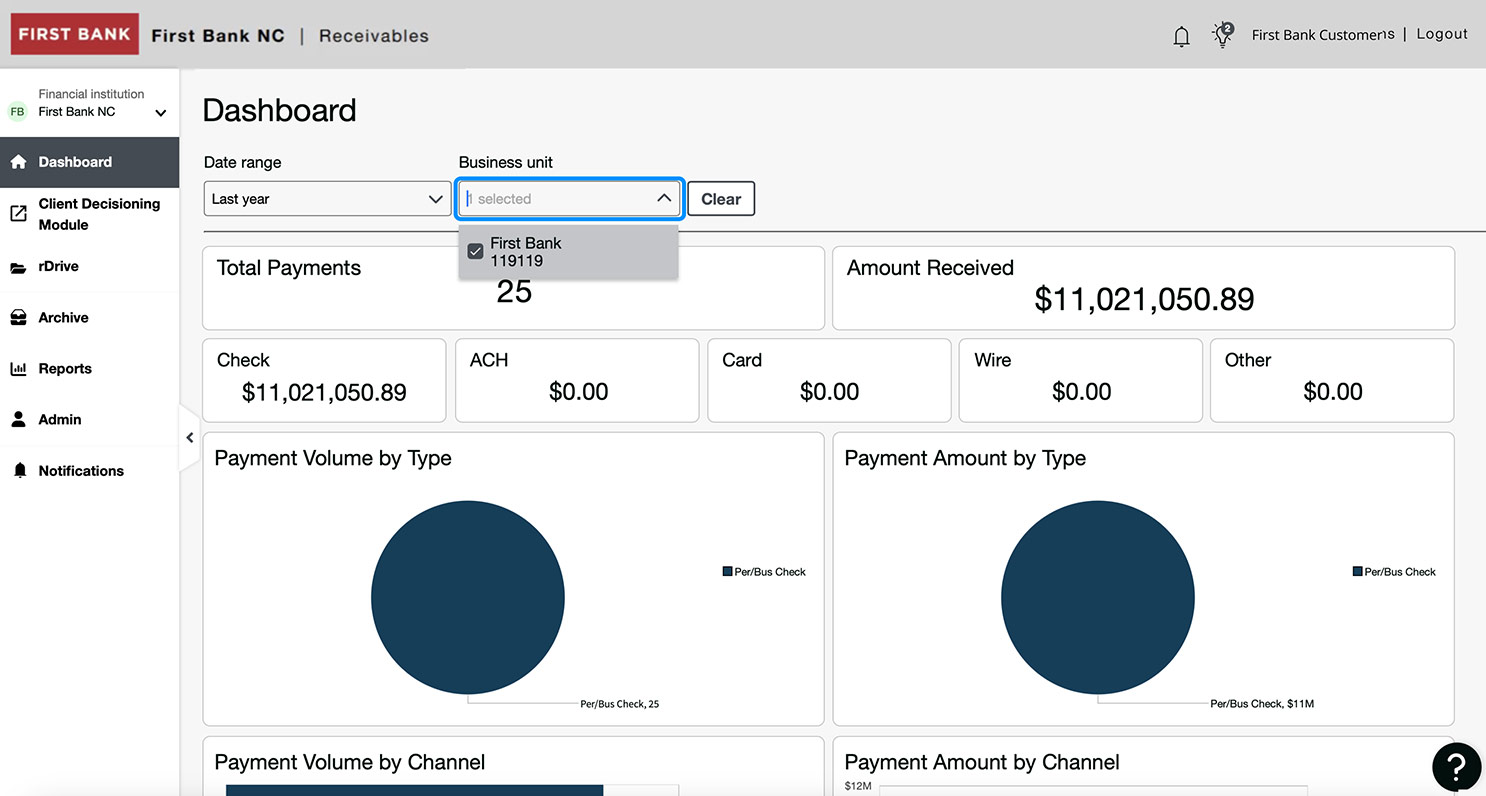
Next, in the dropdown under “Business unit,” make your selection.
Step 4:
Check notifications.
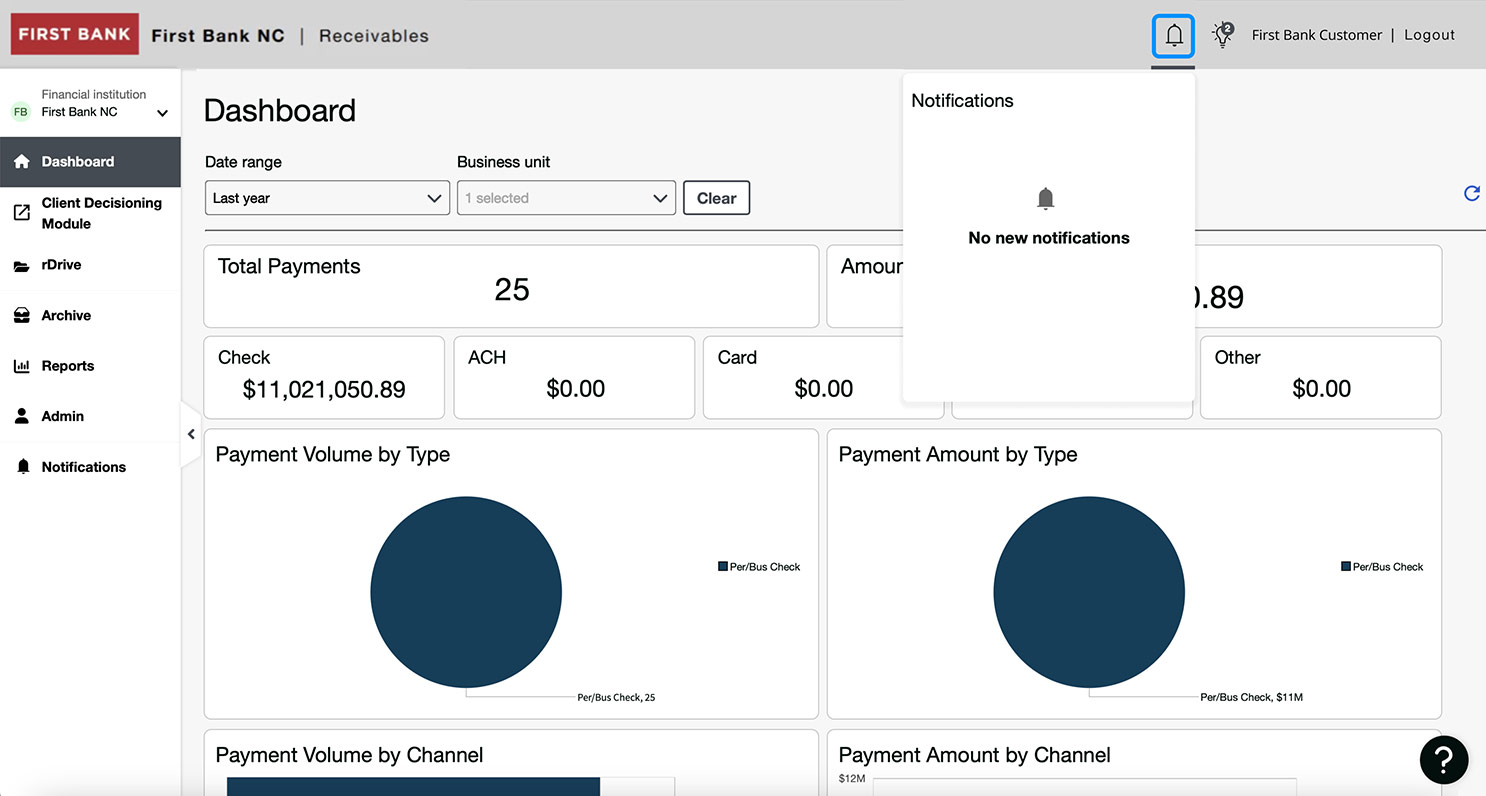
Once you set a new date range and choose the business unit, a new report will be generated. When that report is delivered into the system, the bell icon in the top bar will display the number of reports that are ready. Click on the bell to see notifications.
Step 5:
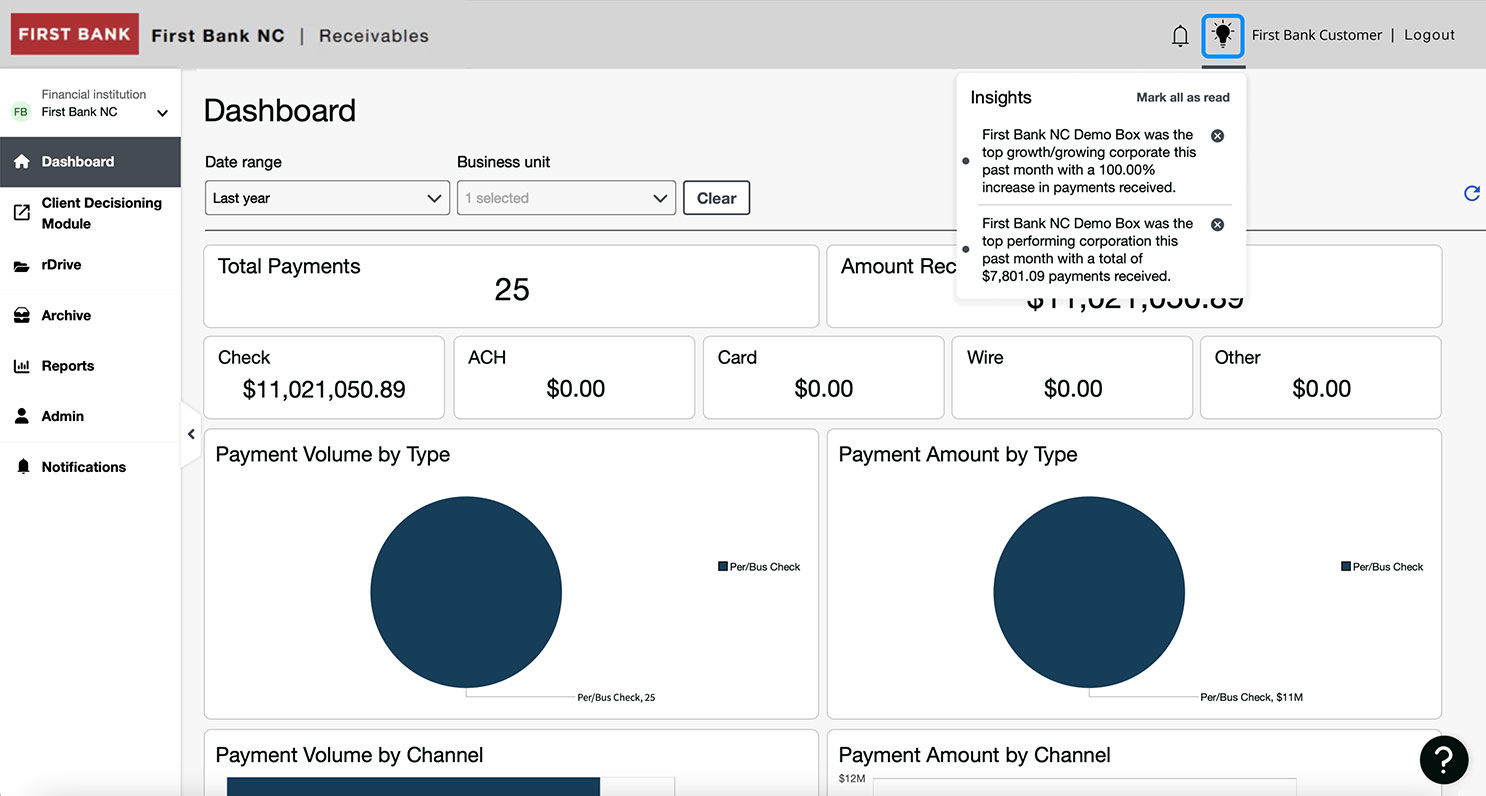
Review insights.
When a number appears over the lightbulb icon at the top of your screen, new insights are ready for you to review. Click on the icon and the latest insights will be displayed first.
Step 6:
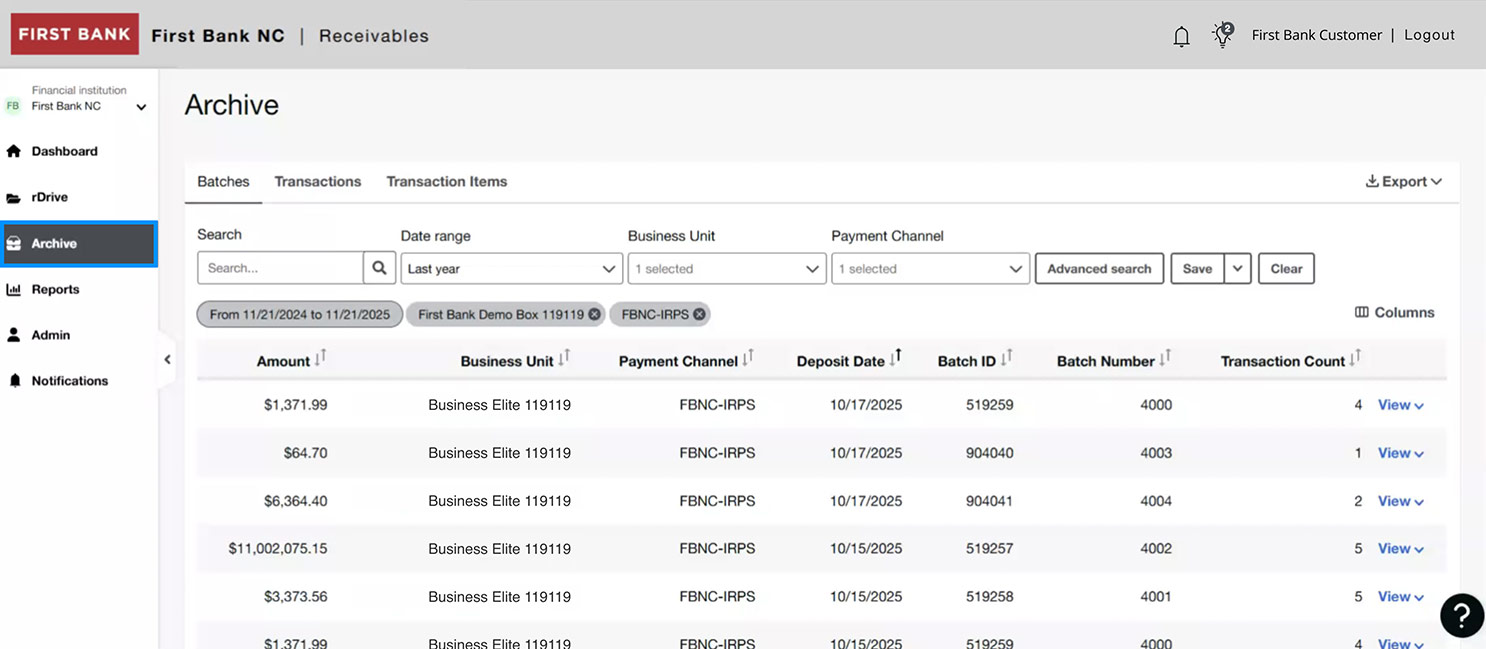
Access archive.
From the menu on the left, click on “Archive” to see previous reports. From here, you can search by tabs for Batches, Transactions, or Transaction Items. You can further customize your search by numerical data, date range, Business Unit, and Payment Channel.
Click “View” to see the row of results.
Step 7:
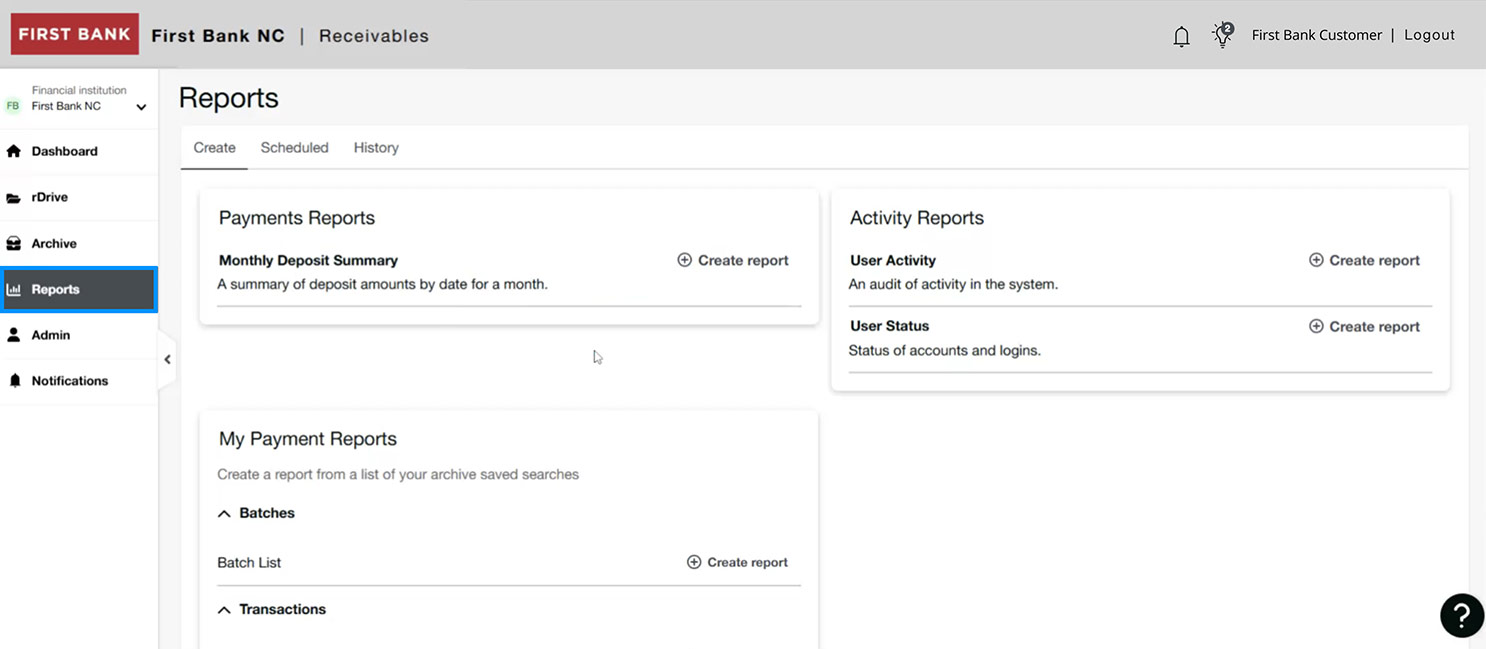
See reports overview.
From the menu on the left, click on “Reports” to see all the report types available to you.
For more detailed instructions on using these features, check out the Archive Demo and Reports Demo.
Have questions or unsure where to start?
Contact your Treasury Services rep, or one of our support teams below, for help or to schedule personalized demos.