_FB_2018-Icons-finalized-cleaned-up_new_FB_2018-Icons-finalized-cleaned-up_newGroup 9
Back
Scroll to top

Adding & Managing ACH/Wire Recipient Demo

We’re here to support your business’s growth every step of the way. Learn how to add recipients to receive wires or ACH payments from your First Bank account.
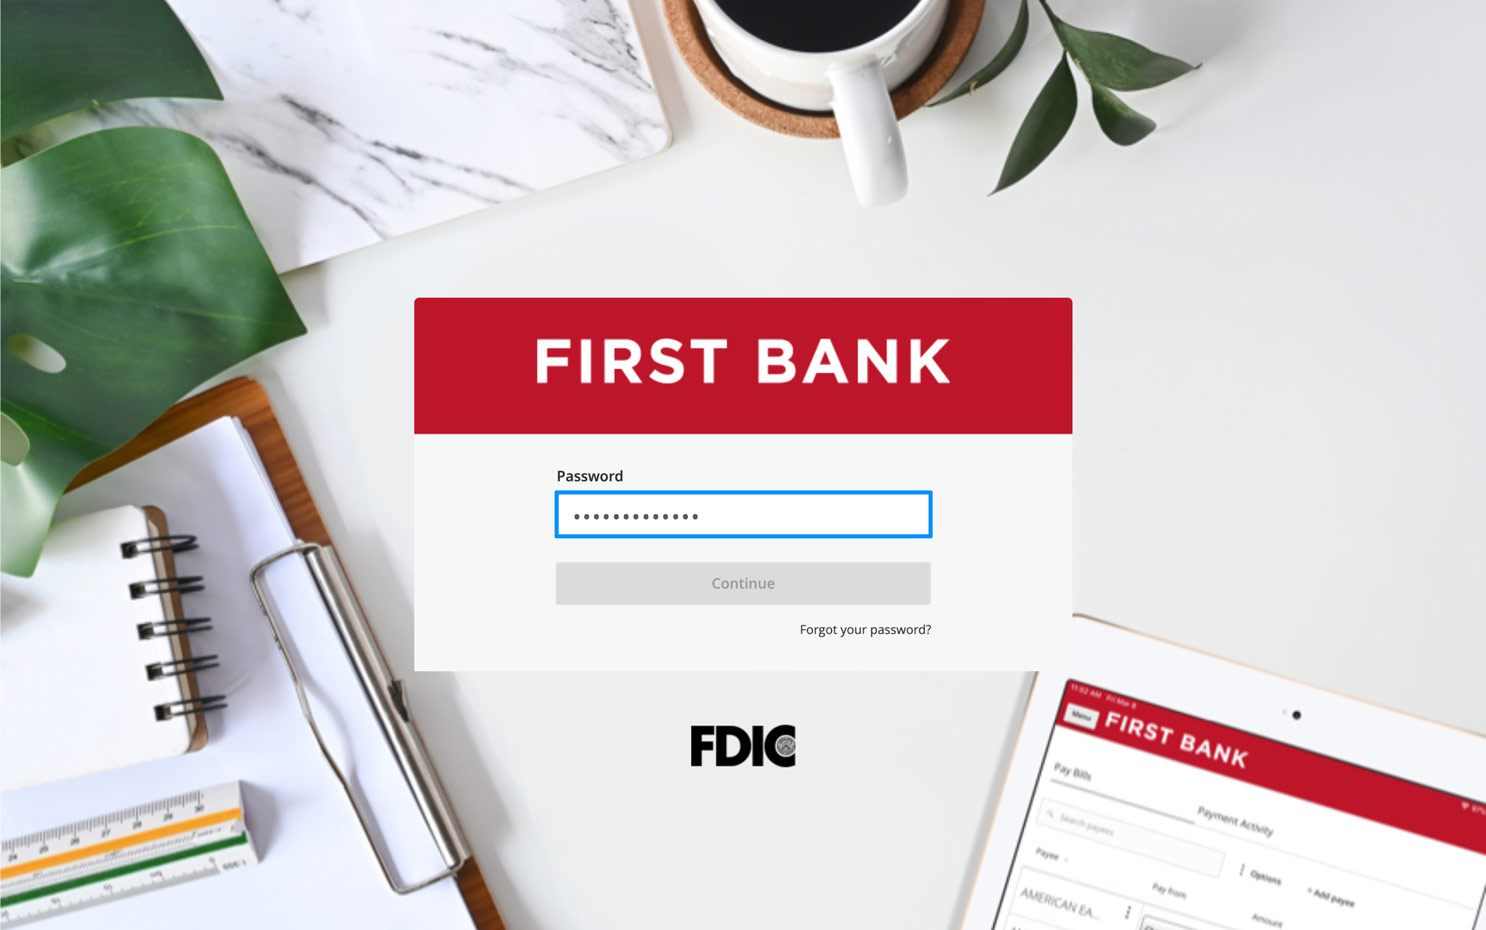
Step 1:
Log in to online banking.

When you enrolled in First Bank digital banking, you created a Login ID and Password. Enter that information in the corresponding screens and then click the “Log In” button. Next, you will be asked to enter your password, then click “Continue.”
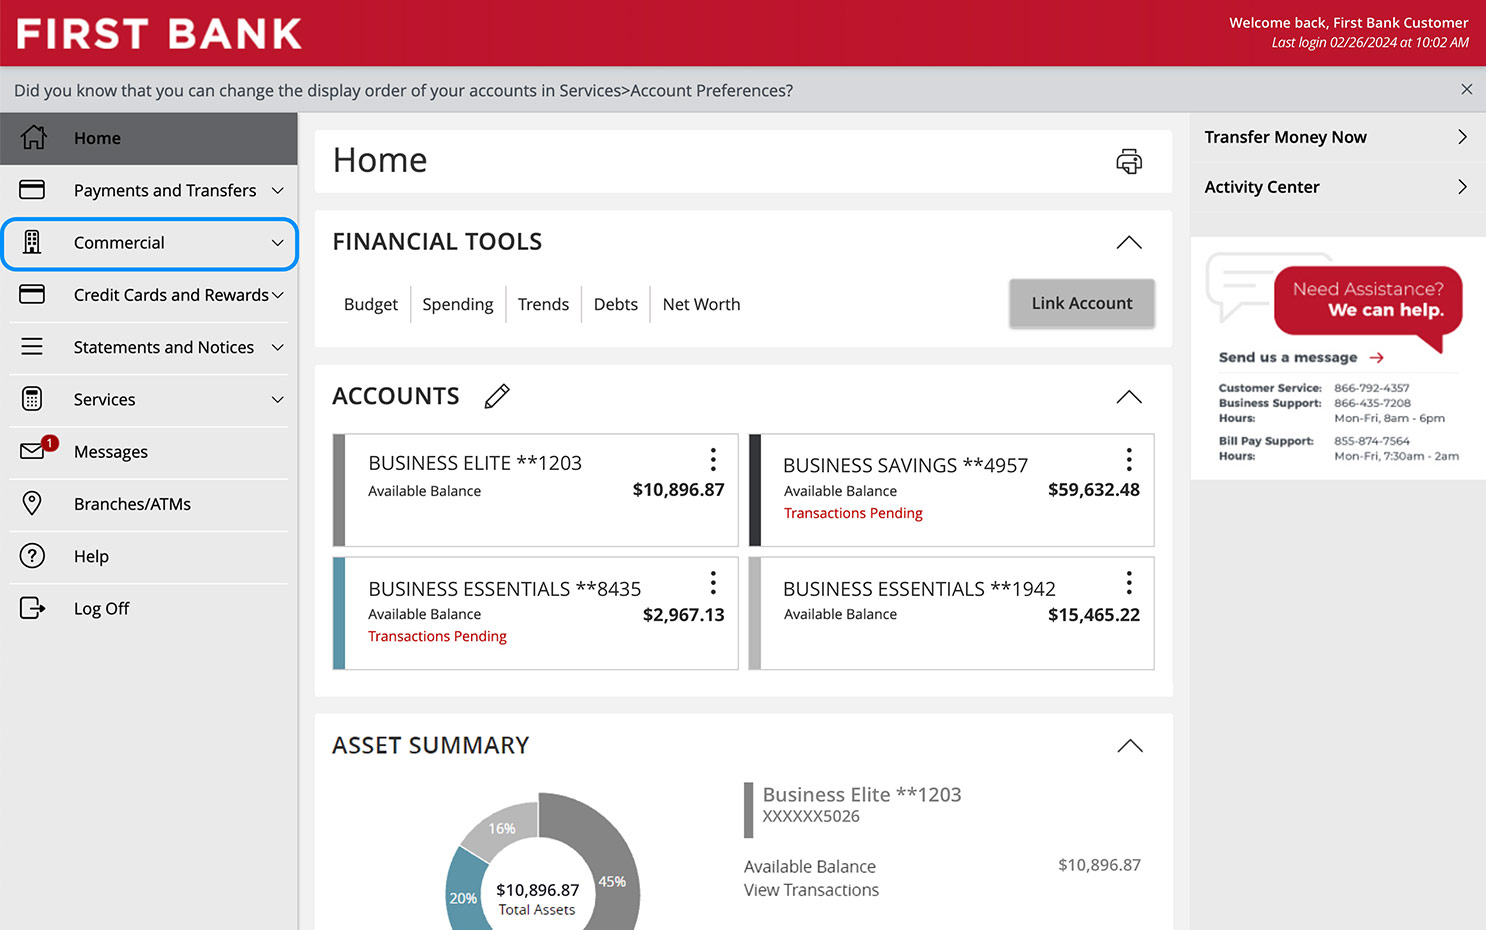
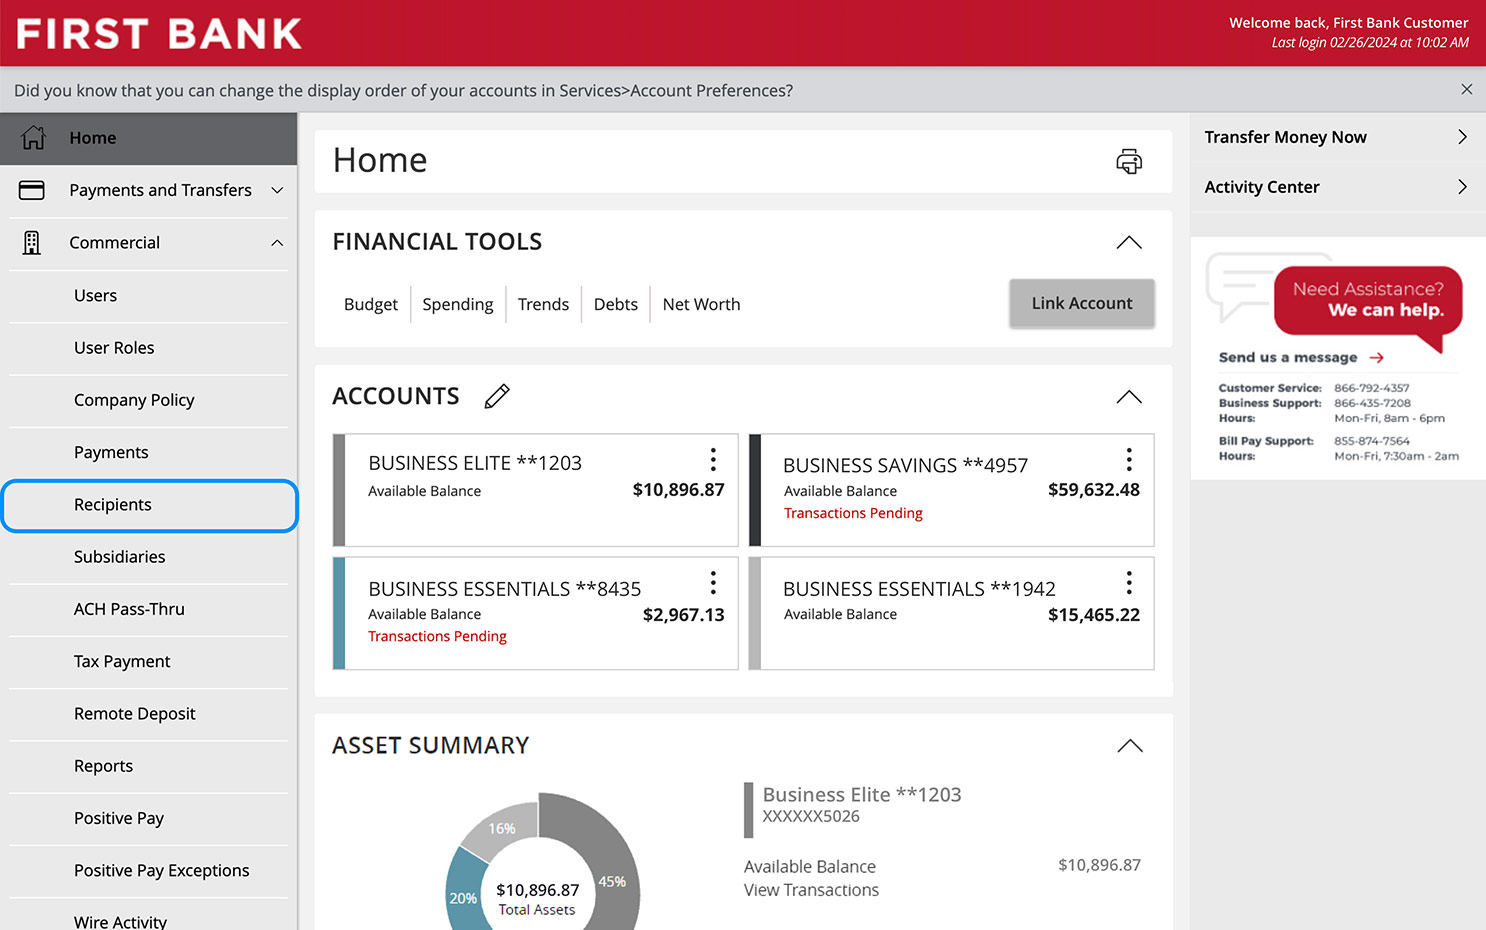
First Bank homepage with login area highlighted. First Bank Online Banking password screen.

Step 2:
Navigate to Recipients.

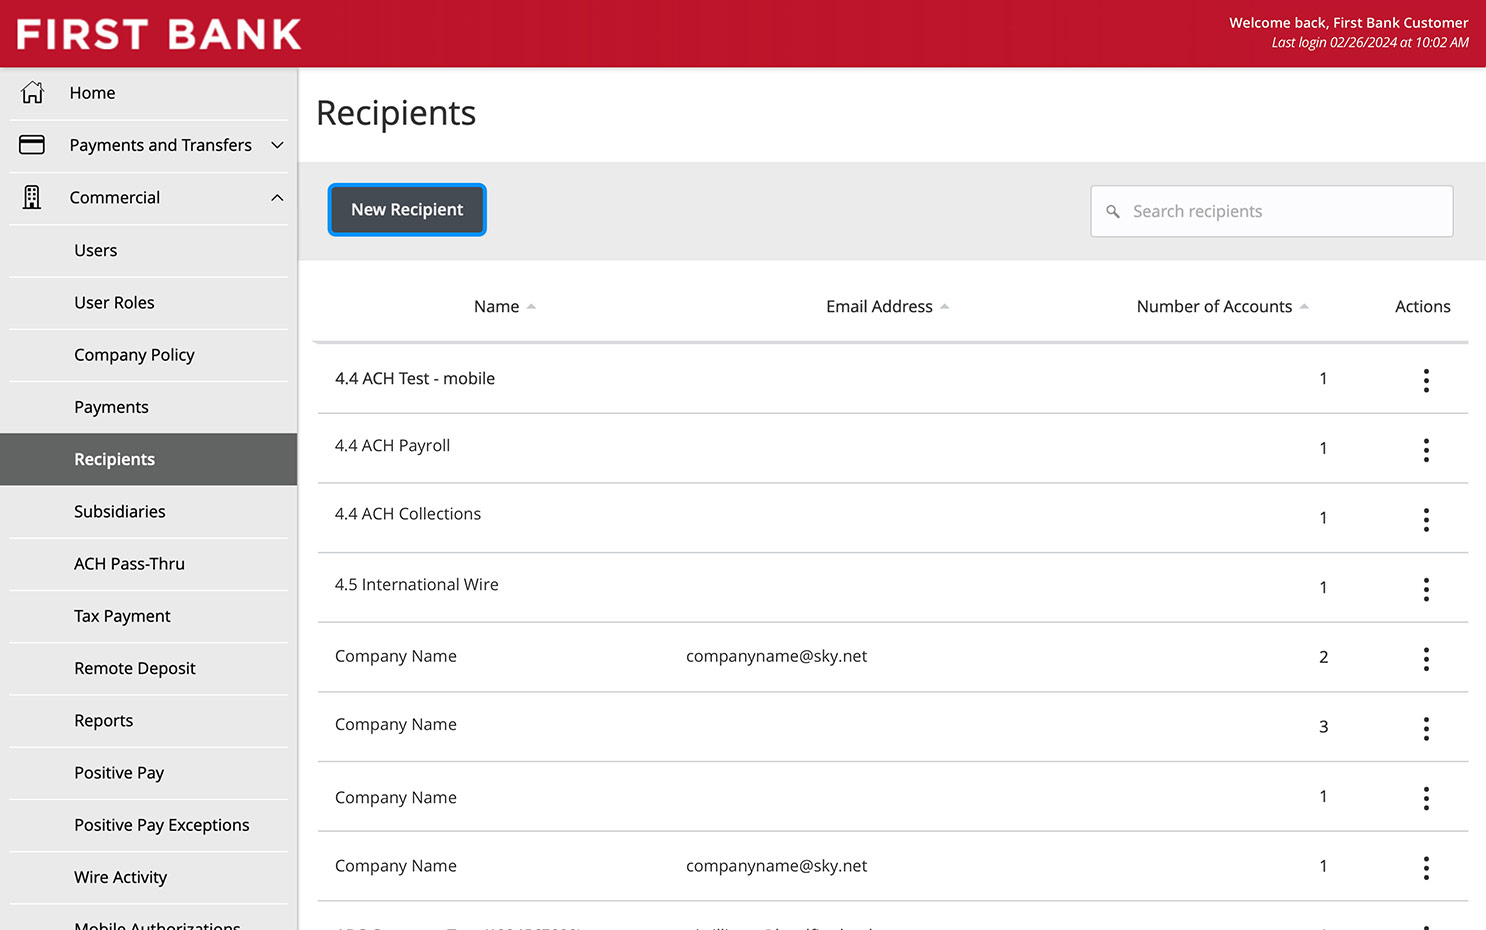
From the menu on the left, click “Commercial” to see the dropdown and choose “Recipients.” Click the “New Recipient” button.
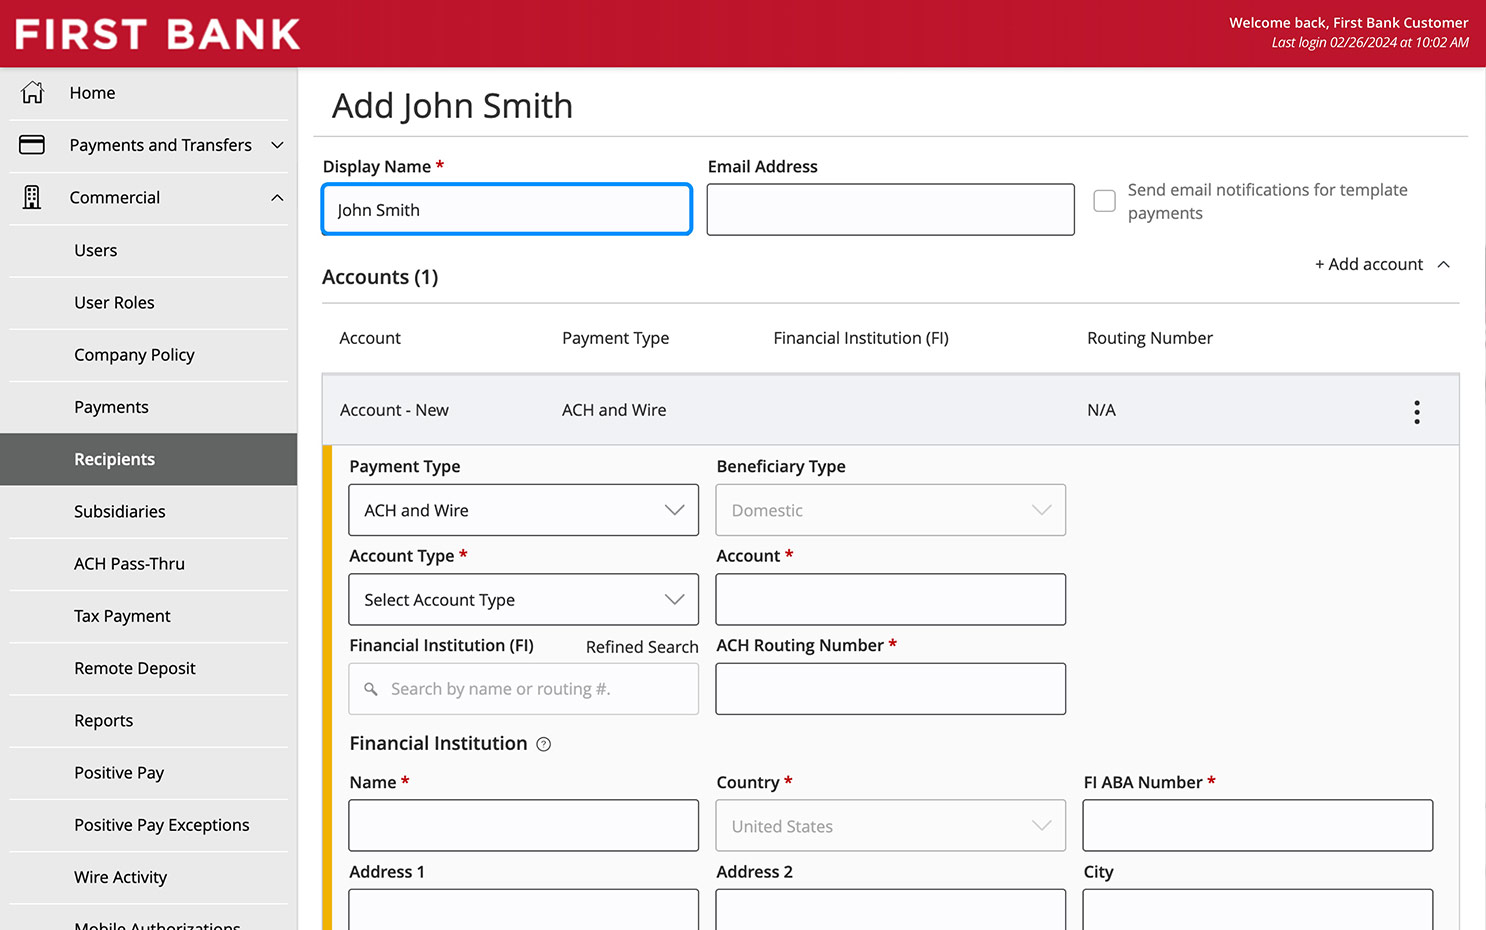
Mobile Banking Screen showing location of Commercial option in menu. Online Banking Screen showing location of Recipients option in menu. Online Banking Screen showing Recipients list.

Step 3:
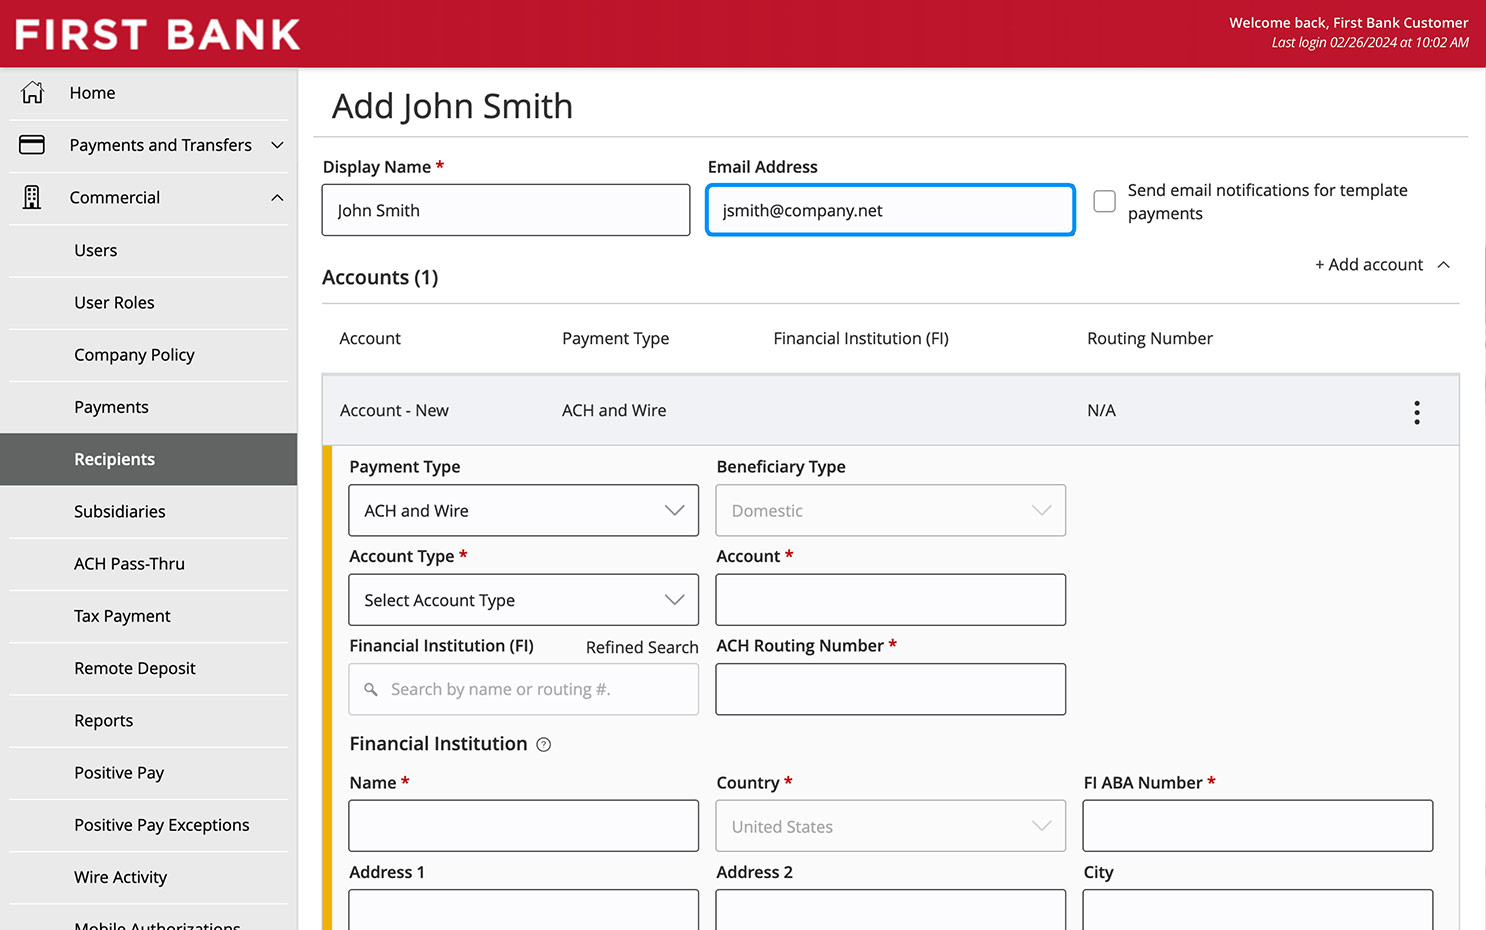
Enter new recipient.

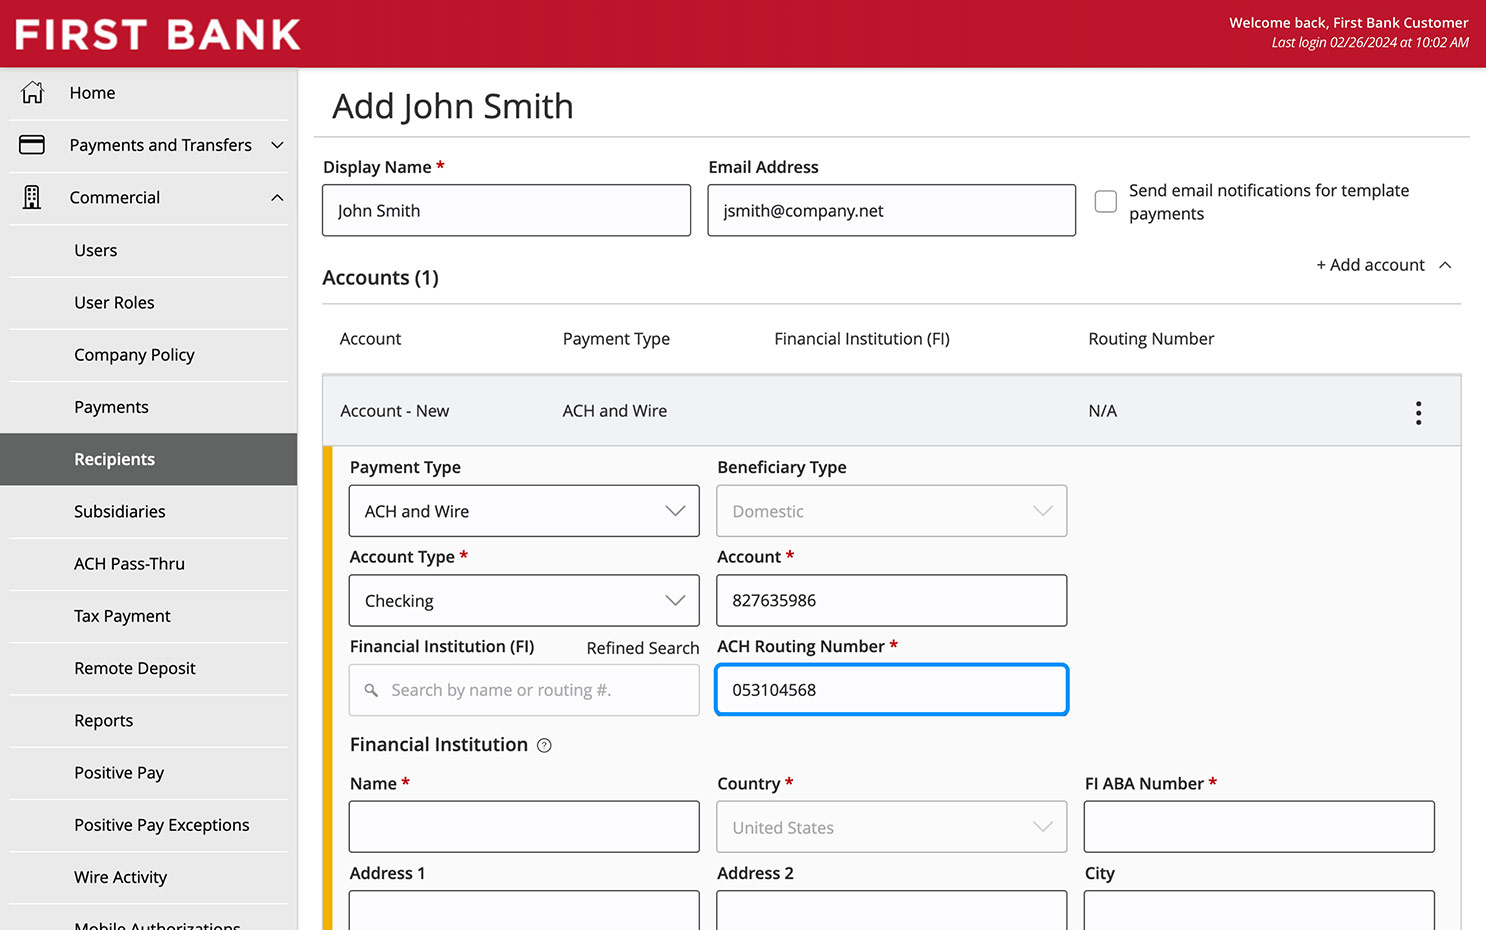
Enter the name you want displayed for that recipient and their email address.
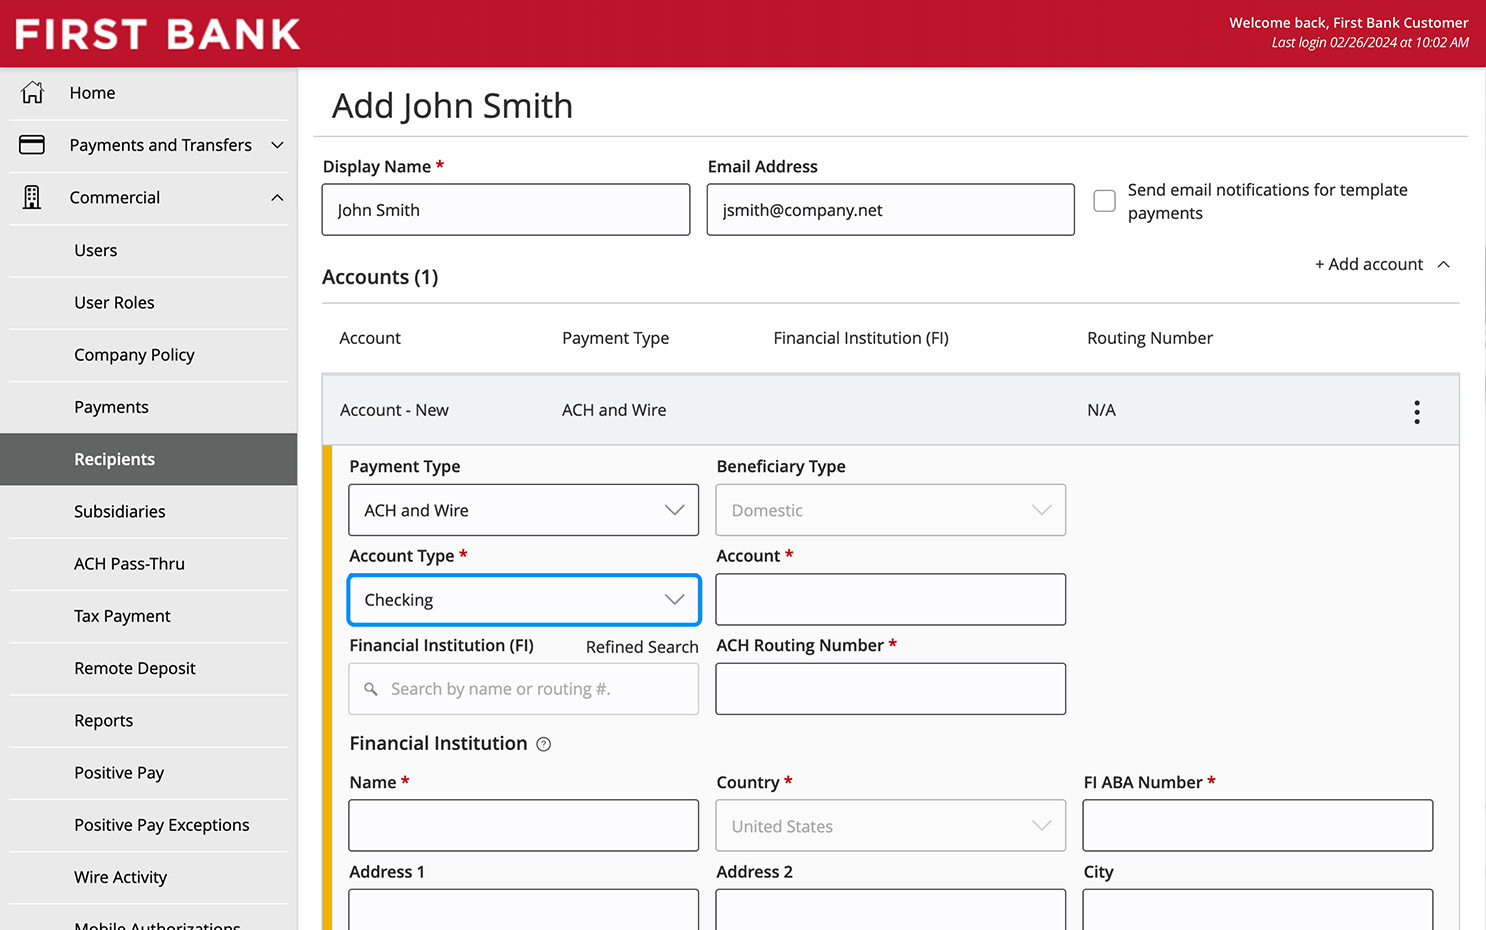
Online Banking Screen showing how to add a recipient display name. Online Banking Screen showing how to add a recipient email address name.

Step 4:
Choose the account.

Click on the “Payment Type” box and select which type of payment you want to send. If you select “Wire Only” you will also be able to select between domestic and international Beneficiary Types. Domestic is the only beneficiary type available for ACH.

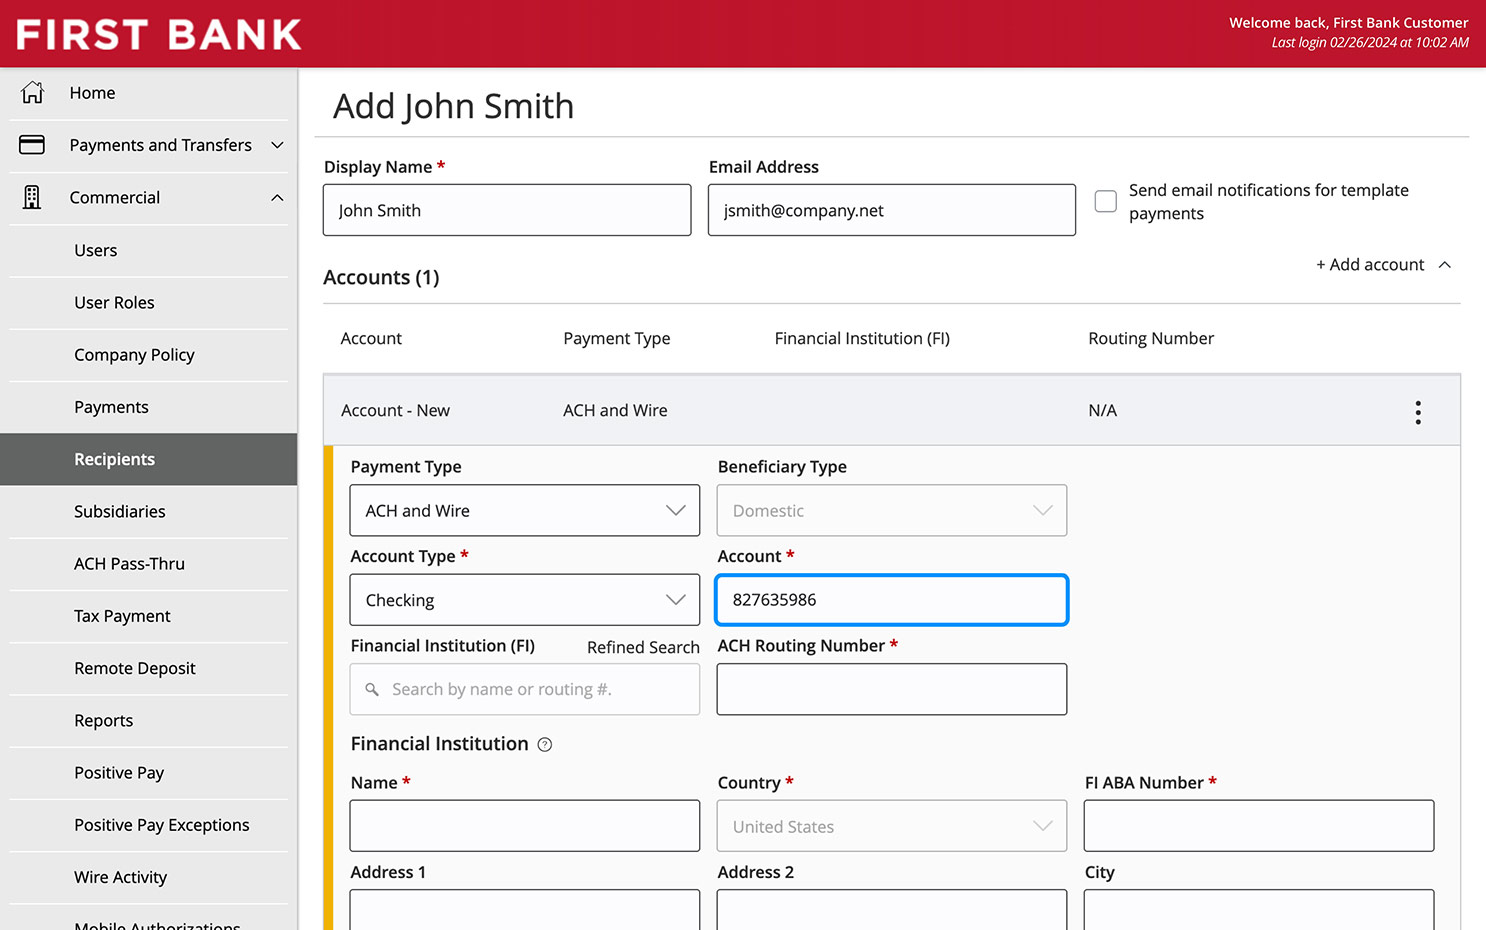
Then select which account you want the funds drawn from in the “Account Type” box. Enter the requested account information (such as account number and ACH routing numbers for domestic transfers) in their respective boxes.

First Bank online banking screen showing how to select Payment Type. Online Banking Screen showing how to set the account type. Online Banking Screen showing how to set the account number. Online Banking Screen showing how to set the ACH routing number.

Step 5:
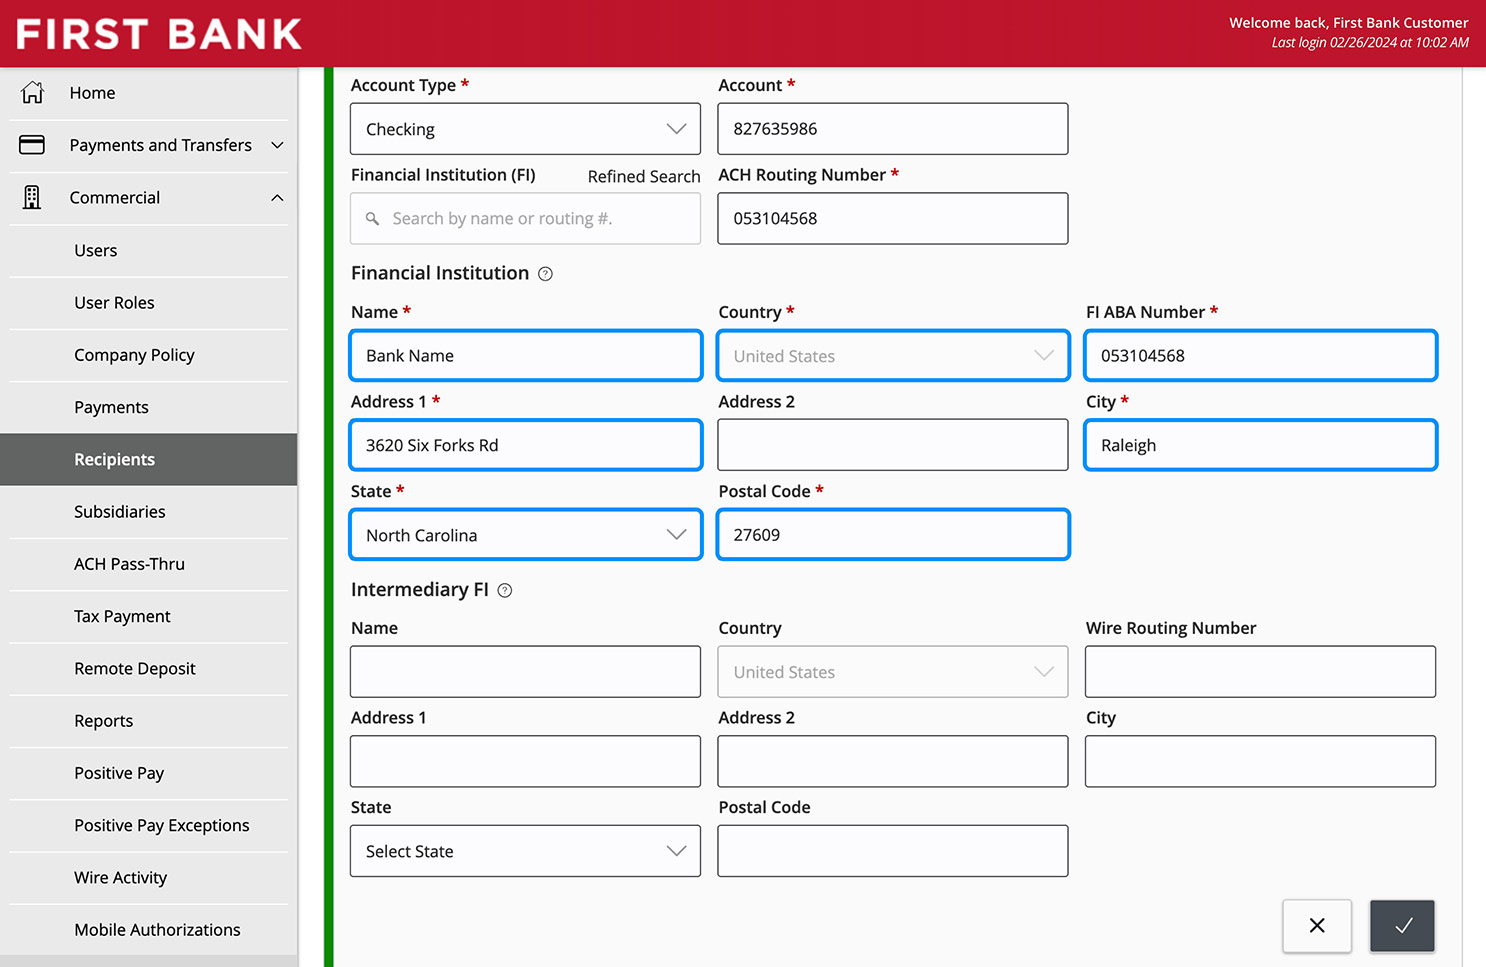
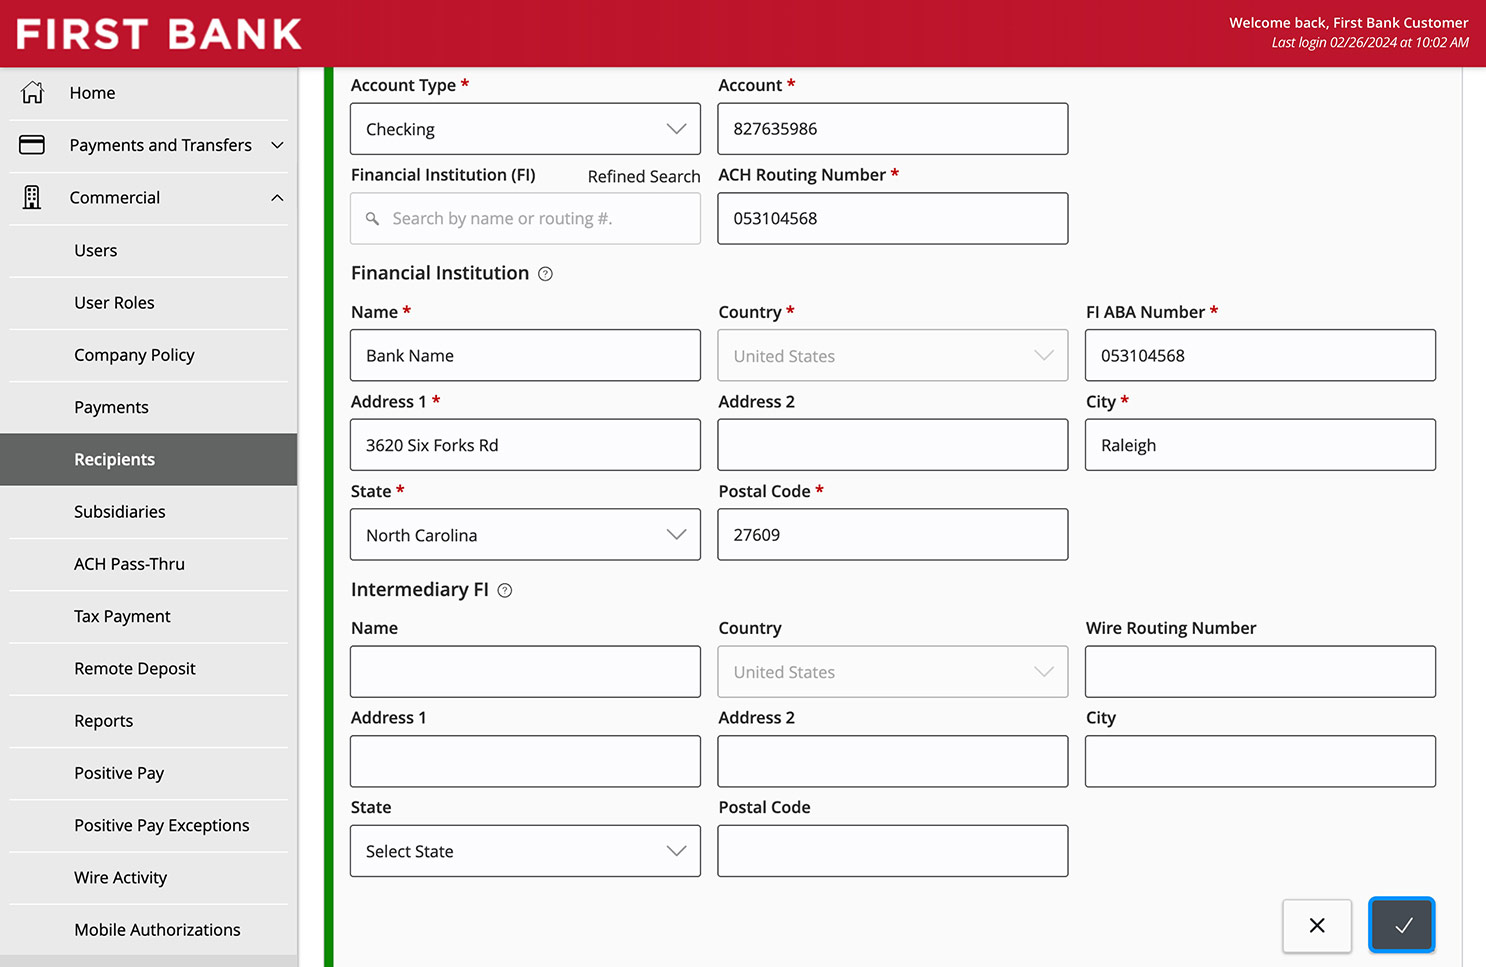
Specify the financial institution.

Fill in the details about the financial institution who will receive the ACH/wire, including name, country, and FI ABA Number, then click on the check box in the lower right corner.
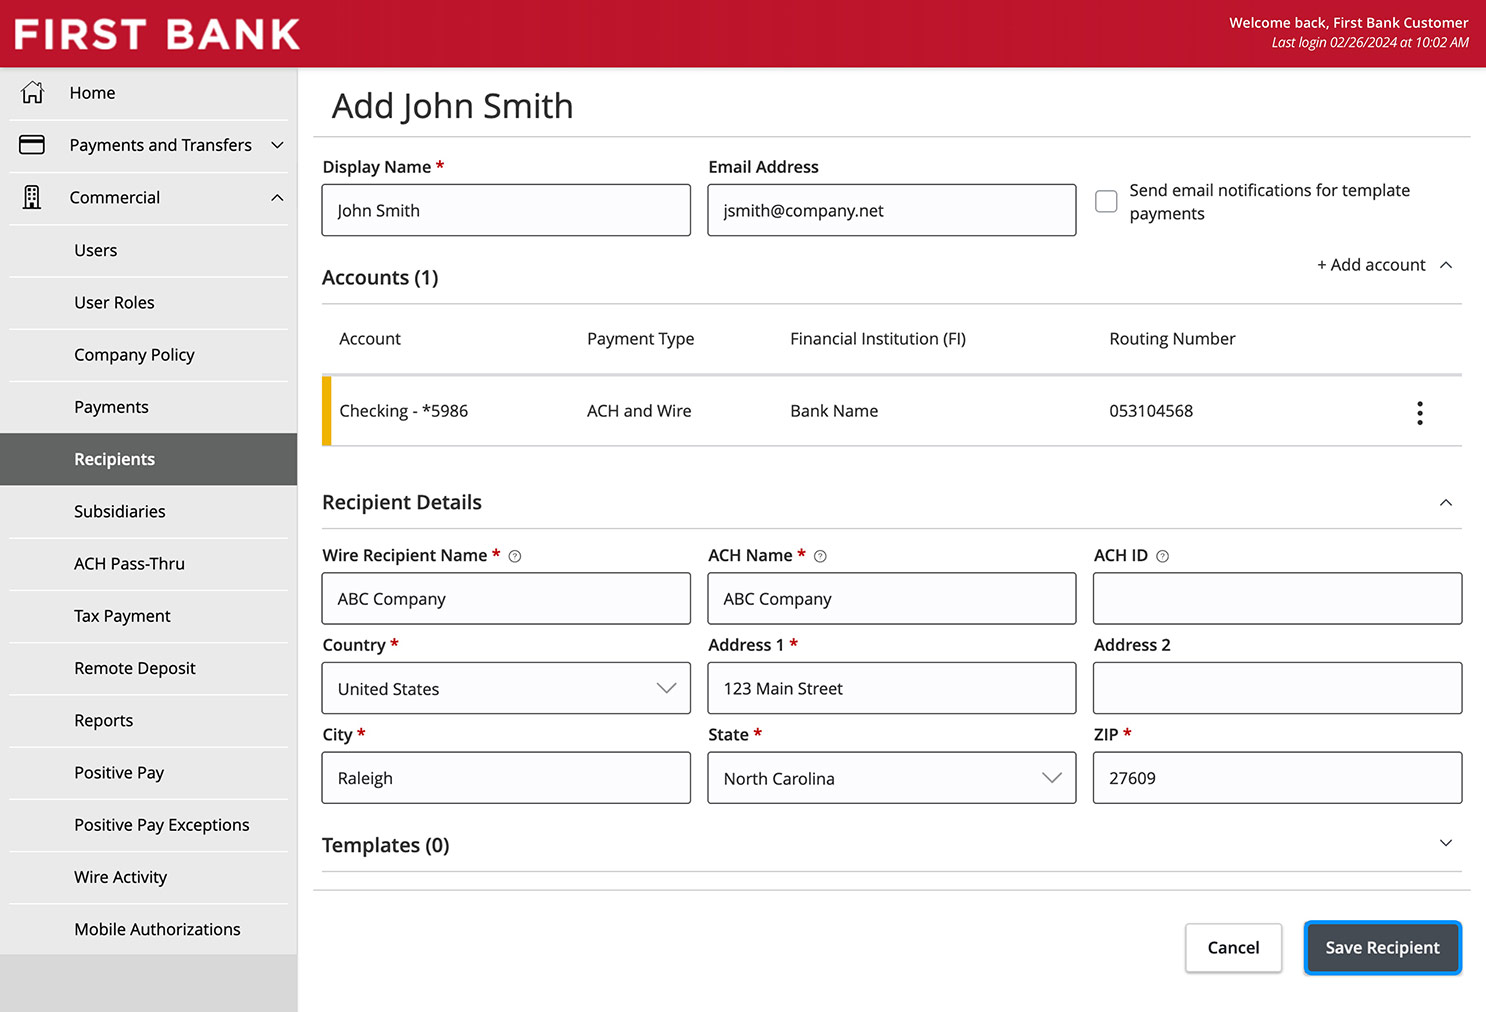
Online Banking Screen showing the financial institution fields. Online Banking Screen showing the accept check button.

Step 6:
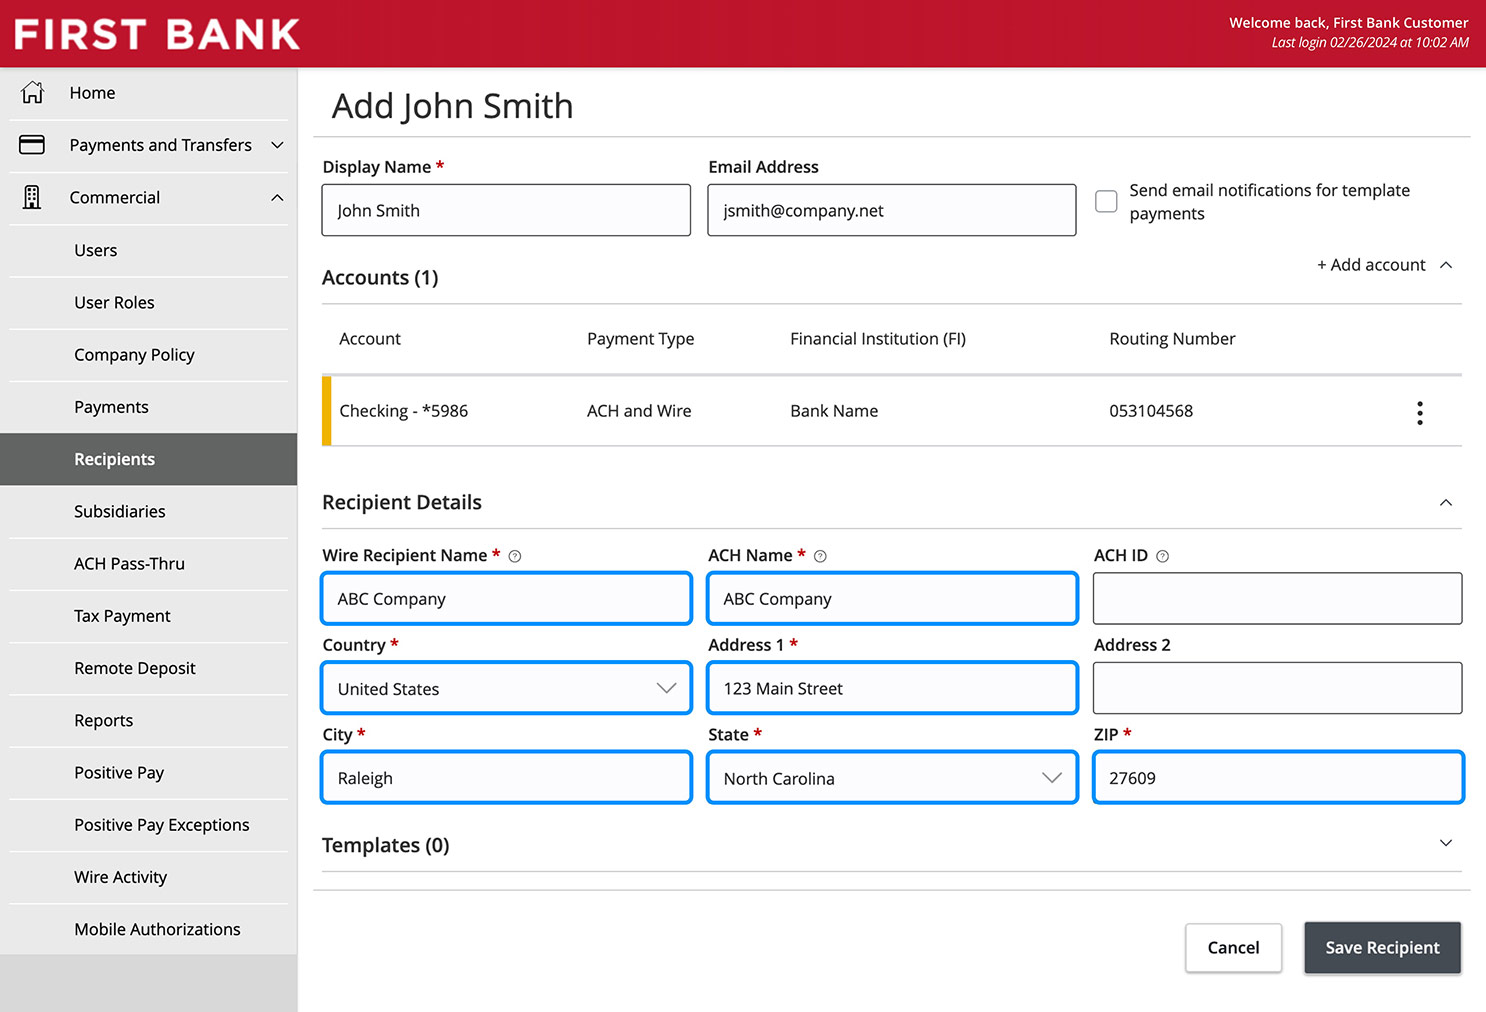
Enter recipient details.

Enter information in all the required fields about the recipient who will receive the ACH/wire, including name, ACH name, address, city, state, and ZIP code. Click “Save Recipient” to finalize.

Online Banking Screen showing the recipient detail fields. Online Banking Screen showing the Save Recipient button.

Explore our guided tutorials

New User Add a new user to your First Bank account. ACH Notices & Returns Learn what to do if your item is returned. Anytime Deposit for iOS Users Learn how to make deposits from your Apple device. Reviewing Scheduled Transactions See how to view your scheduled transactions and make changes. Anytime Deposit for Android Users Learn how to make deposits from your Android device. Activity Center Explore the treasury capabilities within online banking. Anytime Deposit Learn how to make deposits from anywhere. ACH Collection Request and collect funds to be transferred to your First Bank account. Remote Deposit Capture Make fewer trips to the bank to deposit checks. Positive Pay Search Check Find checks you've issued to verify their status. Send International Wires Securely send money overseas. ACH Payroll Process payroll from your First Bank account and learn how to add new payees. Adding ACH Template Learn how to create a template to send ACH payments. Adding ACH/Wire Learn how to create a template to send ACH or wires. Remote Deposit Capture Scanner Get tips for installing or updating your scanner. ACH Payment Learn how to make an ACH Payment from your First Bank account. Positive Pay Learn how to guard against unauthorized electronic activity. Positive Pay Void Check Stop a check from being processed. Positive Pay ACH Transaction Search Learn how to look up ACH transactions. Uploading NACHA Batch Learn how to upload NACHA files in batches to save time. Assigning User Role Create new user roles and assign them to individuals. Domestic Wire Send money domestically from your First Bank account. Company Policy Create policies to help manage your First Bank account. Check Positive Pay Protect your account from fraud with Positive Pay.

Have questions or unsure where to start?

Contact your Treasury Services rep, or one of our support teams below, for help or to schedule personalized demos.

First Bank logo
Privacy Overview

This website uses cookies so that we can provide you with the best user experience possible. Cookie information is stored in your browser and performs functions such as recognizing you when you return to our website and helping our team to understand which sections of the website are the most popular and useful.