Mobile Check Deposit Demo
Deposit funds from checks into your account from anywhere.


Step 1 Open the mobile app and log in.
When you enrolled in First Bank digital banking, you created a Login ID and Password. Enter that information in the corresponding boxes in the app and then tap the “Log In” button.
Step 2 Navigate to mobile deposit enrollment.
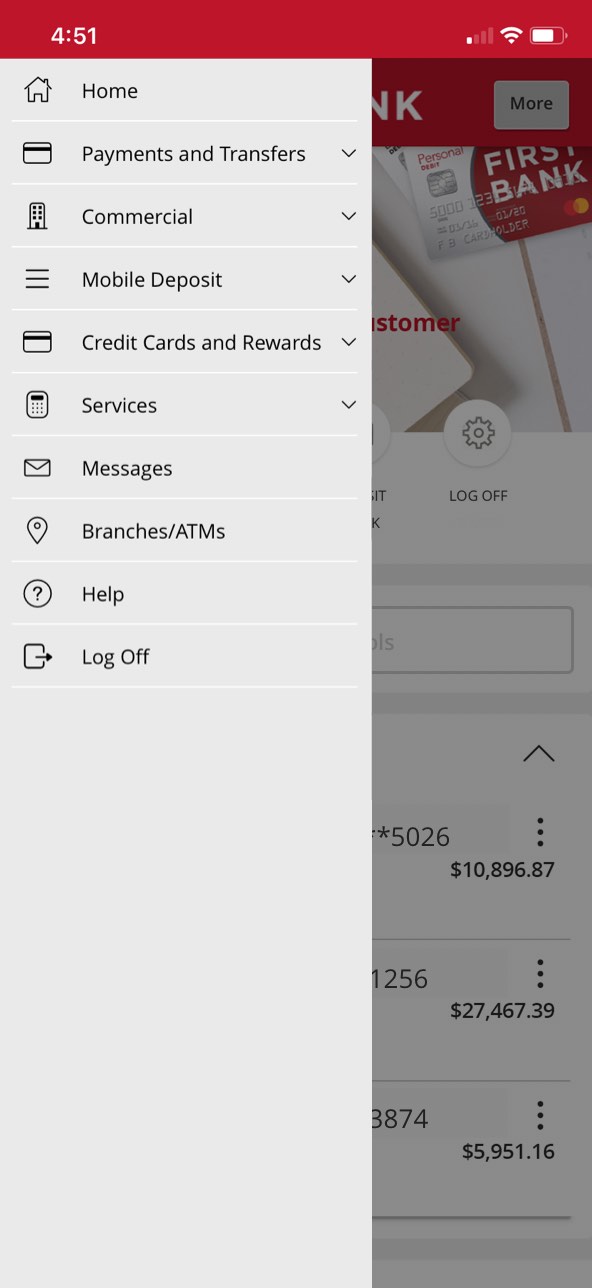
Tap on the “Menu” button in the upper left corner. From the dropdown menu, select “Mobile Deposit” then tap “Mobile Deposit Enrollment.”
Step 3 Review the terms and conditions.
Tap the “Terms and Conditions” link to read and review the terms and conditions.
Step 4 Submit your agreement to the terms. Log out and log back in.
Check the agrement checkbox and then tap on the “Accept” button. Once complete, a confirmation message will confirm your enrollment.
In order to complete your first mobile deposit, you will need to log out of the app and log back in. You will now see options to deposit a check on the home screen and in the app menu.
Step 5 Navigate to mobile check deposit.
Once you’ve logged back in, tap on the “Deposit Check" quick link or tap on the “Menu” button in the upper left corner. From the dropdown menu, select “Mobile Deposit” then tap “Deposit Check.”
Step 6 Tap Deposit Account dropdown and select account.
In the box under “Deposit Account,” tap the arrow to see your accounts. Choose the account you want to deposit funds into.
Step 7 Enter the amount of your check.
Reference your check to see how much it is for, then enter that exact amount in the “Amount” box.
Step 8 Tap the Front of Check box.
To scan the check, tap the “Front of check” box.
Step 9 Take a photo of the front of your check.
Your camera will automatically open to take a picture of the front of the check. Place your check on a flat surface and line it up within the box that appears on your screen. Once the check is centered in the box, tap the button to take its picture.
Step 10 Tap Use Image.
Once you have taken the photo of the check, select “Use Image.”
Step 11 Take a photo of the back of your check.
Endorse the back of the check, then repeat the same steps used to take a photo of the front. Tap on “Back of check,” take a picture, and then select “Use Image.”
Step 12 Tap Submit Deposit.
Verify the amount and account destination are correct, then tap “Submit Deposit.” You will receive verification that your deposit is processing.